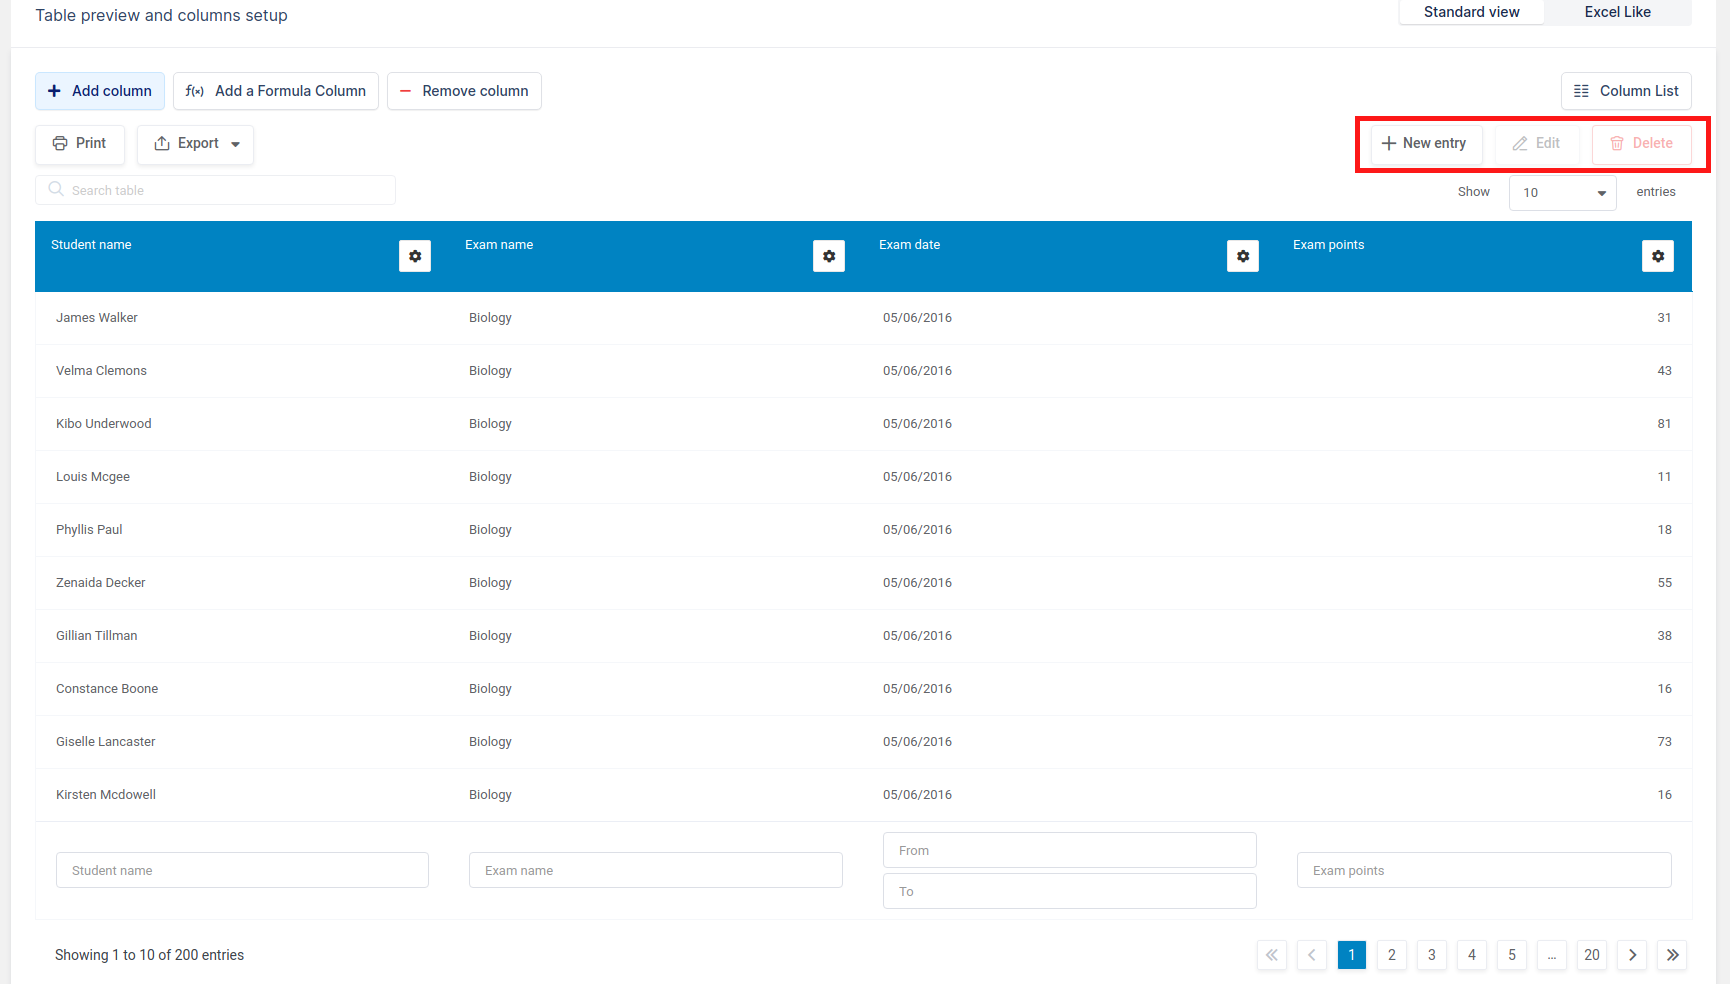
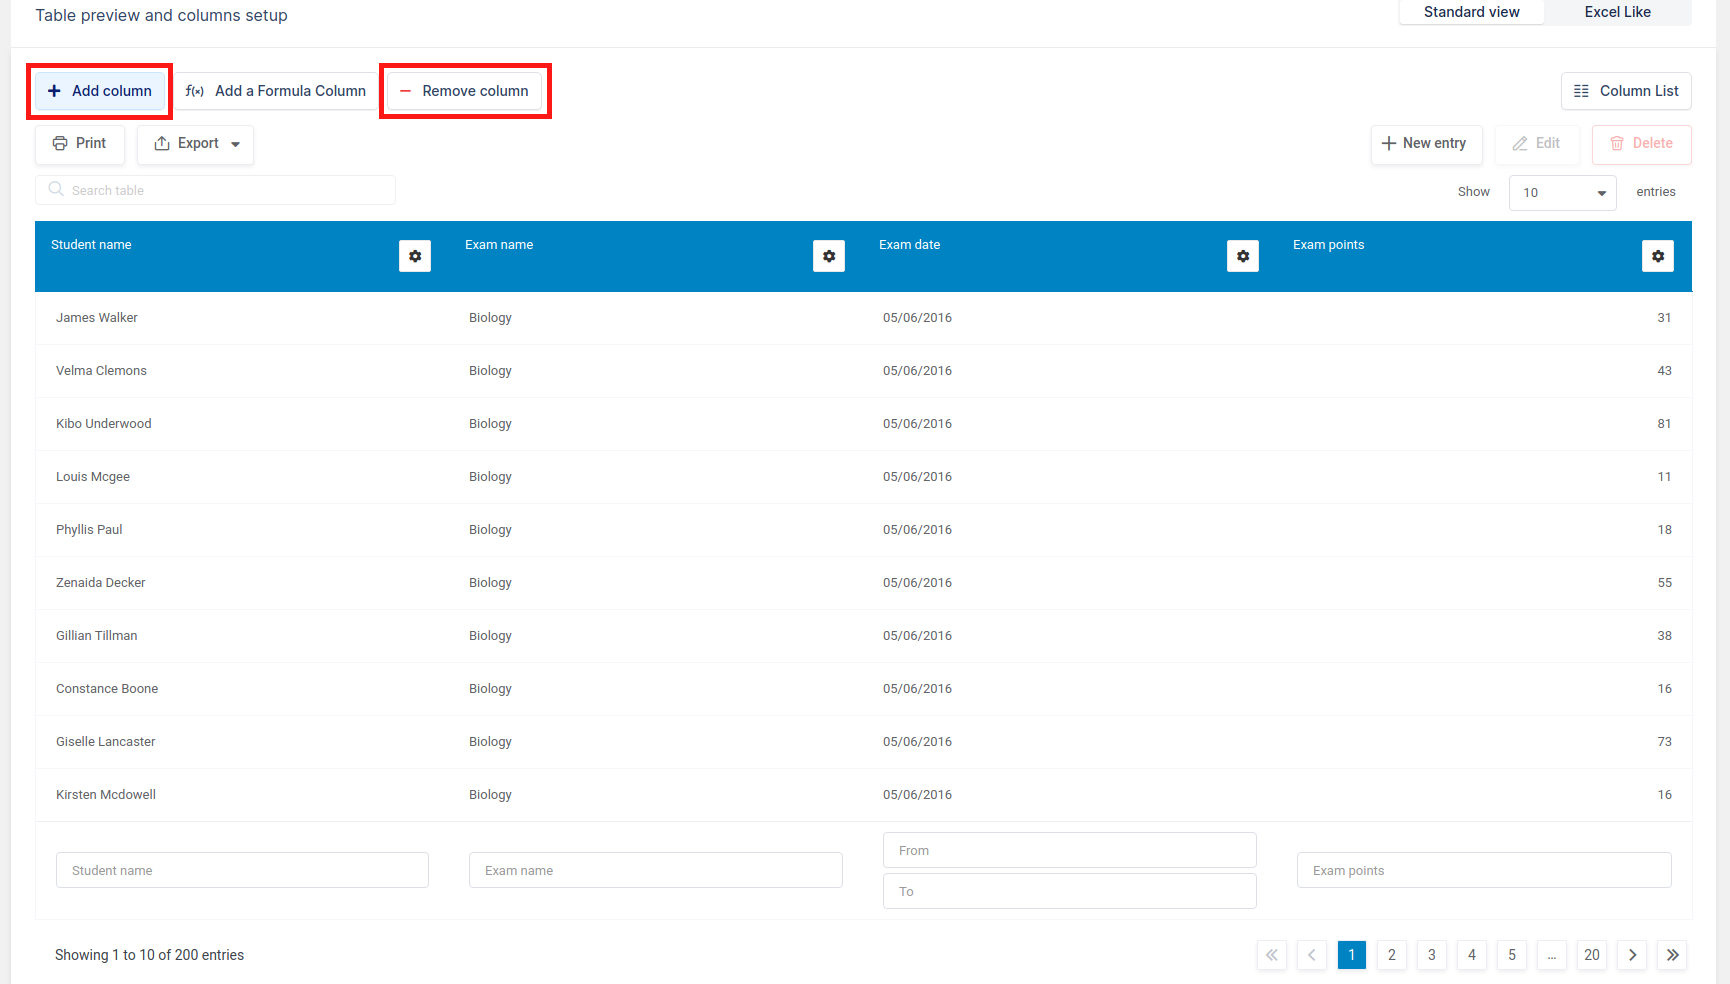
For tables created with either the “Create a table manually” or “Create a table by importing data from data source” options, there is a special block of buttons from the “Create a Table” page that allows editing the table structure (adding/removing columns) in the back-end. Also, you are able to manually edit data in the back-end since the “New“, “Edit” and “Delete” buttons are always visible whether the “Allow front-end editing” option is enabled or disabled.
The table configuration page, where you can edit manually created tables, is automatically opened when you create a table using the “Create a table manually” option, or when you import an Excel, CSV or Google Spreadsheet file to wpDataTable using “Create a table by importing data from data source” option.

To add a new row, click on the “New” button above the table; to edit a row, first select it by clicking on it in the table, and click the “Edit” button; to delete a row, select it and click delete.
The editor popup is described in the front-end editor documentation section, and is rendered the same way here.
In the additional block of buttons that is specific for manual tables, there are two new buttons: “Add column” and “Remove column“. When you click on one of these, a new popup will appear, and you can add or remove a column depending on the action you’ve chosen.


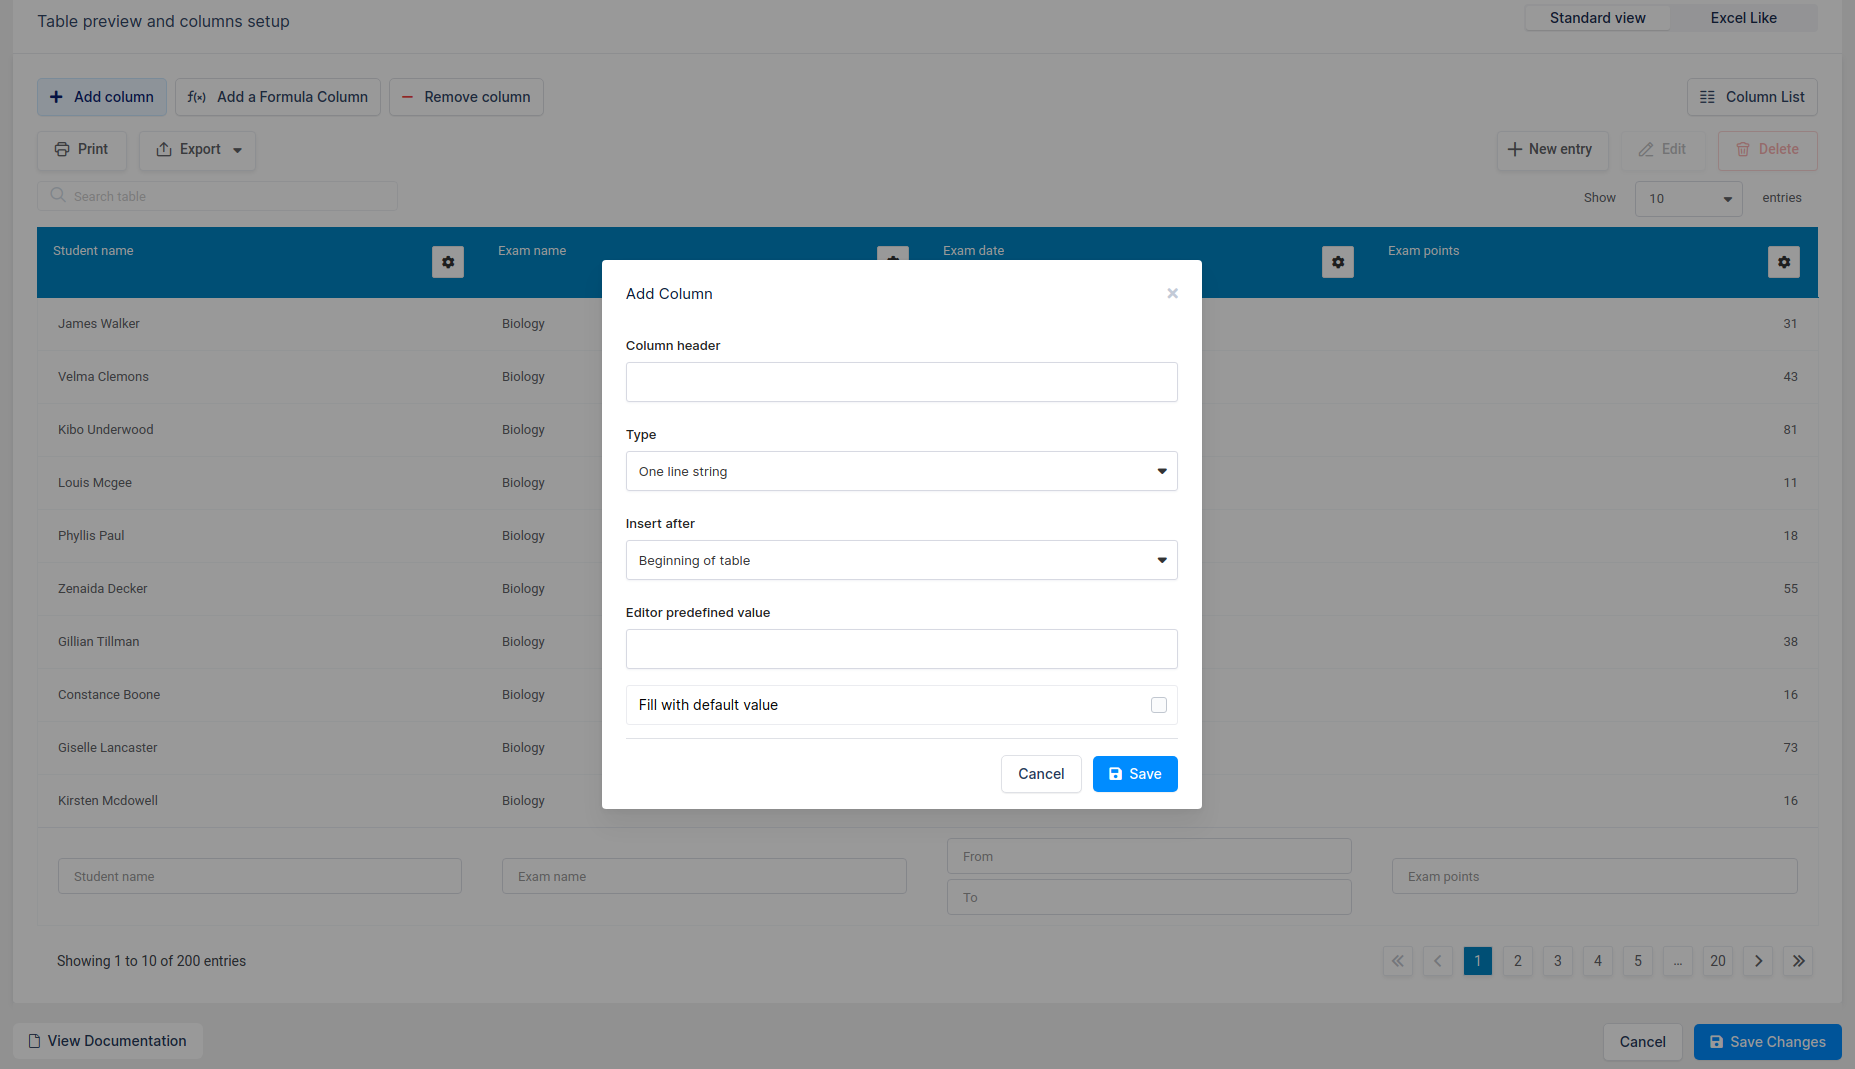
The “Add column” button enables you to add one more column to the table, if for example, you forgot to add it while you created the table with the “Create a table manually” option from the “Create a table” page. It opens a popup with:
- Column header – this will be used as the displayed table header.
- Type – specifies the data type, filter type, and editor input type for the future column. Refer to the “Building and filling in the tables manually” documentation for the full list of types with their details.
- Insert after – here, you can choose the position for your future column – after one of the existing tables, in the beginning of a table, or at the end a table.
- Possible values (available for one-line selectbox, and multi-line selectbox options) – here, you can define all the possible values; separating them with a comma.
- Editor predefined value – allows you to optionally define a default value for the cells in this column.
- Fill with default value – if you enable this checkbox, all the cells for the new column in existing rows will be filled with the defined default value
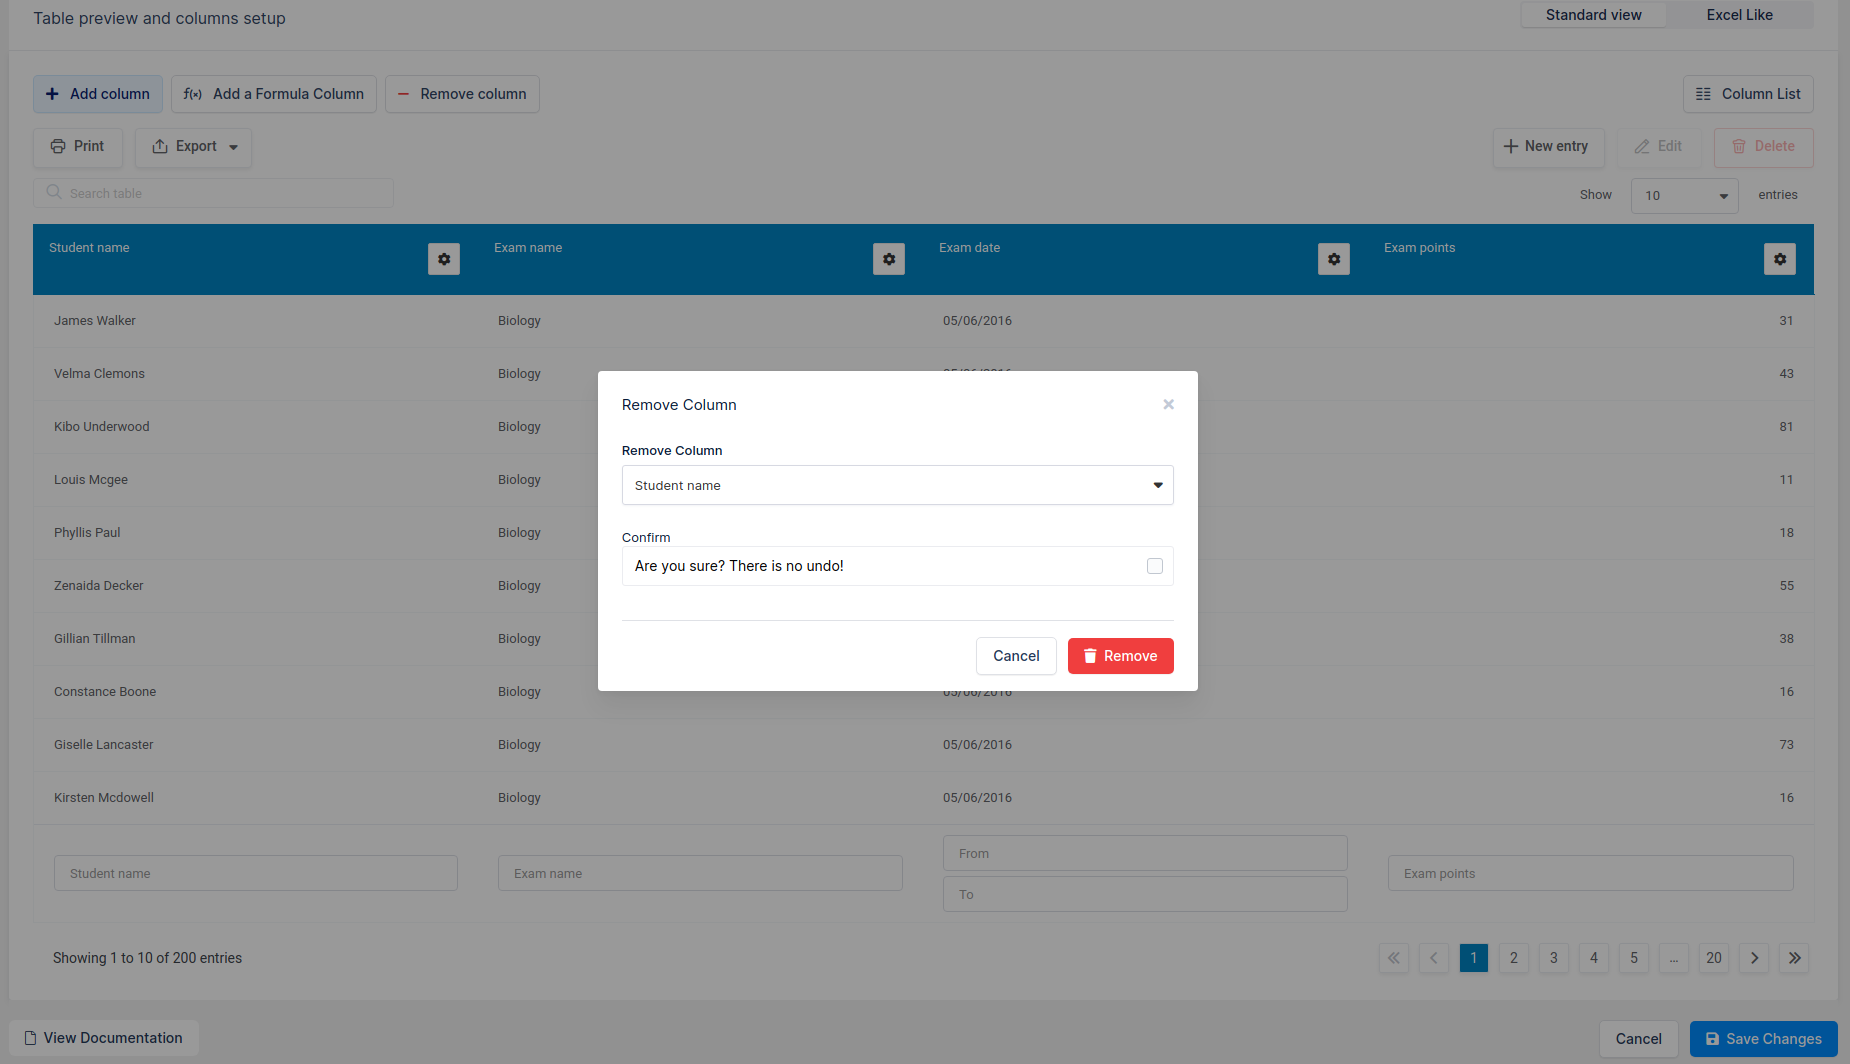
“Remove column” button allows you to completely remove a column from the table (alternatively, you can simply hide it in the table settings, but it is better to delete unneeded columns to optimize page generation and load time). This button opens a popup with a list of existing columns, and a confirmation checkbox for deleting the column. Removing columns cannot be undone!
