Converting JSON data into a structured HTML table can be a game-changer for displaying data comprehensively on web pages. Knowing how to convert JSON to an HTML table is essential for anyone keen on web development or data presentation.
Let’s dive straight in. JSON, or JavaScript Object Notation, is a lightweight data-interchange format. It’s human-readable and easy to parse into an HTML table, making it a perfect fit for web applications and dashboards.
In this article, I’m breaking down the steps involved, from using JavaScript functions to jQuery methods. You’ll learn:
- Creating functions to handle JSON data
- Extracting data keys
- Populating table rows dynamically
- Styling and enhancing tables
By the end, your JSON data will transform into an interactive, styled HTML table. Whether handling static data or integrating real-time API updates, you’ll find the techniques here indispensable.
Table of Contents
Methods for Converting JSON to HTML Tables Using JavaScript and jQuery
Using JavaScript to Convert JSON to HTML Table
Overview of the JavaScript approach
Converting JSON data to an HTML table with JavaScript involves a straightforward yet systematic process. It’s all about turning nested JSON structure into a readable table on your web page. Let’s break it down.
Step-by-step process:
Creating a function to convert JSON to a table
Begin by crafting a JavaScript function. This function will receive JSON data and generate an HTML table. Start with a function signature, imagine it as:
function convertJSONToTable(jsonData) {
  // Body of the function
}
Extracting keys for table headers
The next step involves deciphering your JSON. Typically, you will extract keys from the JSON objects to serve as headers:
let headers = Object.keys(jsonData[0]);
Now, these headers act as column names in your table.
Looping through JSON data for rows and cells
Here, use loops to traverse through each JSON object (row) and its properties (cells):
let table = '<table><thead><tr>';
headers.forEach(header => table += `<th>${header}</th>`);
table += '</tr></thead><tbody>';

jsonData.forEach(row => {
  table += '<tr>';
  headers.forEach(header => table += `<td>${row[header]}</td>`);
  table += '</tr>';
});
table += '</tbody></table>';
Inserting the table into an HTML container
Finally, attach this table structure to an HTML element using JavaScript’s DOM manipulation:
document.getElementById('table-container').innerHTML = table;
Example Code: Converting JSON Data into HTML Tables
Here’s how all the pieces fit together:
function convertJSONToTable(jsonData) {
  let headers = Object.keys(jsonData[0]);
  let table = '<table><thead><tr>';

  headers.forEach(header => table += `<th>${header}</th>`);
  table += '</tr></thead><tbody>';

  jsonData.forEach(row => {
    table += '<tr>';
    headers.forEach(header => table += `<td>${row[header]}</td>`);
    table += '</tr>';
  });

  table += '</tbody></table>';

  document.getElementById('table-container').innerHTML = table;
}
Using jQuery to Convert JSON to HTML Table
Overview of the jQuery approach
With jQuery, handling JSON data and creating an HTML table becomes more streamlined due to its powerful selectors and methods. Let’s walk through it.
Step-by-step process:
Loading JSON data using $.getJSON()
First, fetch the JSON data. The $.getJSON() method from jQuery simplifies this:
$.getJSON('path/to/json', function(jsonData) {
  // Code to handle the JSON data
});
Dynamically generating the table structure
Following this, dynamically generate the HTML table structure. Start by creating table headers from the JSON keys:
let headers = Object.keys(jsonData[0]);
let table = $('<table>').append('<thead><tr></tr></thead><tbody></tbody>');
headers.forEach(header => table.find('thead tr').append(`<th>${header}</th>`));
Appending rows and cells with JSON data
Loop through the JSON data to append rows and cells:
jsonData.forEach(row => {
  let $tr = $('<tr>');
  headers.forEach(header => $tr.append(`<td>${row[header]}</td>`));
  table.find('tbody').append($tr);
});
Example Code: Using jQuery to Populate Tables with JSON Data
Putting it all together:
$.getJSON('path/to/json', function(jsonData) {
  let headers = Object.keys(jsonData[0]);
  let table = $('<table>').append('<thead><tr></tr></thead><tbody></tbody>');

  headers.forEach(header => table.find('thead tr').append(`<th>${header}</th>`));

  jsonData.forEach(row => {
    let $tr = $('<tr>');
    headers.forEach(header => $tr.append(`<td>${row[header]}</td>`));
    table.find('tbody').append($tr);
  });

  $('#table-container').html(table);
});
Using wpDataTables
- Create a New Table:
- Navigate to wpDataTables in your WordPress dashboard.
- Click on Create a Table and select the option Create a data table linked to an existing data source.
- Prepare Your JSON Data:
- Ensure your JSON data is structured correctly. It should not be empty and should follow a valid format. The JSON must be accessible via a URL if you’re linking to an external source.
- Input JSON Data:
- In the Input data source type, choose Nested JSON if your data is nested.
- Paste the URL of your JSON dataset into the Input JSON URL field.
- Get JSON Roots:
- Click on the Get JSON roots button. This will allow wpDataTables to read the data and provide you with options for selecting which level of the JSON structure to use for your table.
- Select Data Level:
- From the drop-down that appears, select the appropriate level from your JSON structure (e.g., “results”, “films”, etc.). This level will determine what data is displayed in your table.
- Save Changes:
- After selecting the desired level, click on the Save Changes button. Your table will be generated based on the selected JSON data.
- Add the Table to Your Page:
- Once the table is created, you can copy the generated shortcode provided by wpDataTables.
- Paste this shortcode into any page or post where you want the table to appear.
- View Your Table:
- Preview or publish your page to see the table populated with data from your JSON source.
Detailed Examples of JSON to HTML Table Conversion
Example 1: Static JSON Data Conversion Using JavaScript
Setting up a sample JSON dataset
Imagine a simple dataset. Not fetched from some remote API, but right here, statically defined. Let’s take a look at our JSON:
[
  { "name": "Alice", "age": 25, "city": "New York" },
  { "name": "Bob", "age": 30, "city": "San Francisco" },
  { "name": "Charlie", "age": 35, "city": "Los Angeles" }
]
Creating and populating a basic HTML table
First, we need a JavaScript function to convert this JSON to an HTML table.
Define the skeleton in your HTML file:
<div id="table-container"></div>
Next, implement the conversion logic in JavaScript:
function convertJSONToTable(jsonData) {
  let headers = Object.keys(jsonData[0]);
  let table = '<table border="1"><thead><tr>';

  headers.forEach(header => table += `<th>${header}</th>`);
  table += '</tr></thead><tbody>';

  jsonData.forEach(row => {
    table += '<tr>';
    headers.forEach(header => table += `<td>${row[header]}</td>`);
    table += '</tr>';
  });

  table += '</tbody></table>';
  document.getElementById('table-container').innerHTML = table;
}

const sampleData = [
  { "name": "Alice", "age": 25, "city": "New York" },
  { "name": "Bob", "age": 30, "city": "San Francisco" },
  { "name": "Charlie", "age": 35, "city": "Los Angeles" }
];

convertJSONToTable(sampleData);
Explanation of the conversion process
The function kicks off by grabbing keys from the JSON dataset to use as table headers. Loop through each row, extract data for each cell, wrap it all in HTML tags, and boom – a table right where you want it. No backend magic, all on the client-side. This example clarifies how to convert JSON to an HTML table in a world of static data.
Example 2: Dynamic JSON Data Conversion Using jQuery
Fetching JSON data from an external source
Dynamic data? Now, we’re talking a real-world scenario. Pull JSON from an external source using jQuery:
$.getJSON('path/to/json', function(jsonData) {
  createTableFromJSON(jsonData);
});
Automatically updating the HTML table based on the JSON response
Next, dynamically generate the HTML table:
function createTableFromJSON(jsonData) {
  let headers = Object.keys(jsonData[0]);
  let table = $('<table>').append('<thead><tr></tr></thead><tbody></tbody>');

  headers.forEach(header => table.find('thead tr').append(`<th>${header}</th>`));

  jsonData.forEach(row => {
    let $tr = $('<tr>');
    headers.forEach(header => $tr.append(`<td>${row[header]}</td>`));
    table.find('tbody').append($tr);
  });

  $('#table-container').html(table);
}

const url = 'path/to/json';
$.getJSON(url, createTableFromJSON);
Explanation of the script and table structure
This approach employs jQuery’s $.getJSON() to fetch data asynchronously. Upon successful retrieval, keys are extracted for headers. Each row is dynamically appended to the table, ensuring it updates automatically with new data from the server.
It’s a seamless way to handle real-time data rendering in your web development endeavors. This JSON parsing method, combined with jQuery’s streamlined DOM manipulation, makes for elegant dynamic data handling.
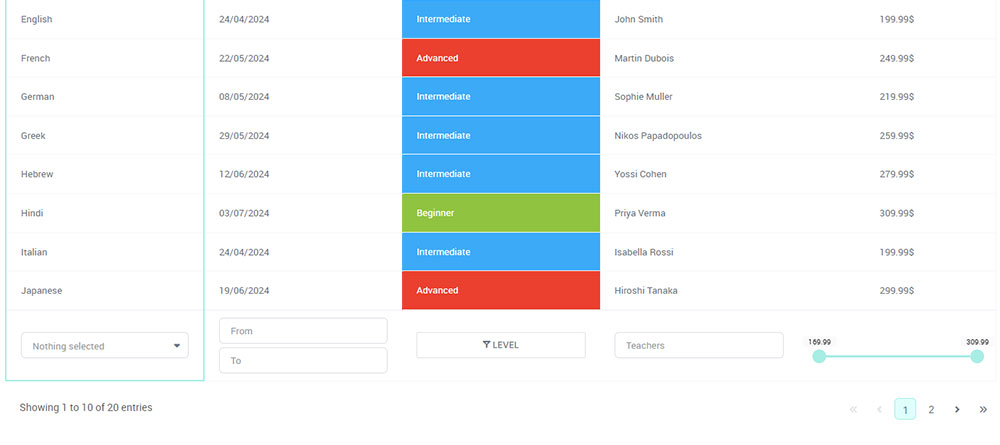
Your beautiful data deserves to be online
wpDataTables can make it that way. There’s a good reason why it’s the #1 WordPress plugin for creating responsive tables and charts.
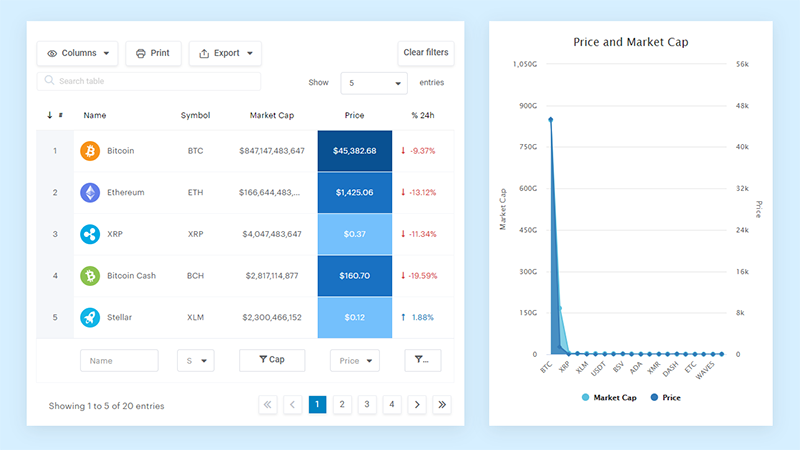
And it’s really easy to do something like this:
- You provide the table data
- Configure and customize it
- Publish it in a post or page
And it’s not just pretty, but also practical. You can make large tables with up to millions of rows, or you can use advanced filters and search, or you can go wild and make it editable.
“Yeah, but I just like Excel too much and there’s nothing like that on websites”. Yeah, there is. You can use conditional formatting like in Excel or Google Sheets.
Did I tell you you can create charts too with your data? And that’s only a small part. There are lots of other features for you.
Advanced Techniques for JSON to HTML Table Conversion
Handling Complex JSON Structures
Nested JSON objects and arrays
Dealing with JSON can sometimes feel like opening nested Russian dolls. You see, basic JSON is straightforward, but what if we’re talking about arrays within arrays or objects within objects? It becomes a tad more challenging.
Strategies for displaying hierarchical or nested data in tables
To tackle this, we need a strategy. For instance, you might flatten the nested structure. Think of it like taking the innermost data and making it accessible at the top level.
Consider a JSON structure:
[
  { "name": "Alice", "details": {"age": 25, "city": "New York"} },
  { "name": "Bob", "details": {"age": 30, "city": "San Francisco"} }
]
Now, extract details and spread them out for clarity:
let flatData = jsonData.map(item => ({
  name: item.name,
  age: item.details.age,
  city: item.details.city
}));
Example of handling multi-dimensional JSON data
Handling multi-dimensional JSON requires looping through each level. Here’s a quick look:
function convertComplexJSONToTable(jsonData) {
  let headers = ["name", "age", "city"];
  let table = '<table><thead><tr>';

  headers.forEach(header => table += `<th>${header}</th>`);
  table += '</tr></thead><tbody>';

  jsonData.forEach(row => {
    table += '<tr>';
    table += `<td>${row.name}</td><td>${row.details.age}</td><td>${row.details.city}</td>`;
    table += '</tr>';
  });

  table += '</tbody></table>';
  document.getElementById('table-container').innerHTML = table;
}
Creating Dynamic Tables Based on User Interaction
Using dropdowns to select different datasets (e.g., customers, products)
Why not let users decide what they want to view? Using dropdowns can make your table dynamic. It’s like offering them a menu and cooking what they order.
Create a dropdown:
<select id="data-selector">
  <option value="customers">Customers</option>
  <option value="products">Products</option>
</select>
<div id="table-container"></div>
Populating tables dynamically based on user input
Listen for changes in selection and fetch the corresponding dataset:
document.getElementById('data-selector').addEventListener('change', function() {
  let dataset = this.value;
  fetch(`path/to/${dataset}.json`)
    .then(response => response.json())
    .then(data => createTable(data));
});

function createTable(jsonData) {
  let headers = Object.keys(jsonData[0]);
  let table = '<table><thead><tr>';

  headers.forEach(header => table += `<th>${header}</th>`);
  table += '</tr></thead><tbody>';

  jsonData.forEach(row => {
    table += '<tr>';
    headers.forEach(header => table += `<td>${row[header]}</td>`);
    table += '</tr>';
  });

  table += '</tbody></table>';
  document.getElementById('table-container').innerHTML = table;
}
Example code for implementing dynamic data-driven tables
Combine user interactions and dynamic data handling:
document.getElementById('data-selector').addEventListener('change', function() {
  let dataset = this.value;
  $.getJSON(`path/to/${dataset}.json`, function(data) {
    let headers = Object.keys(data[0]);
    let table = $('<table>').append('<thead><tr></tr></thead><tbody></tbody>');

    headers.forEach(header => table.find('thead tr').append(`<th>${header}</th>`));

    data.forEach(row => {
      let $tr = $('<tr>');
      headers.forEach(header => $tr.append(`<td>${row[header]}</td>`));
      table.find('tbody').append($tr);
    });

    $('#table-container').html(table);
  });
});
Enhancing the HTML Table with Styling and Features
Styling HTML Tables
Basic CSS for table borders, padding, and alignment
Starting with the basics, CSS can transform the look and feel of your HTML tables. Add borders, padding, and alignments to make data visually appealing.
table {
  width: 100%;
  border-collapse: collapse;
}

th, td {
  border: 1px solid #ddd;
  padding: 8px;
  text-align: left;
}

th {
  background-color: #f2f2f2;
}
Now, your table looks crisp and clean. Borders separate the data, making it easier to read, while padding adds some breathing room to the content.
Using CSS frameworks like Bootstrap to enhance table presentation
When it comes to quick and sophisticated styling, Bootstrap is a go-to. Incorporate it to avoid reinventing the wheel.
Add Bootstrap’s CSS in your head tag:
<link rel="stylesheet" href="https://stackpath.bootstrapcdn.com/bootstrap/4.3.1/css/bootstrap.min.css">
Use Bootstrap classes for tables:
<table class="table table-striped table-bordered">
  <thead class="thead-dark">
    <tr>
      <th>Name</th>
      <th>Age</th>
      <th>City</th>
    </tr>
  </thead>
  <tbody>
    <tr>
      <td>Alice</td>
      <td>25</td>
      <td>New York</td>
    </tr>
  </tbody>
</table>
Bootstrap offers ready-made styles that make your tables look professional in no time.
Adding Interactive Features to Tables
Implementing table sorting and filtering using JavaScript/jQuery
Interactivity breathes life into tables. Sorting and filtering through JavaScript or jQuery transforms static tables into dynamic ones.
Sorting with JavaScript:
function sortTable(columnIndex) {
  const table = document.getElementById("myTable");
  let switching = true, shouldSwitch, rows, i, x, y, dir = "asc", switchcount = 0;

  while (switching) {
    switching = false;
    rows = table.rows;
    for (i = 1; i < rows.length - 1; i++) {
      shouldSwitch = false;
      x = rows[i].getElementsByTagName("TD")[columnIndex];
      y = rows[i + 1].getElementsByTagName("TD")[columnIndex];

      if ((dir == "asc" && x.innerHTML.toLowerCase() > y.innerHTML.toLowerCase()) ||
          (dir == "desc" && x.innerHTML.toLowerCase() < y.innerHTML.toLowerCase())) {
        shouldSwitch = true;
        break;
      }
    }
    if (shouldSwitch) {
      rows[i].parentNode.insertBefore(rows[i + 1], rows[i]);
      switching = true;
      switchcount++;
    } else {
      if (switchcount == 0 && dir == "asc") {
        dir = "desc";
        switching = true;
      }
    }
  }
}
Add this function to call when clicking the column header.
Pagination for large datasets
Handling large datasets? Pagination can help by splitting data into manageable chunks.
Basic jQuery pagination:
<!-- HTML structure -->
<div id="pagination-container"></div>
<table id="paginated-table">
  <thead>
    <tr>
      <th>Name</th>
      <th>Age</th>
      <th>City</th>
    </tr>
  </thead>
  <tbody>
    <!-- Rows go here -->
  </tbody>
</table>
$(document).ready(function() {
  $('#pagination-container').pagination({
    dataSource: 'path/to/data',
    callback: function(data, pagination) {
      let html = template(data);
      $('#paginated-table tbody').html(html);
    }
  });
});
Think of it as breaking down complexity into simpler, digestible parts.
Using plugins like DataTables to enrich the table experience
Plugins like DataTables wrap up all the interactivity you need, from search, sort, and pagination to export functionalities.
Include DataTables in your project:
<link rel="stylesheet" href="https://cdn.datatables.net/1.10.21/css/jquery.dataTables.min.css">
<script src="https://cdn.datatables.net/1.10.21/js/jquery.dataTables.min.js"></script>
Initialize DataTables:
$(document).ready(function() {
  $('#myTable').DataTable();
});
Practical Applications of JSON to HTML Table Conversion
Displaying API Data in Real-Time
Fetching JSON data from APIs
When it comes to real-time data, APIs are the lifeblood. Imagine a scenario where you’re pulling data from an API. It’s not static; it updates, fluctuates, breathes. You need to embed this live data into HTML tables for instant access.
setInterval(() => {
  fetch('https://api.example.com/data')
    .then(response => response.json())
    .then(data => {
      updateTable(data);
    });
}, 30000);
This snippet, running every 30 seconds, fetches fresh JSON data. The key is updateTable, the function that maps this real-time JSON to your HTML table structure.
Updating HTML tables based on live API data
Dynamically update your table with new API data:
function updateTable(data) {
  let table = document.getElementById('live-data-table').getElementsByTagName('tbody')[0];
  table.innerHTML = ''; // Clear existing rows

  data.forEach(item => {
    let row = table.insertRow();
    Object.values(item).forEach(val => {
      let cell = row.insertCell();
      cell.innerText = val;
    });
  });
}
It’s about synchronization, ensuring your web interface reflects real-time API updates seamlessly.
Integrating JSON Data into Web Applications
Using JSON as the data format for internal tools and dashboards
JSON isn’t just for APIs; it’s the backbone for internal tools and dashboards. Imagine managing an inventory system, employee database, or sales metrics. Your data format? JSON, of course.
const jsonData = [
  { "product": "Laptop", "stock": 50, "price": 900 },
  { "product": "Smartphone", "stock": 80, "price": 700 },
  { "product": "Tablet", "stock": 20, "price": 300 }
];
Feeding this JSON into a dashboard provides a clear, organized view of your data. It’s not just static; it’s interactive, dynamic.
Example: Displaying user data, inventory, or other resources dynamically
Picture this: A user dashboard where data updates in real time, reflecting inventory changes, new sales, or user activities.
function renderDashboard(data) {
  let table = document.getElementById('dashboard-table').getElementsByTagName('tbody')[0];
  table.innerHTML = '';

  data.forEach(item => {
    let row = table.insertRow();
    Object.keys(item).forEach(key => {
      let cell = row.insertCell();
      cell.innerText = item[key];
    });
  });
}

fetch('path/to/inventory-data.json')
  .then(response => response.json())
  .then(data => renderDashboard(data));
This dynamic approach to data handling reinforces how to convert JSON to an HTML table seamlessly, embedding JSON objects directly into your app’s UI, making data management intuitive and efficient.
FAQ On Converting JSON To An HTML Table
How do I convert JSON to an HTML table using JavaScript?
Use JavaScript to iterate through JSON data. Create table headers by extracting keys. Then, loop through the data to generate rows and cells. Finally, insert this table into an HTML container using document.getElementById() and set innerHTML to your table string.
How can I dynamically generate an HTML table from JSON in jQuery?
Use jQuery’s $.getJSON() to load JSON data. Create table headers from keys, then append rows and cells by looping through the JSON.
Insert the generated table into an HTML element using $('#element').html(). This method helps to handle real-time data updates.
What are some libraries to simplify JSON to HTML table conversion?
Libraries like DataTables and jQuery streamline this process. DataTables add robust features like search and pagination.
jQuery simplifies JSON parsing and DOM manipulation, making dynamic table generation straightforward and efficient.
How do I style an HTML table generated from JSON?
Use CSS or frameworks like Bootstrap. Add classes to your table, headers, and cells for styling. Example: table { width: 100%; border-collapse: collapse; } th, td { padding: 8px; }. Alternatively, use Bootstrap classes for pre-built styles.
Can I convert nested JSON objects to an HTML table?
Yes, flatten nested JSON structures. Extract nested properties and combine them with parent keys. Use JavaScript to loop through each level, then build the table. This method helps display complex, multi-dimensional data in a readable format.
How do I handle large datasets when converting JSON to HTML tables?
Implement pagination with libraries like DataTables. Load a manageable chunk of data and provide navigation to view more. This approach ensures performance efficiency and a responsive user experience.
How do I sort JSON data in an HTML table?
Use JavaScript to create a sorting function. Trigger this function on table header click events. Sort the JSON array based on the selected column, then re-render the table. Libraries like DataTables also offer built-in sorting features.
How can I make an HTML table interactive with JSON data?
Enhance interactivity with filtering and sorting using JavaScript or libraries like DataTables. Filtering allows users to search table content, while sorting arranges data dynamically. These features improve data presentation and usability.
How to fetch JSON data from an API for HTML tables?
Use Fetch API or jQuery’s $.getJSON() to request JSON from an API endpoint. Example with Fetch API:
fetch('https://api.example.com/data')
  .then(response => response.json())
  .then(data => {
    // Process and generate table
  });
How can I update an HTML table in real-time with API data?
Set an interval to periodically fetch JSON data from an API, then update the table. Use setInterval() in JavaScript to make repeated API calls, updating the table each time with the new data. This approach ensures your table reflects the latest information.
Conclusion
Understanding how to convert JSON to an HTML table is a vital skill for effective data presentation in web development. By leveraging both JavaScript and jQuery methods, you can seamlessly transform JSON data into interactive, styled tables.
From extracting keys to generate headers, looping through JSON entries for rows and cells, to dynamically inserting the table into your HTML, each step is crucial for creating a user-friendly interface. Use libraries like DataTables for enhanced functionality such as sorting, filtering, and pagination.
Incorporating CSS or frameworks like Bootstrap ensures your tables are visually appealing and well-structured. Real-time updates from API data can be achieved with interval-based fetching, keeping the displayed information current and relevant.
With these techniques, your ability to present complex data in a clear, organized manner will significantly improve, catering to diverse user needs and enhancing overall web application functionality.