Ever stumbled upon a WordPress post and wondered, “Who wrote this?” Maybe you’re aiming to create that mystery on your own site. Hiding the author’s identity in WordPress isn’t just about cloak and dagger; it’s a genuinely needed tweak for many admins prioritizing privacy and simplifying designs.
This article dives deep into how to mask author details, fortifying digital privacy while maintaining sleek post aesthetics. From using plugins that seamlessly strip away author info to tweaking PHP functions or CSS, you’ll master the quiet art of anonymity.
Expect to unlock:
- Enhanced WordPress security protocols.
- Step-by-step guides to modify WordPress theme code.
- Tips on leveraging WordPress backend settings for ultimate control.
Discover how seamless it can be to transform a typical WordPress blog into a staunch fortress of authorial privacy—all without sacrificing functionality or flair.
Table of Contents
Reasons to Hide the Author in WordPress
Some may think that it is unnecessary to hide the author’s name since it adds to the content’s credibility.
The author’s name metadata is an essential part of WordPress. It helps the readers to learn more about the writer.
But there are reasons why hiding or removing the author’s name is beneficial.
These include:
1. Multiple Staff Members Collaborated on a Blog Post
If this is the case, then crediting a single person would be unfair to the whole team. You have to use a different strategy to put all authors below the title as contributors.
2. The Website Has Different Contributors and Freelance Writers
As the owner of a blog website, the goal is for readers to know that “you” are the one who’s writing. As the demand for articles grows, it may be necessary to hire freelancers or ghostwriters.
In time, a writer may stop contributing to the blog. This is less noticeable to readers if the author’s name is withheld in posts and articles.
3. The Article is Controversial
Authors may want to stay anonymous if the article’s topic is sensitive or controversial. This helps them to avoid risking their reputation or work.
At these times, having a “hide the author” option is helpful.
The following section explains how to hide the author in WordPress.
Solutions to Hide or Remove the Author’s Name from WordPress
Use Custom CSS
It’s not necessary to be a developer to use CSS in this instance. The following instructions can assist users to hide the author’s name.
This is one of the easiest methods. In this solution, the CSS will not remove the author’s name completely but will hide it on the website’s frontend.
This step works best in Google Chrome, using the following instructions. However, this method also works in other web browsers.
How to Use Custom CSS in Google Chrome to Hide Author’s Name:
- Go to the live post you want to remove the author’s name from.
- Search the author’s name displayed on that page, and right-click on that section.
- Go to the Element’s tab. Find the author’s name and ‘By:’ label by hovering over various HTML elements. Look for the highlighted texts and elements.
- Go to Appearance > Customize, located on the dashboard’s left menu area.
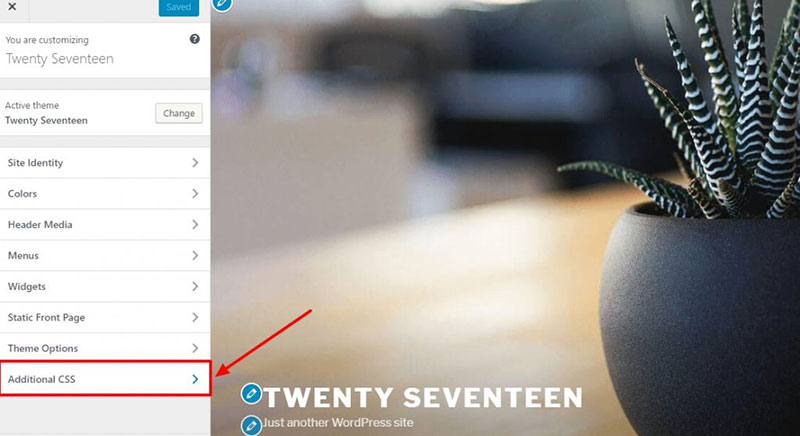
- Select the “Additional CSS” tab.
- To delete this element at any time, add the ‘display:none’ rule to the custom CSS code box.
You will see something like this:
<php> .your-theme-name-post-info-author {
display: none;
} </php>
When these codes appear, it means the author’s name is now hidden. Users can add comments about the codes to make troubleshooting easier in the future.
Don’t forget to organize and make the code snippets structured and less cluttered.
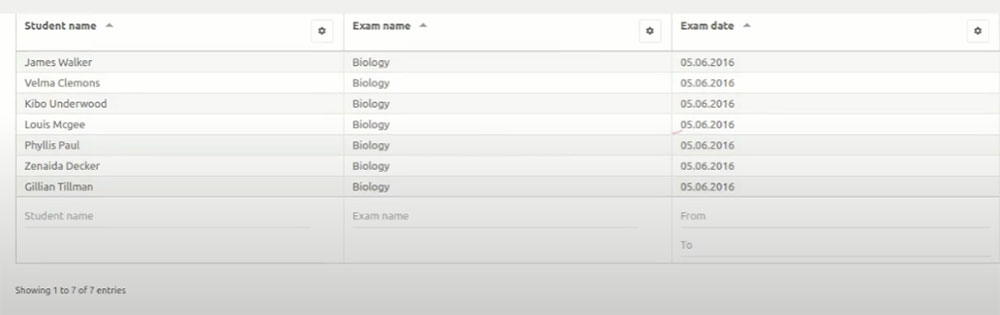
Use a Generic Name for All WordPress Posts
This solution does not completely remove the author’s name. But it removes the need to list the names of all the writers.
Using a generic name gives readers confidence in the writer. They feel that they are reading articles created by a single person.
Doing this also benefits the team. Site owners can create a generic or group name that represents all the writers.
This motivates everyone to work together as a team, rather than as an individual.
By maintaining a consistent writing style, readers will keep on coming and put their trust in you. Make sure to use the generic name for past and future articles too.
How to Replace the Author’s Name with a Generic Name on a Single Post
The steps to replace the author’s name with a generic one will depend on the page builder used. But the differences are only slight.
Gutenberg Page Builder

- Open the relevant post to change the author’s name.
- Navigate to the screen’s top-right section.
- Select the Document tab, then click on the Status and Visibility section.
- Look for the Author option, and click on the previous author’s name.
- Press the Update button
Classic Editor or WPBakery Page Builder
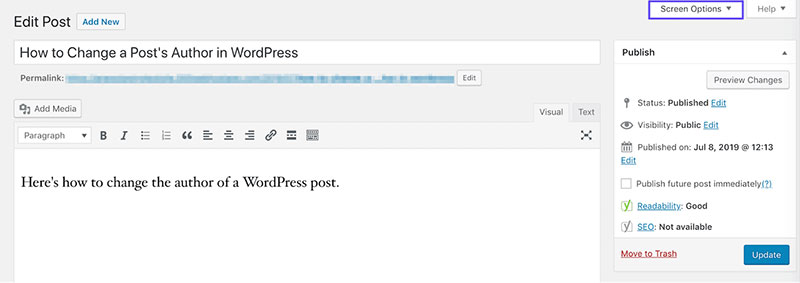
- Enable the Author section.
- Go to the screen’s top right corner.
- Next to the Author option, tick the checkbox.
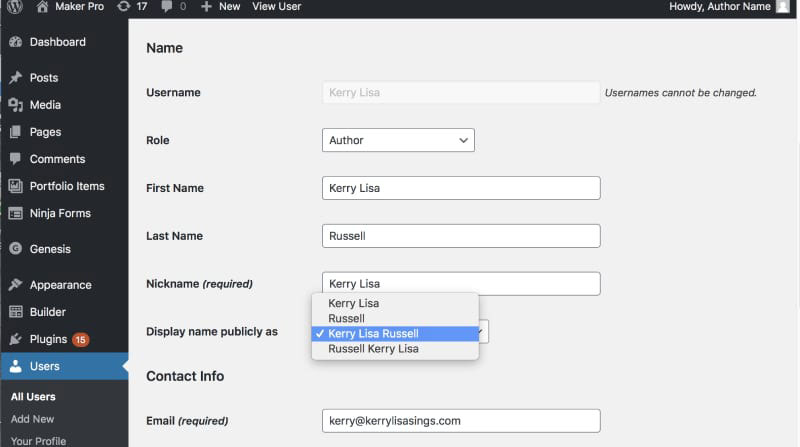
- Choose the replacement for the author’s name, then type it in the Nickname field.
- In the “Display Name Publicly” option, select the chosen nickname.
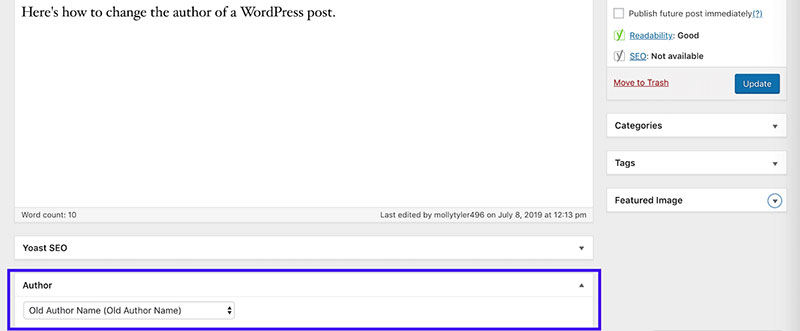
- Go to the Author section, click on “New Author”.
- Go to the Publish section on the right, and select the “Update” button.
Check the post to make sure that the author is no longer the previous name. Readers will not know a specific author’s name, but they’ll know that it was written by a team.
How to Replace the Author’s Name in All Blogs or Articles
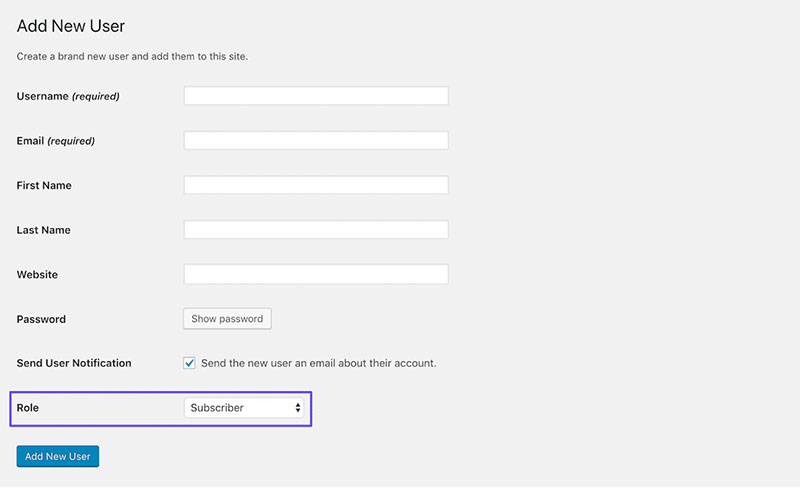
- Select Add New to the Users section to create a new user. (A different approach to the previous steps for changing a single post’s author’s name.)
- Add a generic name, like “editorialteam”.
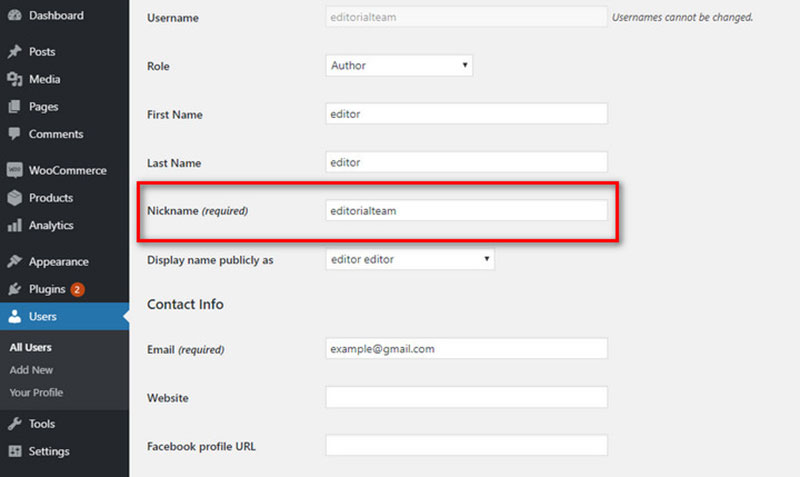
- Visit the Users section, go to the All Users page.
- Below the new username, click on the “Edit” link.
- Scroll down to the ‘Nickname’ option located on the user profile screen.
- Enter the name you want to display.
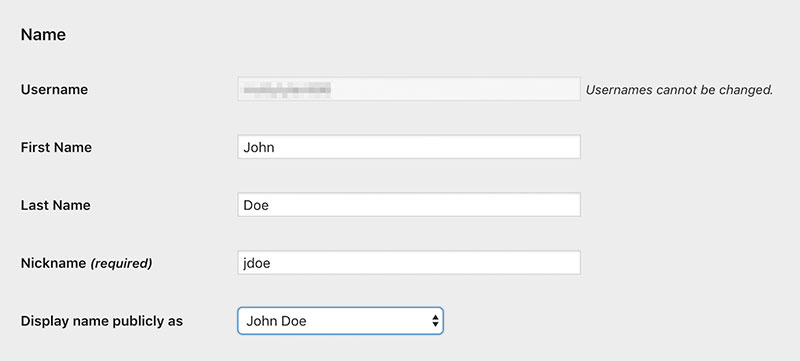
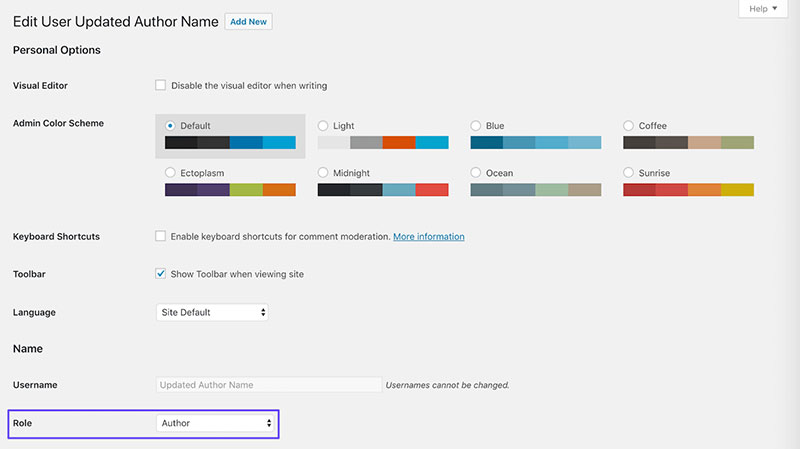
- Next to the ‘Display name publicly as’ option, click on the drop-down menu. Then click the chosen nickname.
- Users can create a gravatar and generic bio for the new user account.
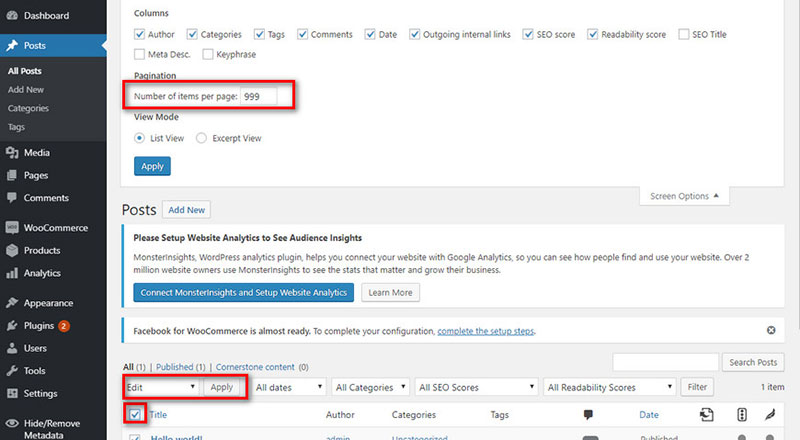
- Go to the Posts > All Posts page, and click on the top screen options menu. Select 999 of the display’s number of items.
This enables users to change and customize the bulk number of posts or articles.
- Using the checkbox, select all posts.
- Under the bulk actions drop-down menu, select the ‘Edit’ section.
- Select the ‘Apply’ button.
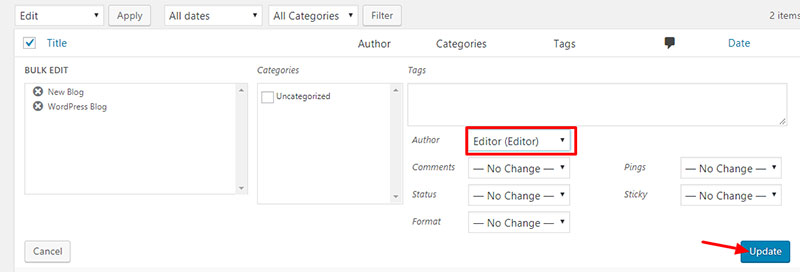
- The Bulk editing options will appear.
- Change the previous author’s name to the new generic name.
- Select the ‘Update’ button.
- WordPress will start to refresh and update all the posts with the new generic name of the author.
Note: If there are more than 999 posts, go to the next page and repeat the process presented above.
The processing time depends on the loading time of the WordPress hosting used. Try to visit your website, and see how it goes.
Use Code to Remove the Author Name
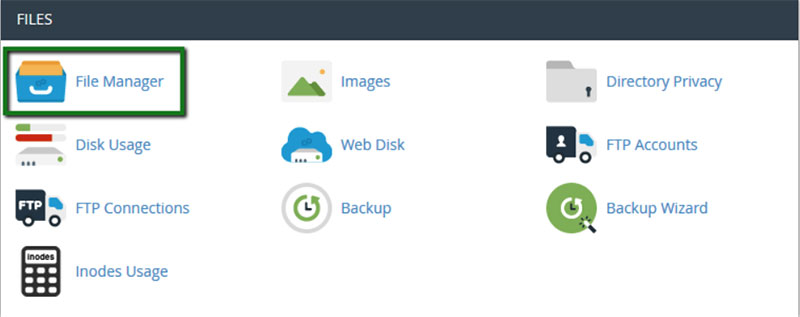
Before making changes to the code, make sure to backup the website whenever a problem occurs.
First, locate the code that shows the posts’ or articles’ author name. In the theme files, look for index.php files, archive.php, content.php, and single.php.
Having located the code, it’s necessary to delete it to make it disappear on the pages.
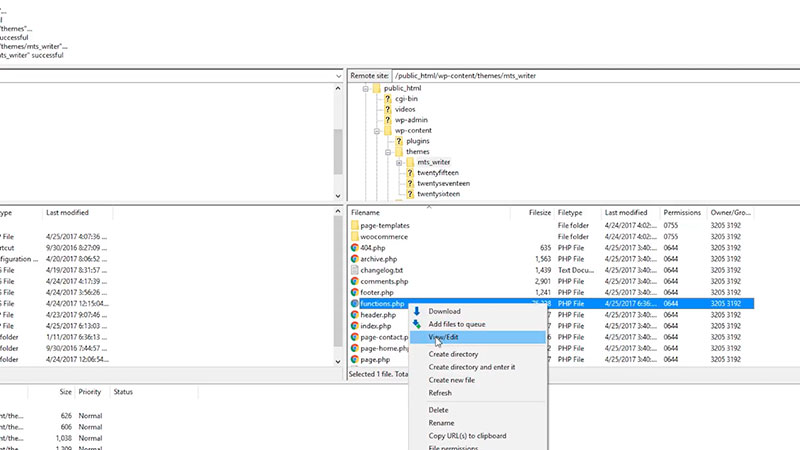
In some circumstances, it’s not possible to locate the author’s name in the current template. If that is the case, then find the codes in the template-tag.php or functions.php
For example, the name of the template is “Twenty Nineteen”. It uses the function “twentynineteen_posted_by” to present the author’s name.
Look at the template-tag.php, and the code should look like the following:
function twentynineteen_posted_by() {
printf(
/* translators: 1: SVG icon. 2: post author, only visible to screen readers. 3: author link. */
‘<span class=”byline”>%1$s<span class=”screen-reader-text”>%2$s</span><span class=”author vcard”><a class=”url fn n” href=”%3$s”>%4$s</a></span></span>’,
twentynineteen_get_icon_svg( ‘person’, 16 ),
__( ‘Posted by’, ‘twentynineteen’ ),
esc_url( get_author_posts_url( get_the_author_meta( ‘ID’ ) ) ),
esc_html( get_the_author() )
);
}
endif;
In order to remove the author’s name, users have to delete the entire code. Or replace it with the following code:
function twentynineteen_posted_by() {
}
endif;
Don’t forget to upload the files to the server after making changes.
FAQ on how to hide the author in WordPress
How to enable the “Hide Author” feature in WordPress?
Diving into WordPress settings won’t directly reveal a straightforward “Hide Author” toggle. Instead, achieving this requires either plugin installation or manual adjustments in theme files—primarily through CSS code manipulations to surgically remove or obscure author displays from your posts.
What WordPress plugins can hide the author’s name?
Plugins like “WP User Manager” or “Author Remover” are sterling choices. These plugins efficiently manage user roles and privacy without tinkering with code. They provide easy interfaces to hide author details across all posts or selectively, based on your preferences.
Is it possible to hide the author by editing theme files?
Absolutely! If plugins are not your go-to, you can edit your theme’s PHP files or CSS directly. For the PHP route, adjustments in the functions.php file would be pertinent. Meanwhile, adding CSS rules can conceal the author meta information from the frontend effectively.
How to ensure changes are not overwritten by theme updates?
To guard against loss during updates, create a child theme. Implementing changes in this child theme, especially in functions.php or the CSS, ensures that your customizations remain intact, even after the main theme receives updates.
What are the risks associated with hiding the author’s name in WordPress?
The primary risk involves digital privacy and user experience. If multiple authors contribute to the blog, removing attribution can affect transparency and recognition. Technically, misconfigured code might lead to site display issues or unintended visibility problems.
Can author details be hidden on specific posts only?
Absolutely. This finer degree of control can be managed through conditional tags in WordPress templates or by using plugins that allow settings on a per-post basis. This method offers the flexibility to hide the author in specific instances rather than site-wide, maintaining normal operations elsewhere.
Does hiding the author affect SEO?
Hiding the author’s name does not inherently harm SEO as long as the content remains content-rich and engaging. However, the clear attribution to a reputable author can sometimes bolster content credibility and, potentially, rankings.
How to customize the “Posted by” text in WordPress?
Tweaking the “Posted by” label involves delving into theme PHP templates. Locate phrases within single.php or archive.php and adjust as necessary. For a coding-free solution, various plugins enable text changes through a user-friendly interface, enhancing your website management efficiency.
What if I want to re-display the author later?
Reversing the process is as straightforward as reversing the changes. Remove the respective CSS rules, or re-enable author details through the plugin settings. Keeping a clean version of the original code commented out is a wise practice for easy toggling.
Best practices for managing user roles and permissions when hiding authors?
Effective user role management lies at the heart of this process. Ensure admins have the ability to see and edit author details even when they’re hidden publicly. Regularly audit access permissions via your WordPress admin panel to maintain security and functionality in locking down visible author information.
Conclusion
By now, hiding the author in WordPress should no longer be a puzzle. With the armory of plugins, CSS tweaks, and PHP edits at your disposal, you have the capability to control author visibility to your precise specifications.
- Plugins serve as an ideal pick for those preferring straightforward solutions with no code entanglement.
- Custom CSS offers a laser-focused approach for those comfortable with stylesheets, ensuring that every pixel aligns perfectly with your visual goals.
- Diving into PHP file modifications might be for the more adventurous souls who enjoy granularity in their web governance.
Ultimately, these tools not only aid in hiding author details but also bolster site aesthetic and user privacy. Remember, the power to shape how information is presented on your WordPress site is just a few clicks or lines of code away—use it wisely.
If you enjoyed reading this article about how to hide the author in WordPress, you should read these as well:
- How to Delete WordPress Themes And When to Do It
- Where are WordPress Pages Stored? (Answered)
- How to Fix “Your Connection Is Not Private” For a WP Site in Chrome
- How to Upload an HTML File to WordPress Easily