So, you’ve designed a stunning HTML page and now you’re wondering, “How do I upload this HTML file to WordPress?”
Imagine this: you’ve crafted a perfect landing page with HTML and CSS, polished every pixel, and now it’s time to bring it to life on your WordPress site.
Whether you’re looking to add a custom page, enhance your site’s functionality, or simply integrate a unique design, the process of uploading an HTML file to WordPress can be a game-changer.
In this guide, you’ll learn step-by-step methods to seamlessly integrate HTML into your WordPress environment.
From using the WordPress media library and leveraging FTP for more control, to the nuances of managing your WordPress dashboard, we’ve got you covered.
Table of Contents
How to Upload an HTML File to WordPress: Quick Workflow
There are a few different methods you can use to upload HTML files to your WordPress website:Method 1: Using the WordPress Dashboard
- In the WordPress dashboard, go to the post or page where you want to add the HTML file.
- Insert a ‘File’ block in the Gutenberg editor and click ‘Upload’ to add the HTML file.
- Alternatively, you can upload the HTML file directly to the WordPress Media Library by going to Media > Add New and selecting the file.
Method 2: Using FTP
- Open an FTP client like FileZilla and connect to your WordPress hosting account using the FTP credentials.
- In the FTP client, navigate to the root directory of your WordPress site (usually public_html or www).
- Upload the HTML file to the desired location, such as a new folder you create.
- Once uploaded, you can access the HTML page by visiting yourdomain.com/foldername/filename.html.
Method 3: Using cPanel File Manager
- Log into your hosting account’s cPanel and access the File Manager.
- In the File Manager, navigate to the root directory of your WordPress site.
- Upload the HTML file directly to the root folder or create a new folder to upload it to.
- Once uploaded, you can access the HTML page by visiting yourdomain.com/foldername/filename.html.
The key things to remember are:
- Make sure to properly format and validate your HTML file before uploading.
- Consider where you want the HTML file to be accessible on your WordPress site.
- Avoid overwriting any existing WordPress files or folders when uploading HTML.
- Test the uploaded HTML file to ensure it loads correctly.
Uploading an HTML File to WordPress through the WordPress Dashboard
This is the easiest method for adding HTML files to WordPress. You can do this through a blog post, a page, or through the Media Library.
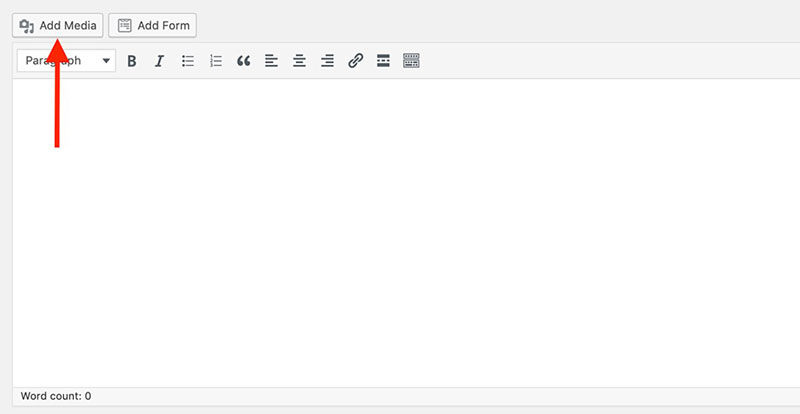
To begin, go to ‘Posts’ on the left sidebar of your WordPress dashboard. Choose any published post or create a new post. The WordPress Visual Editor will open by default. Click ‘Add Media’, and a pop-up window will be displayed. To upload files from your hard drive, cloud drive, or external storage device select the ‘Upload Files’ tab. To add existing files from your Media Library click on the ‘Media Library’ tab.
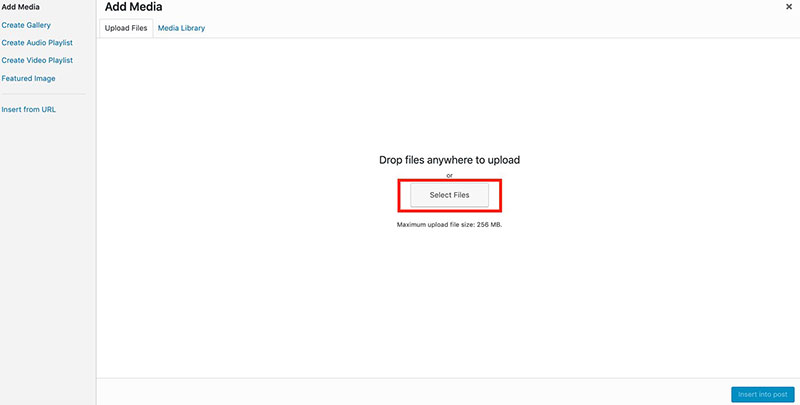
On the ‘Upload Files’ tab, click ‘Select Files’ and select the HTML file you want to upload. You may also drag and drop the selected HTML file from your local folder to the ‘Add Media’ pop-up window.
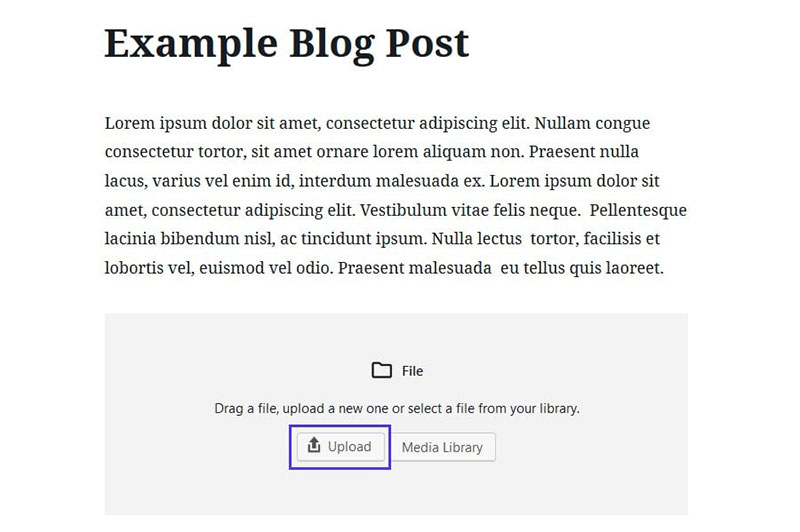
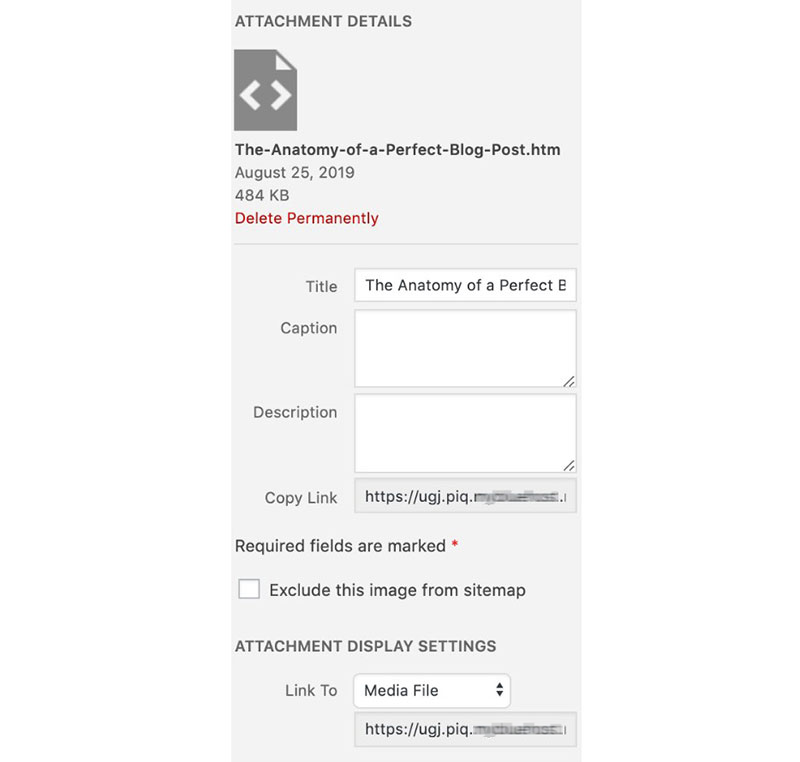
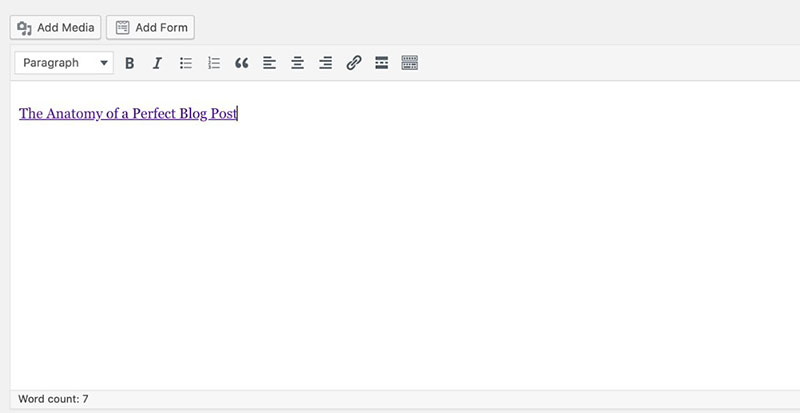
If you are using the Gutenberg Editor plugin, you may insert a ‘File’ block, then click the ‘Upload’ button. Select the desired HTML file, then click the ‘Insert into post’ button to embed the link of the HTML file into the post. The link is automatically saved to the Media Library.
It’s also possible to upload a file directly to the Media Library. To do this, go to Media Library in the admin dashboard. Click the ‘Add New’ button and select the HTML file from your computer to upload it.
Uploading an HTML File to WordPress using an FTP Client
File and folder permission errors can occur when adding multiple HTML files or plugins to WordPress. A proven way to avoid this is to transfer files through a File Transfer Protocol client.
FTP allows users to transfer files from their local computer to a website host account.
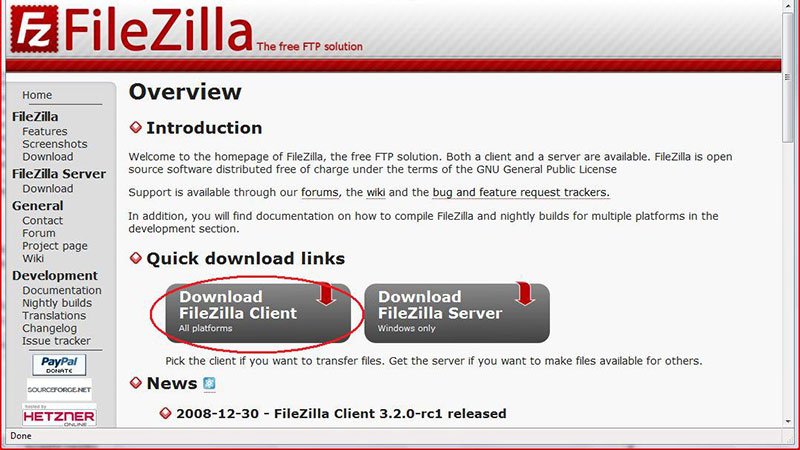
An FTP client is software that uses the FTP protocol to transfer files manually. There are many free FTP clients available. For example, FileZilla, WinSCP, and Cyberduck are all compatible with Windows, Mac, and Linux.
Before beginning an upload, it is important to ensure that you have created a backup of your website. This will avoid any data loss in the event of a system failure.
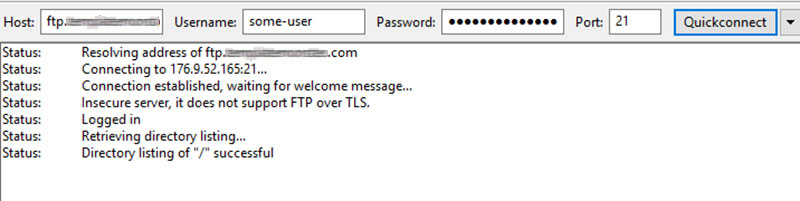
Once downloaded, open the FTP client and connect your web host account with WordPress. To do this, enter your FTP login credentials into the Site Manager.
FTP login credentials are supplied after signing up for a WordPress hosting account. They are usually sent by email but are also located in the web host’s cPanel dashboard. If you experience difficulty locating the credentials, contact the hosting provider.
Next, enter your website information and choose “SFTP”. After the FTP account information is entered, click the ‘Quick Connect’ button. This connects you to your WordPress website, and you may now upload the HTML file.
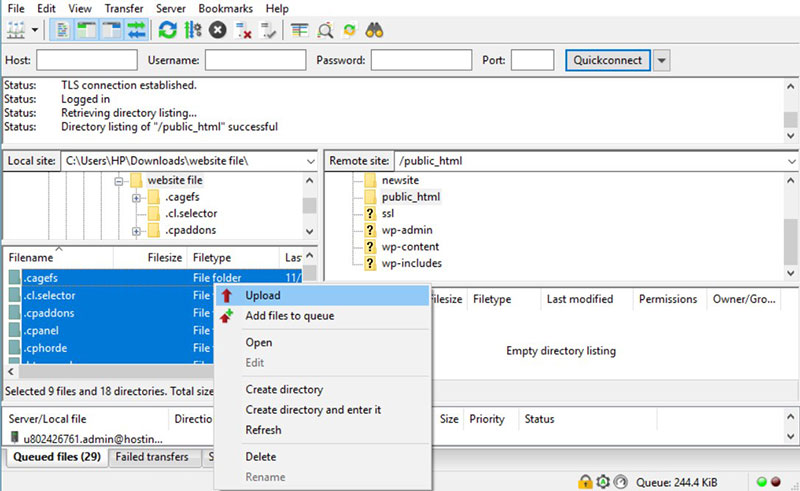
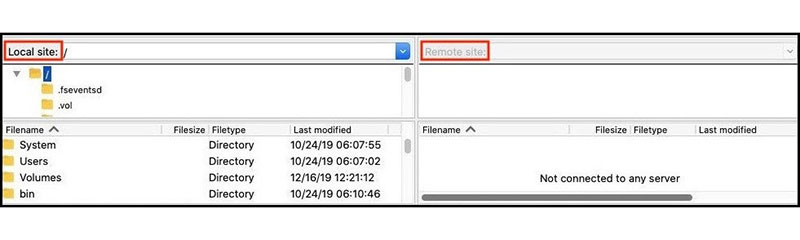
Start by browsing through your computer files in the ‘Local Site’ folder. Right-click on the required HTML file and select the ‘Upload’ option. The FTP client will transfer the file to your WordPress website, indicating when the upload is successful.
To see if the website shows the file, go to your browser. Enter your website’s URL followed by the name of the HTML file: www.mywebsite.com/html-file. You will be directed to the new website page created with the HTML file.
Uploading an HTML File to WordPress via cPanel
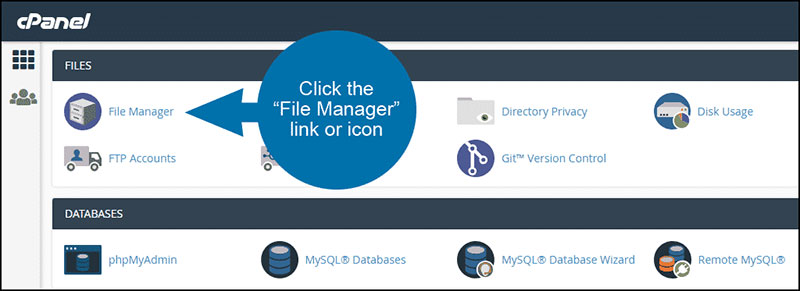
cPanel is a control dashboard that displays the database of your website. For this final method, you will use the cPanel and File Manager.
Compress your HTML page, CSS, and all necessary files and folders into one zipped archive. Windows users can do this by right-clicking the HTML folder, then selecting the ’Compress’ option. For Mac users, right-click the parent folder, then select the ‘Compress folder’ option.
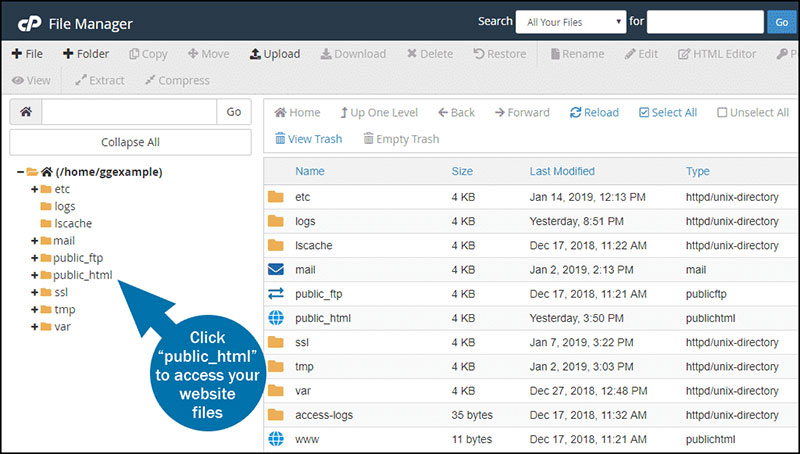
After logging into the cPanel, go to the ’Files’ section and open the ‘File Manager’ app. Inside the ‘File Manager’, navigate to the root folder of the website. This is usually named ‘public_html’ by default.
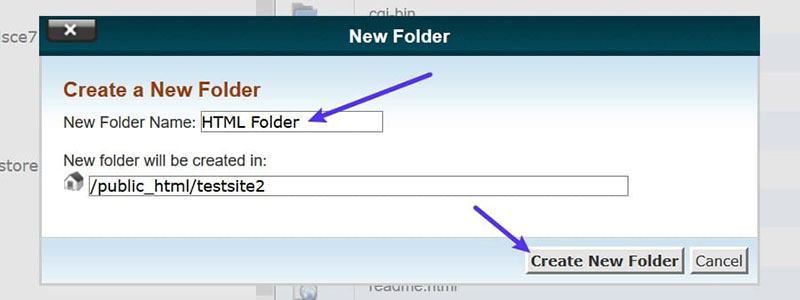
Create a new folder by clicking the ‘New Folder’ button at the upper left side of the screen. This will generate a pop-up window. Enter the name of the new folder. The folder name will become part of the URL of your HTML page, so take this into consideration. Click the ‘Create New Folder’ button.
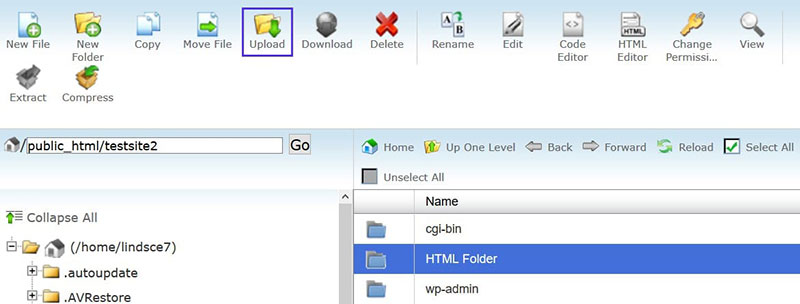
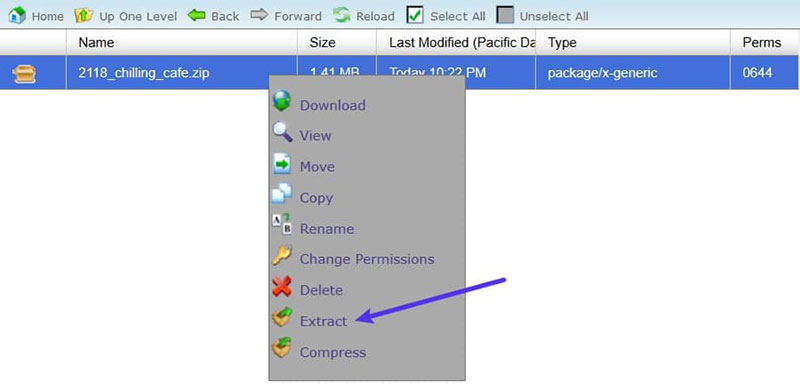
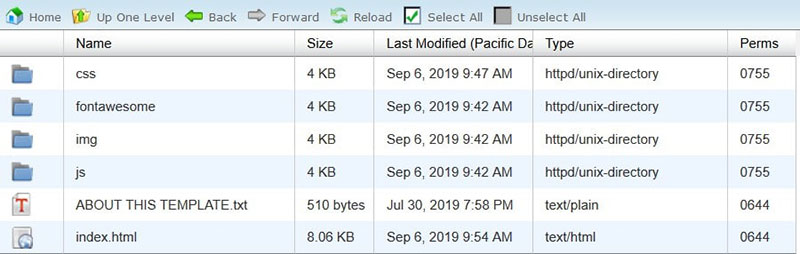
Open the new folder and click the ‘Upload’ button from the top menu. Click the ‘Select File’ button and select the zipped archive of the HTML file that you want to upload. Extract the compressed files by clicking the ‘Extract’ button at the upper right part of the screen, then select the ‘Extract files’ button. Once this has completed click the ‘Close’ button.
Click the ‘Reload’ button to show all the extracted HTML files. The zipped HTML file can now be deleted. This will not cause any changes to the HTML page.
Preview the new page in the browser by entering your website’s URL followed by the folder name. For example yourdomain.com/FolderName/HTMLFileName.html.
A 404 error might occur if your server does not support redirection, or if the ‘index.php’ file is not redirected on loading the URL in the browser.
To fix this within the ‘File Manager’ app, edit the ‘.htaccess’ file by double-clicking it. This can be found in your website’s root folder ‘public_html’. Add the following code and save any changes:
RewriteRule ^(.*)index\.(php|html?)$ /$1 [R=301,NC,L]
This code will redirect and load your ‘index.php’ file in the browser. It will also redirect files or folders with case-sensitive names to view the content.
FAQs about uploading an HTML file to WordPress
How do I upload an HTML file to WordPress?
To upload an HTML file, access your WordPress dashboard. Navigate to the media library and select “Add New.” Upload the HTML file directly. Alternatively, use FTP to transfer the file to your web server. Both methods let you manage your custom HTML content easily.
Can I upload HTML files without a plugin?
Yes, you can upload HTML files without a plugin. Use FTP or your hosting provider’s file manager. Access your site’s directory and upload the HTML file to the desired location. This method bypasses the need for additional plugins while giving you more control over your files.
How do I display an uploaded HTML file on my site?
After uploading the HTML file, create a link or a custom page to display it. Use the WordPress editor to add a link to your HTML file’s URL. This integrates your custom content seamlessly into your WordPress site, making it accessible to visitors.
What is the best way to manage uploaded HTML files?
Managing HTML files is straightforward with the WordPress media library. Alternatively, use an FTP client for direct access to your server. This allows for easy file organization and updates. Regularly back up your site to safeguard your custom content.
Can I use an HTML file as a template in WordPress?
Absolutely! Use your HTML file as a custom template by converting it into a WordPress theme. Incorporate PHP and WordPress tags to make it dynamic. This approach leverages your HTML design while integrating WordPress functionalities, offering a cohesive user experience.
How do I edit an uploaded HTML file in WordPress?
Edit your uploaded HTML files using the WordPress editor or an FTP client. Access the file through the dashboard or directly on the server. Make changes in your preferred code editor and save the updates. This method ensures your custom content remains current.
Is it possible to upload multiple HTML files at once?
Yes, multiple HTML files can be uploaded at once using FTP or the media library. For FTP, select all desired files and transfer them to your web server. In the media library, upload files one by one or use a bulk upload feature if supported.
Do I need to change file permissions after uploading an HTML file?
After uploading, check and adjust file permissions via your FTP client or hosting control panel. Typically, HTML files should have permissions set to 644, ensuring they are readable by browsers but secure from unauthorized edits. Proper permissions are crucial for site security.
How do I ensure my uploaded HTML files are secure?
Security is vital. Use SSL certificates to encrypt data between your server and visitors. Regularly update WordPress and plugins. Limit FTP access and use secure passwords. Additionally, consider security plugins to monitor and protect your site from vulnerabilities.
Can I upload HTML files to a WordPress multisite network?
Yes, you can upload HTML files to a WordPress multisite network. Each site in the network can manage its own uploads. Use the media library or FTP for individual site directories. This flexibility supports diverse content needs across your multisite setup.
Conclusion
By leveraging the WordPress media library and FTP, you’re equipped to manage and display HTML content seamlessly. This knowledge not only enhances your site’s functionality but also opens up creative possibilities.
Remember the essentials:
- Upload your HTML file using the media library or FTP.
- Display the file by linking it through the WordPress editor.
- Manage your uploads effectively, ensuring security and proper file permissions.
Mastering these techniques ensures that your content is not only unique but also integrated smoothly into the WordPress ecosystem. Your site will benefit from the added customization and functionality, providing a richer user experience.
If you enjoyed reading this article on how to upload an HTML file to WordPress, you should read these as well:
- Get the Best WordPress Catalog Plugin From This List
- How to Create Great WordPress Charts With These Plugins
- The Best WordPress Table Plugins for Your Site