Embedding a Google Form in your WordPress site can be a game-changer for collecting user feedback, conducting surveys, or managing event registrations directly on your website. Imagine capturing valuable insights right where your audience interacts the most.
This tutorial will guide you through the seamless integration of Google Forms into your WordPress CMS. It’s not just about embedding a form—it’s about optimizing user engagement and feedback collection effortlessly.
By the end of this article, you’ll master the process of inserting Google Forms using HTML, shortcodes, and even the iFrame method. I’ll also explore the use of helpful plugins like Contact Form 7 and WPForms to enhance functionality.
So get ready; you’re about to transform the way you interact with your website visitors by embedding Google Forms into your WordPress site—making data collection as smooth and efficient as possible. Prepare to elevate your web development skills to the next level.
Table of Contents
How to Embed a Google Form in WordPress: Quick Workflow
Create Your Google Form
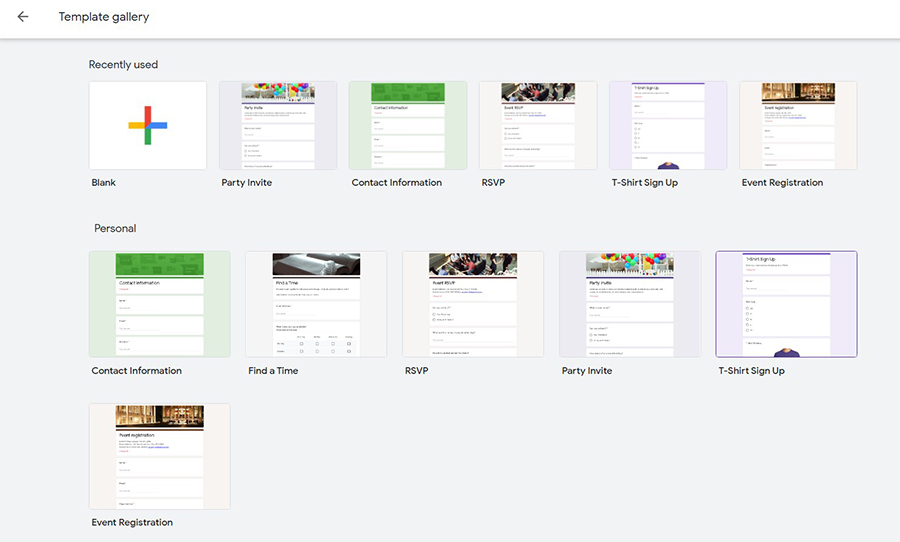
- Visit the Google Forms website and click ‘Go to Forms’ to create a new form or select a template.
- Add a title, description, and form fields. Google’s AI will automatically select the correct field type based on your question.
- Click the ‘Send’ button at the top right to get the embed code.
Access the Embed Code
- In the ‘Send form’ popup, click the embed tab with the <> symbols.
- Copy the embed code by clicking the ‘Copy’ button.
Add the Code to WordPress
- In your WordPress post/page editor, add a Custom HTML block.
- Paste the embed code from Google Forms into the Custom HTML block.
- Preview the page to see the Google Form embedded.
- Click ‘Publish’ to save the changes and make the form live.
That’s it! The Google Form will now be embedded on your WordPress page. A few additional tips:
- Embedding Google Forms does not slow down your site, as the form is hosted on Google’s servers.
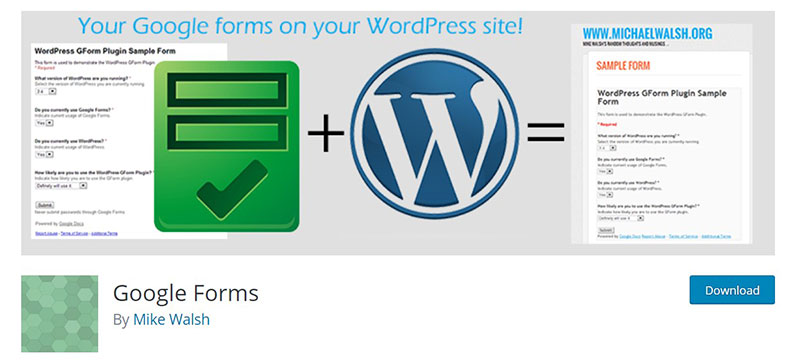
- You can also use the Google Forms plugin for WordPress to add extra options like columns, CAPTCHA, and read-only mode.
The Benefits of the Google Forms Application
The Google Forms application is part of the Google Drive office suite. For simple tasks, Google Forms should be your go-to option. Google Forms is the easiest way to create forms, there is no doubt about that, but although it offers many features compared to some of the Google Forms alternatives, it might fall short, so if you are looking for a really advanced form builder with advanced features such as payment integrations, you ought to check out the other form builders in the market.
It is convenient and efficient for creating forms for websites and other platforms.
Provides a Simple Interface
When it comes to Google forms, simplicity is key. It draws people to view the important details, instead of focusing on the design.
Allows Users to Create Registration Forms, Quizzes, and Online Surveys
When hosting an important event, it is helpful to know the number of attendees. This way hosts can prepare the right amount of drinks and meals to serve the visitors.
With the Google Form application, it is easy to create registration forms, quizzes, and online surveys.
Other Benefits
- Comes with customizable and powerful features
- Enables media items insertion
- Produces real-time responses
- Comes with several add-ons
Reasons To Choose Google Forms Instead of Contact Form 7 or Ninja Forms
In WordPress, there are several form creators available. Each of these can create surveys, quizzes, and registrations.
For those considering Google Forms, the following features are worth noting:
- Convenient to use
- Users can add images and videos from Youtube directly into the form’s questions
- Comes with add-ons to improve its functionality
- Organized and neatly-arranged
- View real-time responses
- Access all forms in a single section
- Google Drive stores all the data
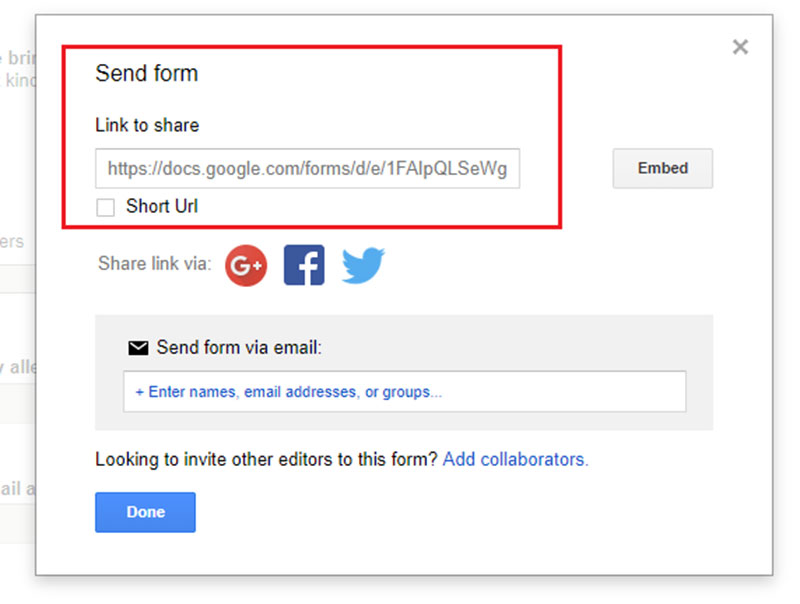
- Share the forms with other team members and collaborate
- Work on a single form and share it on different pages
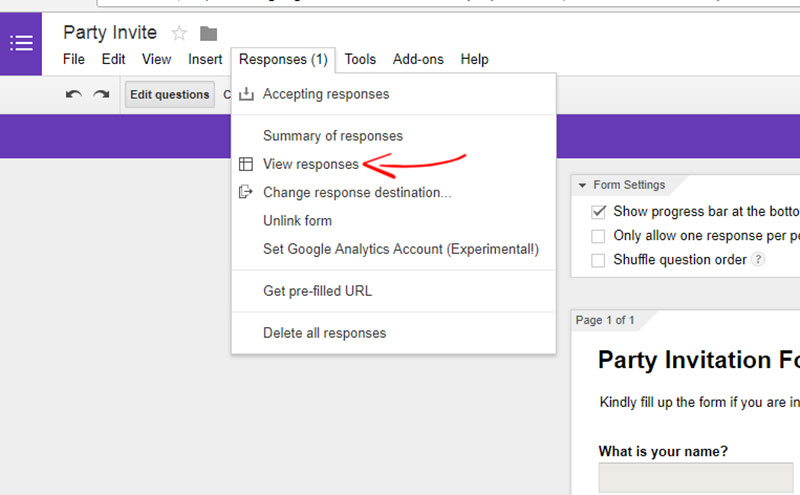
- Allows users to save the data into a spreadsheet
- Responsive forms allow users to create, edit, and respond to new answers
The Step-by-Step Guide to Creating a Google Form

Before learning how to embed a Google Form in WordPress, it is important to know how to create one. Here is a step-by-step guide to creating a Google Form:
- Log in to your Google Drive account, then find Google Form.
- In the Google Drive account’s top-left section, select New > More > Google Forms.
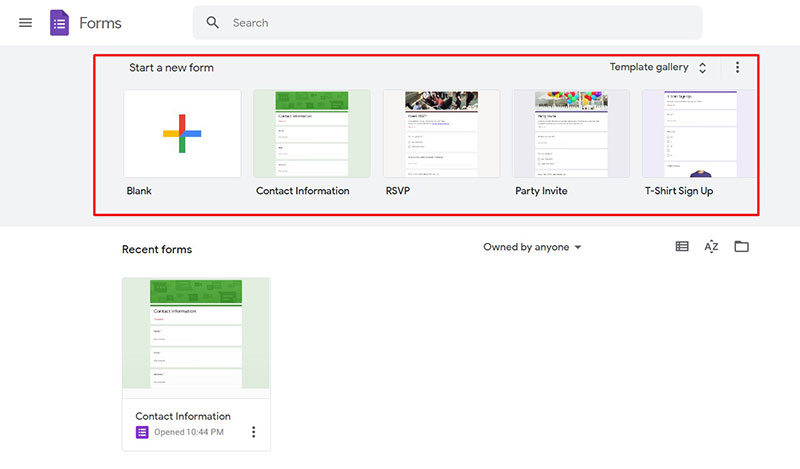
- A blank form will appear, or the user can choose from different templates.
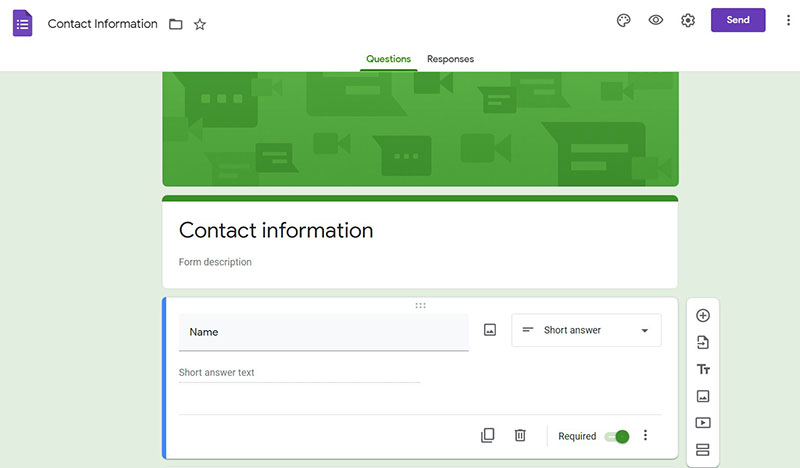
- Introduce the form to your respondents by entering a form title and description.
- Fill out the form fields. Google’s AI will create a format for the responses based on the details entered.
Users can modify this according to their preferences.
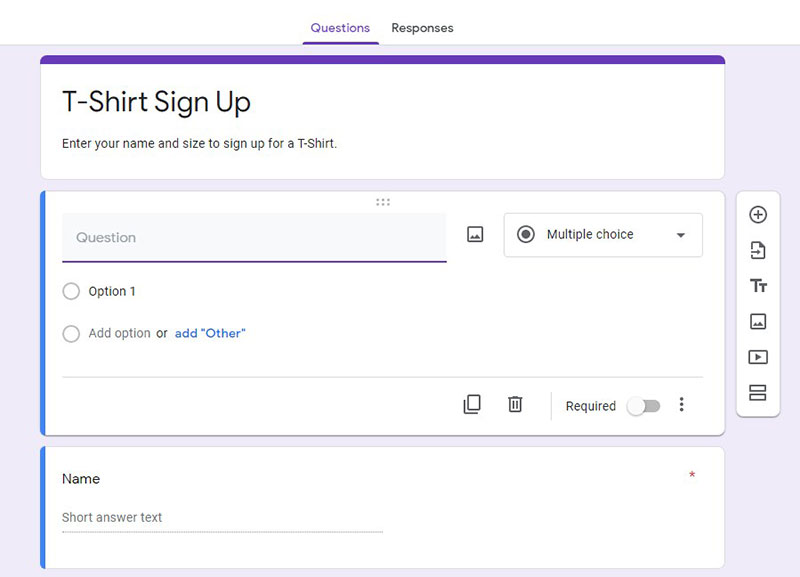
- Ensure the Google Form’s design complements the website theme. It is possible to change the font, video, and add more images.
However, a Google Form has limited customization. There could be challenges in matching it completely to the landing page layout.
Learn How to Embed a Google Form in WordPress
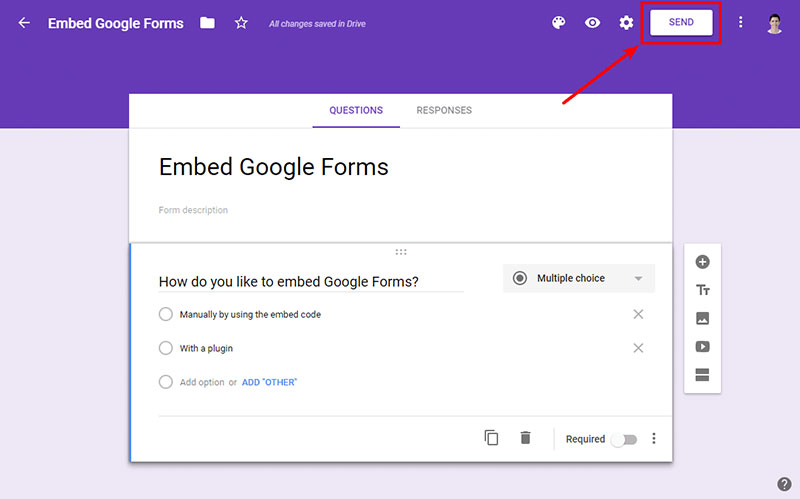
A simple way to do this is to embed the Google Form’s iframe code onto the WordPress website.
Here are the steps to make this possible:
- On the Google screen, look for the “Send” option in the upper-right corner.
- A “Send” form pop-up will appear, offering various ways to send a Google Form.
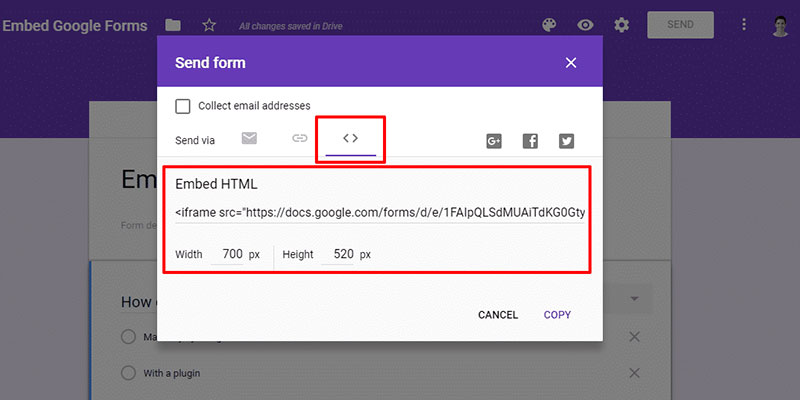
- Go to the Embed HTML option (the one with two-outward facing carets symbol). Select the iframe code, then paste it on the clipboard.
- Having obtained the HTML code snippet, users can embed the Google Form in WordPress.
- Visit the page section where the Google Form is to be embedded.
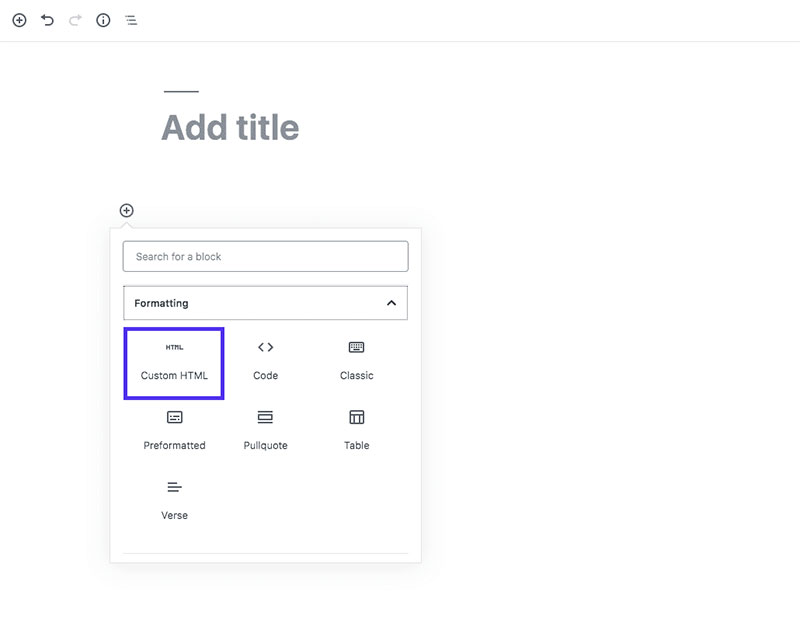
- Users can add a custom HTML block if they have the WordPress Block Editor.
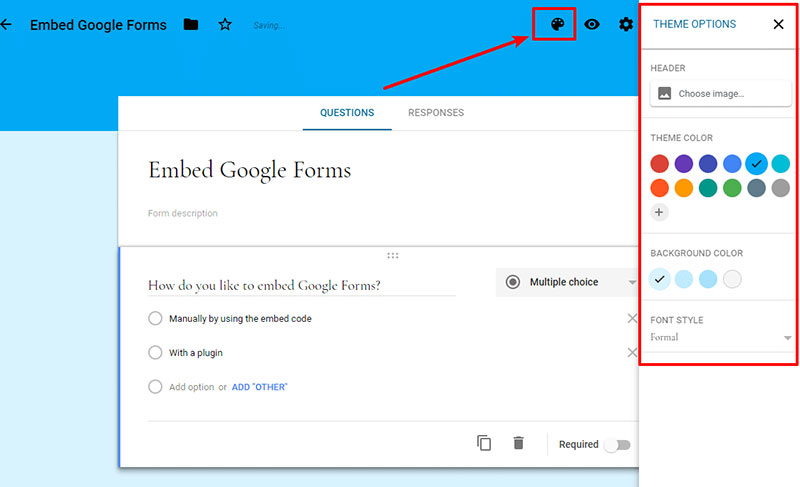
- Users can customize the Google Forms interface according to their style and preferences.
- When editing a form in the Google Forms interface, go to Theme Options to start editing.
The Ultimate Guide for Adding Google Forms to WordPress with a Plugin
When embedding the form’s code into WordPress, users have only limited customization options. It retains Google’s default style, which might not complement the overall theme’s design.
There is another option available. To create more customizable forms, the Google Forms WordPress plugin can help.
It allows users to manage and edit forms from the WordPress dashboard section. What’s more, it comes with more customization choices for Google Forms.
CSS Prefix
Users can style forms differently by adding a CSS prefix at the beginning of each class name in a Google Form.
Read-Only
This allows the users to create a form that is only readable, but not editable.
Captcha
Users have the option to boost security by adding Captcha to the WordPress form. That will secure the form from spambots and spammy responses.
Columns
Users can split the form responses from 2-10 columns.
The Google Forms WordPress plugin is easy and convenient to use. The only problem is that it doesn’t work with the latest Google Forms update.
To use the plugin, users should revert to the old version. Here is how to do it:
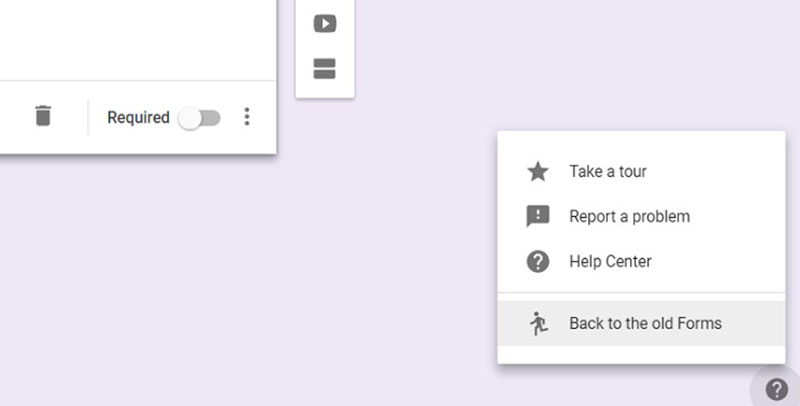
- To go back to the previous version, go to the Google Forms interface. Click on the question mark in the bottom-right corner.
- Click on the “Back to the old Forms” button.
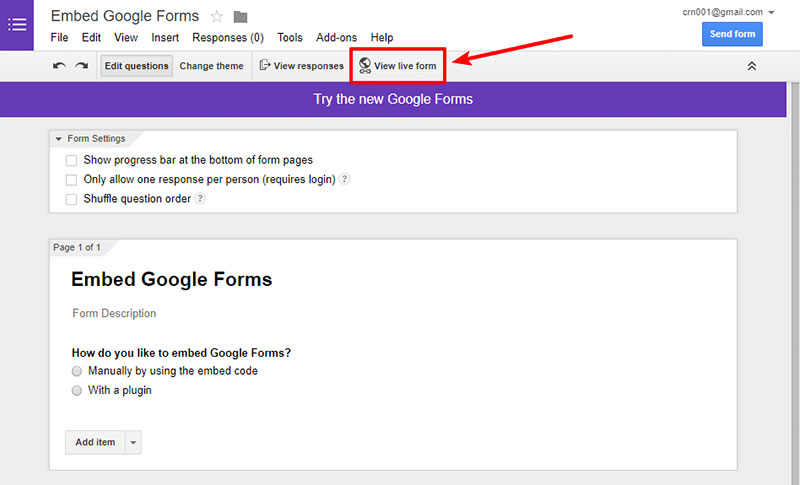
- Select the “View to live form” button to receive and copy the form’s direct link.
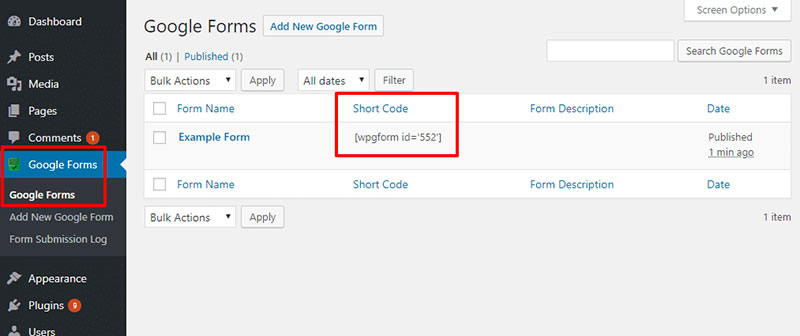
- Visit Google Forms, then add New Google Form in the WordPress dashboard section.
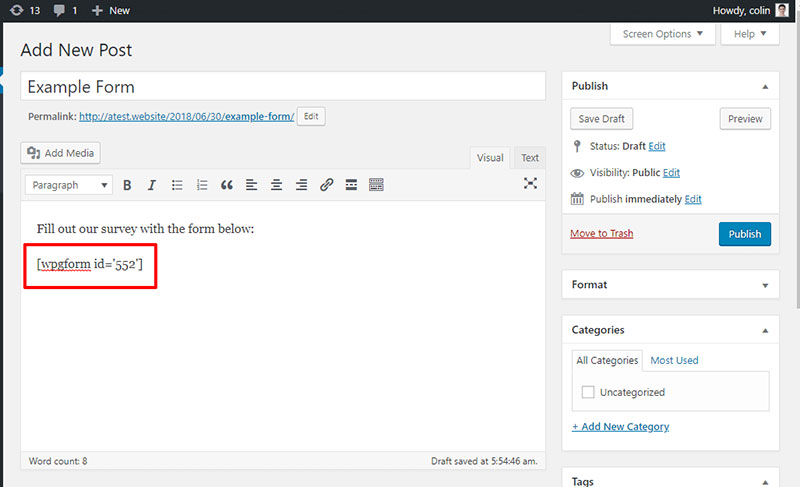
- Paste the copied form link to the Form URL field.
The Google Forms WordPress plugin comes with various options. Users can add a CAPTCHA, split the form into many columns, and exclude certain elements.
They can also override the default Google Forms text, use custom CSS classes, and add a custom confirmation page.
FAQ on Embedding a Google Form in WordPress
How do I generate the embed code for a Google Form?
To get the embed code, open your Google Form and click the “Send” button. Select the “HTML code” icon (<>). Copy the provided iframe embed code. This code is crucial for integrating the form into your WordPress page seamlessly.
Can I embed a Google Form using a plugin?
Yes, you can use plugins like WPForms or Google Forms plugin for easier integration. These plugins often provide a more flexible and user-friendly way to embed forms without manually handling the HTML or shortcode.
Where do I paste the embed code in WordPress?
You can paste the iframe embed code directly into the Gutenberg editor, Classic editor, or the HTML block of your WordPress page. Ensure the editor is in “Text” mode so the HTML code is interpreted correctly.
How do I make the Google Form responsive?
To make the form responsive, adjust the width attribute in the iframe embed code to "100%". This ensures that the form scales with the screen size, providing a better experience on mobile devices.
Can I customize the appearance of the embedded Google Form?
While you can’t style Google Forms directly, you can enclose the iframe in a div or span in your WordPress site and use CSS to style the container, giving some control over the form’s appearance.
Do I need any special permissions to embed a Google Form?
Typically, anyone can embed a Google Form if they have view access to the form. Make sure your form’s settings allow responses from anyone with the link to ensure it’s accessible to your audience.
Why isn’t my Google Form displaying correctly in WordPress?
Double-check the iframe embed code for errors and ensure it’s pasted into the HTML section of the editor. Some WordPress themes or plugins might conflict, so disable them temporarily to diagnose the issue.
Can I track submissions from an embedded Google Form?
Yes, responses are recorded in the form’s linked Google Sheet. For more detailed analytics, integrate with Google Analytics or other tracking tools to monitor user interactions on your WordPress site.
Is it possible to embed a Google Form in a WordPress widget?
Absolutely! Paste the iframe embed code into a Custom HTML widget found in your WordPress dashboard under Appearance > Widgets. This allows the form to be displayed in your site’s sidebar or footer.
How can I secure the data collected via a Google Form?
Ensure your form settings are set to require sign-in or use CAPTCHA to protect against spam. All data is stored securely in Google Drive, complying with Google’s stringent security standards. Always review privacy settings to protect the data.
Conclusion
Mastering how to embed a Google Form in WordPress opens up a realm of possibilities for boosting engagement and gathering valuable data directly from your site visitors.
From understanding the nuances of the iframe method and shortcode implementation to leveraging plugins like WPForms or Contact Form 7, you now have the tools to seamlessly integrate a Google Form onto your WordPress page. Adjusting the form for responsiveness ensures a smooth user experience across devices, while custom styling adds that extra touch.
The technical steps may seem intricate at first, but following these guidelines ensures that your forms are not only functional but also aesthetically pleasing. Don’t forget to secure your data with necessary privacy settings and consider using Google Analytics for deeper insights into form submissions.
Implement these techniques, and you’ll effortlessly elevate your website, making it a more interactive and valuable resource. Your newfound skills in embedding Google Forms will undoubtedly enhance your web development toolkit.
If you enjoyed reading this article on how to embed a google form in WordPress, you should check out this one about how to hide the author in WordPress.
We also wrote about a few related subjects like how to upload an HTML file in WordPress, where are WordPress pages stored, and how to delete WordPress themes.
