Imagine this: a sleek, seamless product catalog on your WordPress site, one where every item pops from the page, neatly organized in an interactive table.
That’s not just a dream; it’s fully possible with wpDataTables. In the vast expanse of digital commerce, standing out matters, and a well-structured online catalog could be the game changer that propels your business forward.
By diving into the ins and outs of wpDataTables, I’ll guide you through crafting a hub for your products that not only looks good but functions with the finesse of a high-end boutique.
You’ll master everything from importing a CSV file to designing responsive tables that adapt like a chameleon to any screen.
By the end of this read, you’ll confidently transform a spreadsheet into a dynamic, sortable, and filterable catalog.
Ready to tackle table creation, WordPress database queries, and shortcode implementation? Let’s turn your product showcase into a compelling, clickable experience that resonates with your audience.
This article will guide you through the process of creating a product catalog in WordPress with the wpDataTables plugin, which is probably the easiest way.
Table of Contents
First – prepare the data for your future product catalog in WordPress

Of course, no catalog would make sense without having some products in it. I presume you have already prepared the data, now you would need to compile it in a form that our WordPress plugin would “understand”. It can be one of the following:
- Excel or CSV file: if you are no developer, and you keep track of your products in Excel – this way would probably be the easiest for you. Just prepare an Excel file with one sheet which would have all the info about your products organized in the table. CSV file would be preferred since it works a little bit faster.
- MySQL table (preferred): this is probably the best data source for your catalog. It provides quick work, and real-time updates without any re-uploads, and if you have 10,000 products it is the best solution. You can convert your data from CSV to MySQL.
- PHP array: If you collect data from several data sources, or if they depend on some external inputs, and if you have some PHP development skills you might prefer to prepare the data in a PHP array, and then prepare a PHP file which would print it out in a serialized string (with serialize function) like this.
- JSON or XML data source – if you have an XML or JSON web service you can prepare the data in these formats. You can read about how to use them here and here
After the data is ready we can move on to the next step
Install the wpDataTables WordPress plugin, which will render your product catalog
Before we move on we need to make sure that the wpDataTables plugin is installed. You can get it here.
Installation is quite simple:
- Upload the plugin to your plugin directory.
- Activate the plugin.
You can read more about this here.
Create a new wpDataTable for your WordPress catalog
Open your WordPress Admin panel and find the wpDataTables admin panel. Then press the “Add new” button to create a new wpDataTable.
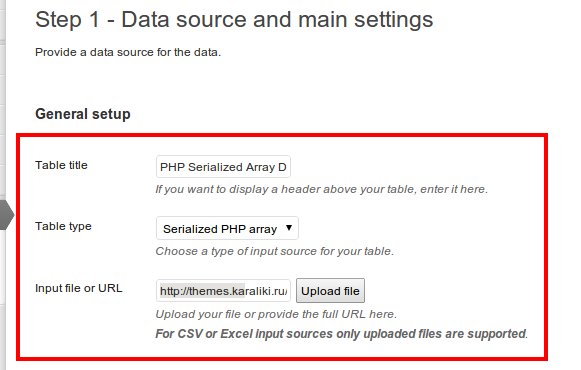
Add a table title. You can call it “Product catalog in WordPress example” or something like this.
Then select a table type. It depends on what you chose in step 1: Excel file, CSV file, MySQL query, serialized PHP array, JSON or XML input source.
If you decided to create the catalog based on MySQL data, provide a correct SELECT query. It can be something like:
SELECT * FROM my_product_catalog
Then you can set one of the following checkboxes and parameters if you want them for your catalog:
- Server-side processing – If you check this checkbox all the filtering, sorting, and other processing will be sent in an AJAX request from the client’s browser and processed by the server. Use this if you have a large MySQL dataset
- Responsive – If your site is responsive check this checkbox, your WordPress catalog will also become responsive.
- Advanced filtering – Enabling this checkbox will add a filter below each column in your new WordPress catalog. So it will allow your users to e.g. filter by price, by release date, or whatever.
- Table tools – Enabling table tools will add the possibility to export data in CSV, PDF, or Excel, or copy catalog data to the clipboard.
- Enable sorting – This checkbox will enable sorting in your catalog. So e.g. your user will be able to sort all your products by alphabet, by price, or whatever he prefers.
- Limit table layout – This checkbox would limit the catalog’s width to the parent container width.
- Word wrap – You can check this checkbox if you have long descriptions of your products in the catalog or long product names. It will make the table cells stretch.
- Display length – This will define how many products will be shown on one page of your catalog.
Press “Save table” and your catalog will be ready to publish.
You can read in more detail about table/catalog settings in the tutorial section. E.g. here
Publish your new product catalog in your WordPress blog
You will get a shortcode generated in the plugin. Paste it in your page or blog post – and your new catalog is ready.
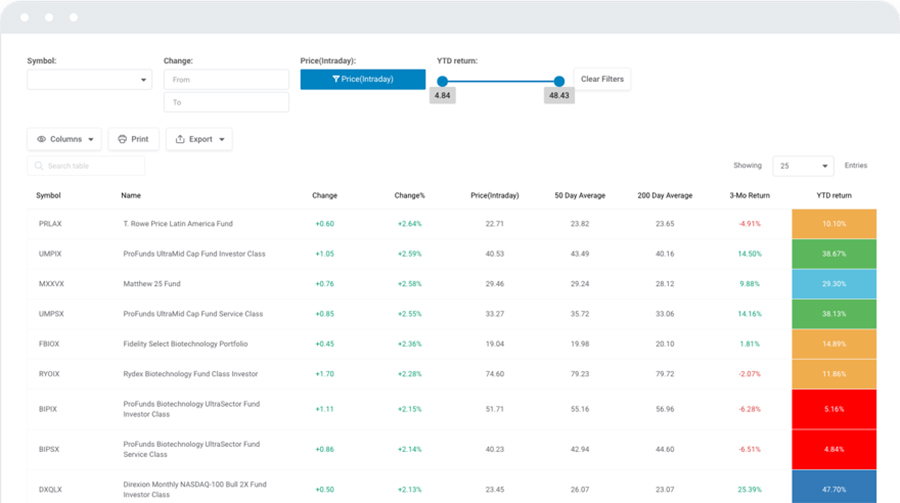
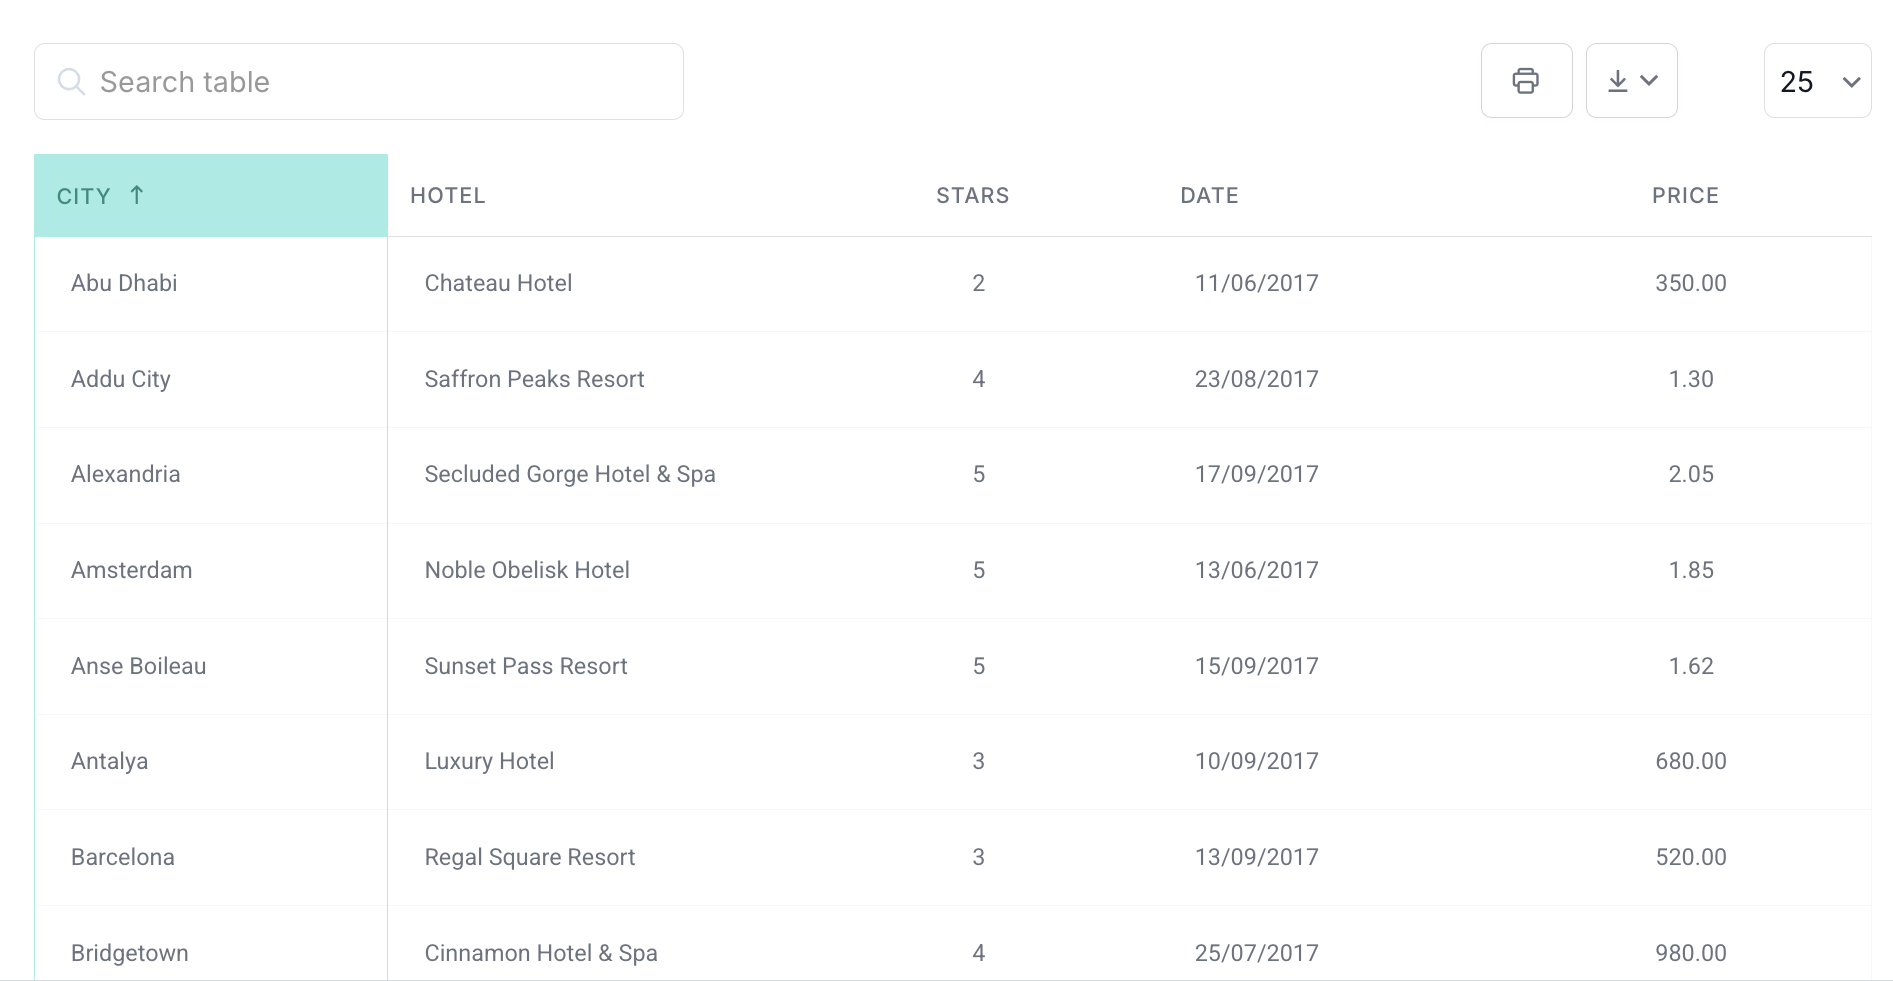
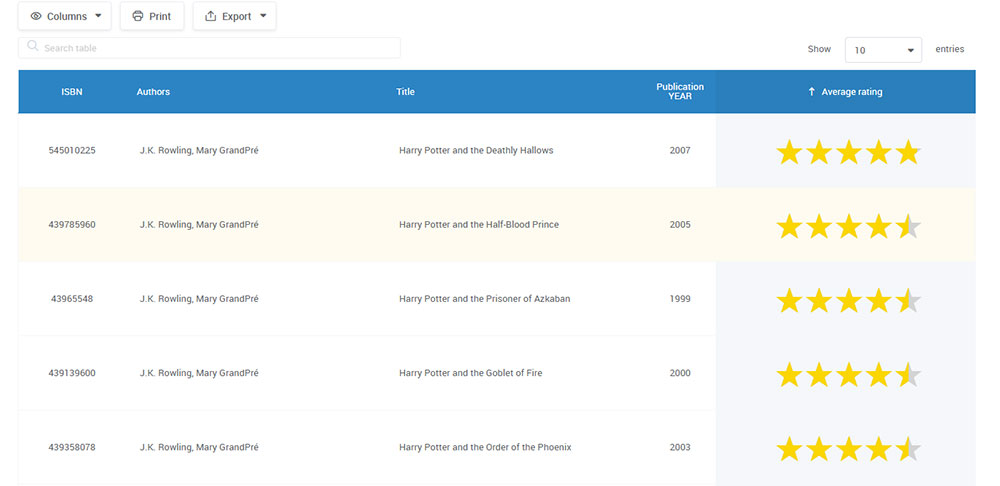
Here is the result:
FAQ on WordPress Product Catalogs
How do I create a WordPress product catalog without coding?
You start with a plugin, see? wpDataTables fits the bill beautifully. You upload your product data, tweak the table design to match your site, and bam! Your catalog’s ready. No need to dive deep into code—just intuitive settings and drag-and-drop simplicity.
Can I integrate my WordPress product catalog with WooCommerce?
Oh, absolutely! Make your product tables in wpDataTables and use a shortcode to embed them in your WooCommerce store. You’ll get a fusion of inventory management with a slick, shoppable interface. It’s like a power couple, really.
How can I import product data into my WordPress catalog?
If you’ve got your product data in a CSV or Excel file, wpDataTables has you covered. Through the plugin’s panel, you map out your file columns to your table, hit import, and watch your products populate—smooth as silk.
Is it possible to make my WordPress product catalog responsive?
Yep, responsivity is key! With wpDataTables, it’s a given. Your sleek tables will adapt to any device, mobile to desktop. No squinting at tiny text or scrolling endlessly—just crisp, clear content, every time.
Can customers sort and filter products in the WordPress catalog?
For sure, that’s the cherry on top! wpDataTables gives you powerful sorting and filtering options. Customers can sift through your catalog with ease—by price, category, or any custom field you set up. It’s user experience gold.
What’s the best way to update my product catalog in WordPress?
Keepin’ it fresh is easy. With wpDataTables, you either edit directly in WordPress or re-import your updated CSV file. Your changes reflect immediately, so your catalog’s always up-to-date—no stale data here!
How can I display product images in the WordPress catalog table?
A picture speaks a thousand words, right? Embed your images straight into the wpDataTables cells. It’s like laying out a visual feast for your visitors—each image making your products irresistible.
Is it possible to style my WordPress product catalog to match my brand?
No doubt! Brand consistency is clutch. In wpDataTables, customize the heck out of your tables—fonts, colors, borders. Make that catalog scream “you” from every pixel.
Can I use wpDataTables for a large number of products?
You bet. wpDataTables chews through big data sets for breakfast. AJAX table loading and server-side processing keep things snappy. No matter the inventory size, your users get a sleek browsing experience.
How can I make individual products in my WordPress catalog link to product pages?
Create that seamless journey. Each product in your wpDataTables setup can hyperlink to its own star-studded product page. Click, and they’re there—it’s like teleporting them to exactly where they want to go.
Conclusion
You went through the how-tos, the clever tricks, and the nitty-gritty of creating that snazzy WordPress product catalog. With wpDataTables, you’re now equipped to turn a plain spreadsheet into an engaging, responsive table that shouts convenience and class.
You’ve seen the power of CSV imports, how to give your tables that custom flair that echoes your brand, and the joy of letting users sort and filter to their heart’s content. The game has changed; your product showcases aren’t just lists, they’re experiences.
Let’s not forget that bit about making your tables work magic on any device—responsive design is the name, and wpDataTables is the game. You’ve got a catalog that’s as flexible as it is functional.
From here on, it’s about keeping that catalog fresh, your inventory sparkling with updates, and your digital storefront inviting. All thanks to wpDataTables, your WordPress catalog is not just a list—it’s a gateway to your products.