Navigating the digital seas of WordPress can often feel like charting unknown waters, especially when it comes to organizing vast oceans of information.
That’s where a sturdy data table becomes your trusty compass. Fact is, in the web of information, nothing speaks louder than well-structured data, beautifully arranged for your audience to engage with at a glance.
This article isn’t just about pasting numbers into boxes; it’s your map to crafting responsive, interactive tables that blend seamlessly with your WordPress site’s aesthetics.
By the end you’ll master database content management without breaking a sweat, even customizing the look and feel like the seasoned web artisan you aim to be.
Step-by-step, we’ll dive into using visual table editors, tweaking data displays with sortable capabilities, and optimizing for all devices.
Forget about the tech-induced frown lines; you’ll be smiling at your sleek data table design, wondering why you didn’t set sail on this journey sooner.
Table of Contents
Why Use a Table Plugin?
With a WordPress plugin, a user can make, adjust, and dress up a table. Then they can insert the table into WordPress and use it in a variety of ways.
Making data tables with a plugin is much more practical. The result is more professional and of high quality.
Putting information in tabulated form makes it more understandable. People enjoy studying and looking at them.
The result is that they will spend more time on the website and are more likely to return. That is good for business!
Of course, this tutorial will make abundant use of wpDataTables. It is amazing to see how many different things this plugin can make and the professional results it gives.
It has tons of functionalities and features. It does so much more than make basic tables.
Importing large data sets is not easy. wpDataTables has a feature that makes it easy, which is available with the paid version.
It can export the created tables in a variety of formats into a post. It can make CSV or Excel formats, as well as ODF and MySQL queries.
A benefit of wpDataTables is that using it does not require experience or knowledge of HTML or CSS. There is a clear and practical settings page that controls everything.
When all settings are correct, it is only a matter of copying and pasting the shortcode.
How to Make a Data Tables with wpDataTables Plugin
This is how it works:
The Source File
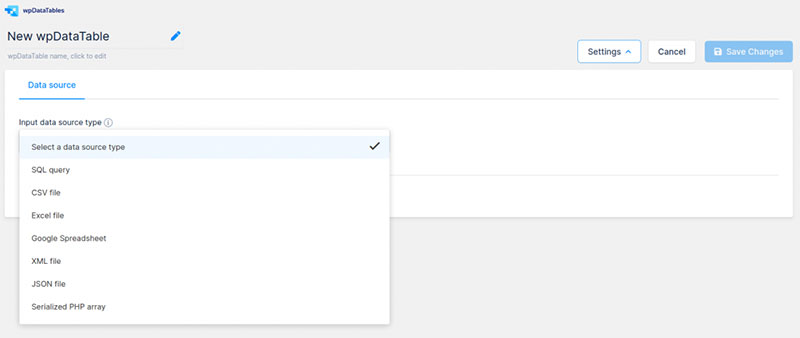
Make sure to have the source file ready. The Table Configuration page has a Data Source tab.
In this tab, users will find various settings. This is also where to define the data source.
This can be:
- MySQL query
- Excel
- CSV
- XML
- Google Spreadsheet
- URL
- Serialized PHP array
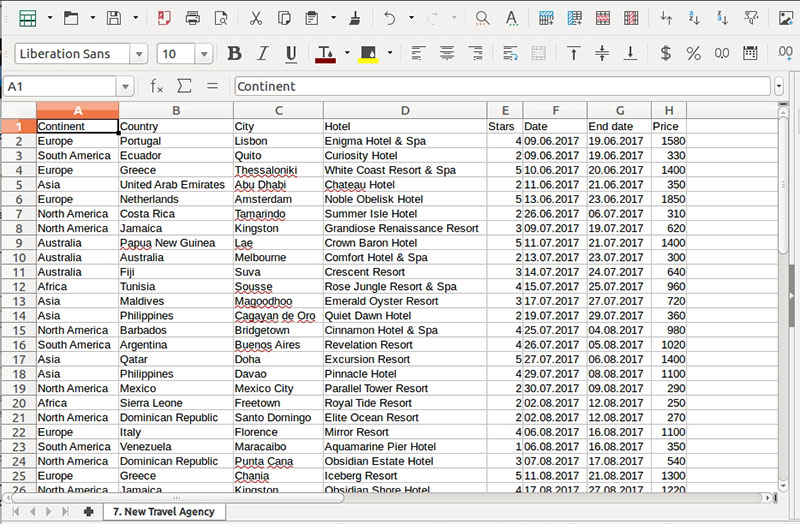
The example uses an Excel document that contains the data.
Make sure that all the data is correctly tabulated. If it is not properly arranged wpDataTables will struggle to read the table’s columns.
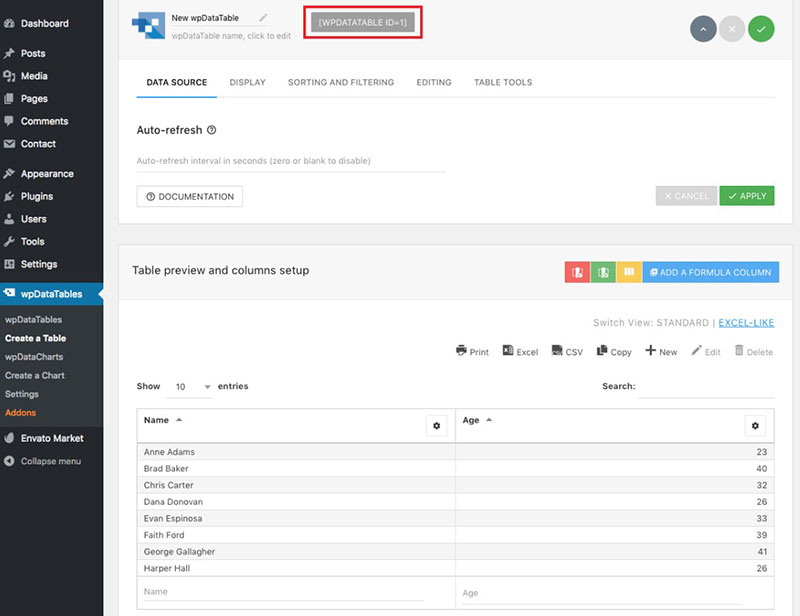
Create a New Table
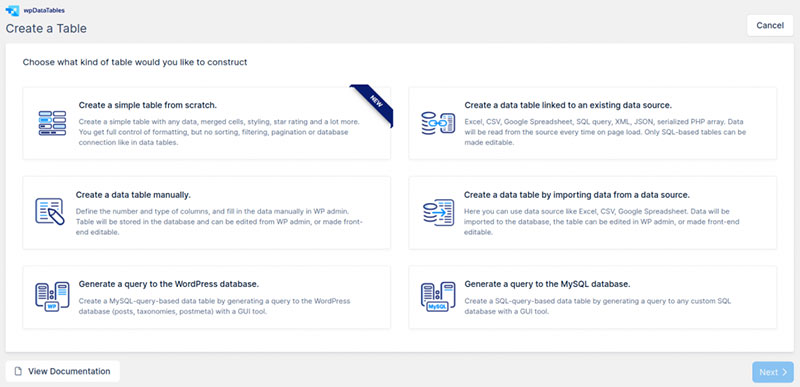
To create a new table go to the wpDataTables, which is on the left part of the WordPress dashboard. Clicking on it will bring up the screen shown above.
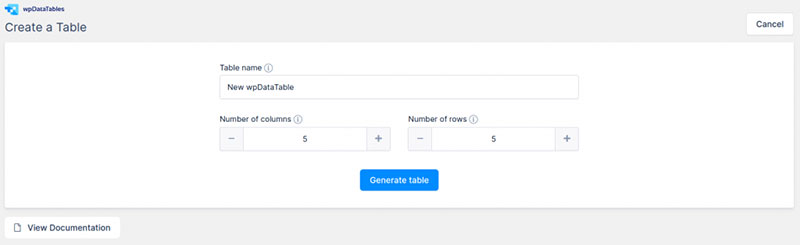
This is where to create or add a new table. Click the Add New button and a screen will appear that looks like the one above.
Now set the table’s correct parameter. The parameters define what the table looks like and how it behaves.
The next subheading discusses some of these features.
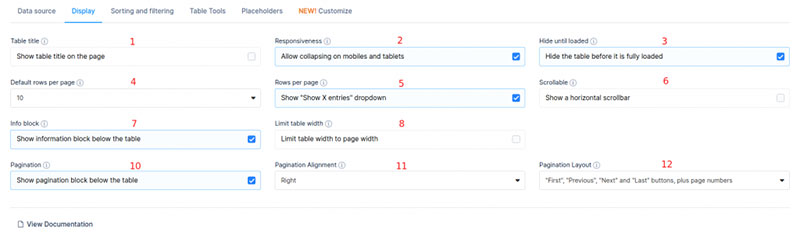
Define the table features
There are several sections on the Table Setup page. These are the ones that are in the first three sections:
- Default rows per page
- Hide until loaded
- Info block
- Limit table width
- Pagination
- Pagination Alignment
- Pagination Layout
- Responsiveness
- Rows per page
- Scrollable
- Show table title
- Word Wrap
All the parameters are customizable. The resulting data table can be as complicated as desired.
After setting these parameters, click the Upload File to select the source document.
After the three sections discussed above there are some more customization settings:
- Responsive. This setting displays the data table according to the device and screen size of the viewer.
- Scrollable. Allows for horizontal scrolling.
- Hide table until page is completely loaded. A practical setting for pages that load slowly.
- Advanced filtering. Adds a filter at the end of each column.
- Filter in form. Adds a filter in the form.
- Table tools. Allows for the embedding of additional functions. These include copying and saving to Excel or CSV.
- Enable sorting. Add a table sorting function.
- Limit table layout. Sets the table’s size to the size of the parent container.
- Display length. Defines the number of entries on a single page.
There is a Preview button that shows what the table will look like. Make more adjustments as needed.
Once all the parameters are correct and the form optimized, click the Save button.
However, after saving there are additional options. Use these to make the table even better.
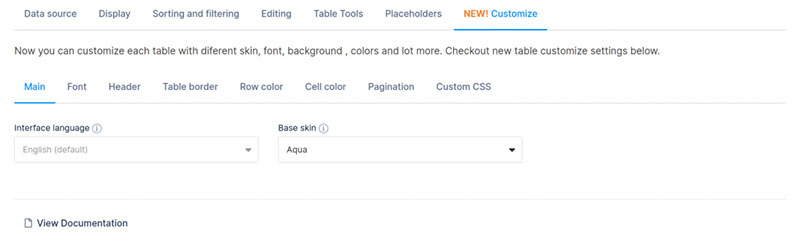
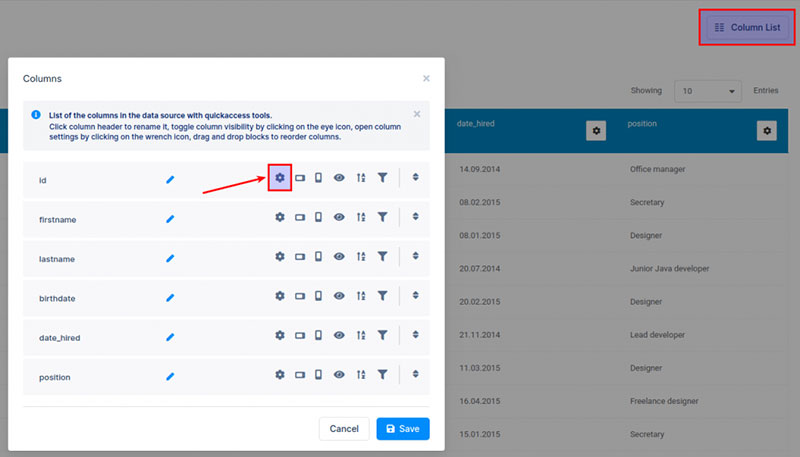
The plugin has some default settings that are automatically used. These settings include color and filter type.
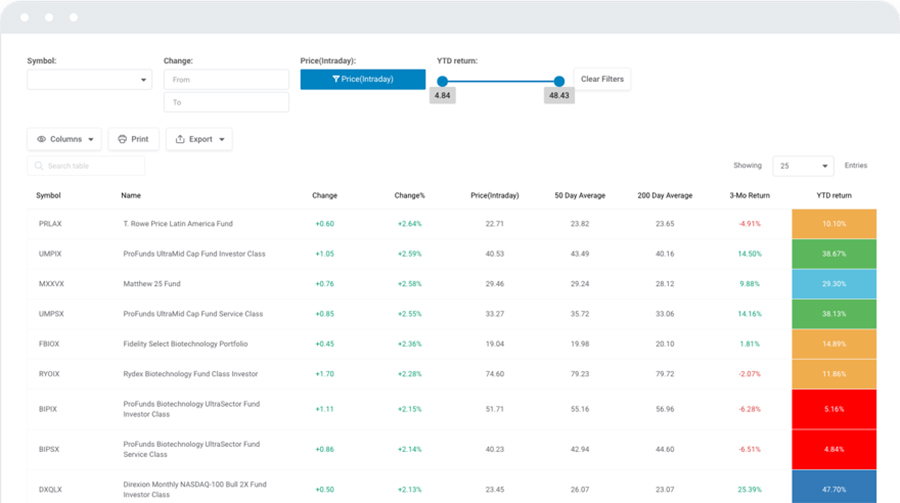
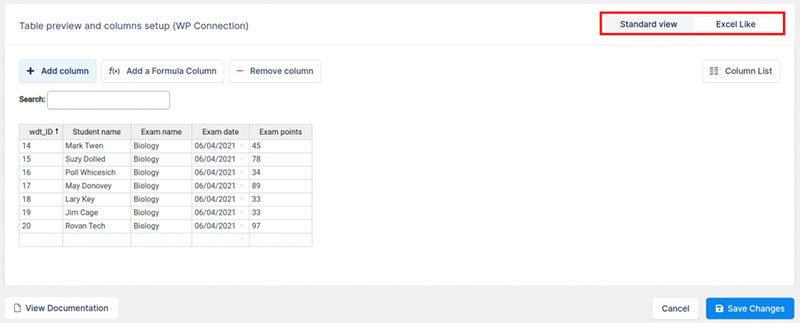
Sort data by parameters like date, time, and text. Below is an example of edited column types, colors, numbers, and strings.
Save and Copy Shortcode
Do not forget to save the table and click Close. The plugin will go straight back to the homepage.
If everything went ok, the recently created table appears, along with the title, type, and a duplication option.
It will also show the shortcode. Copy the code and go to the target page.
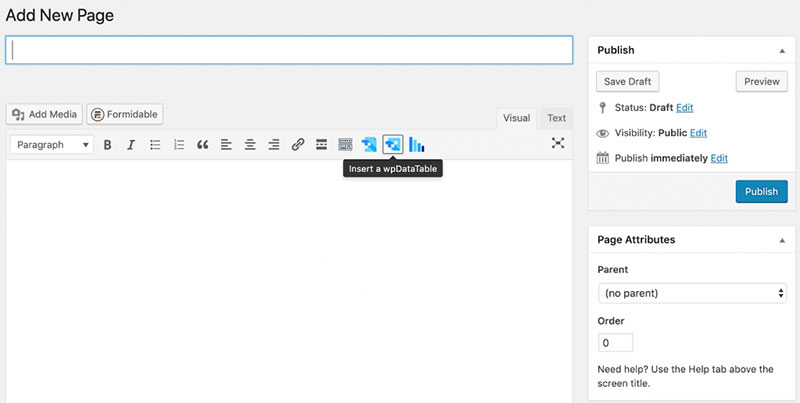
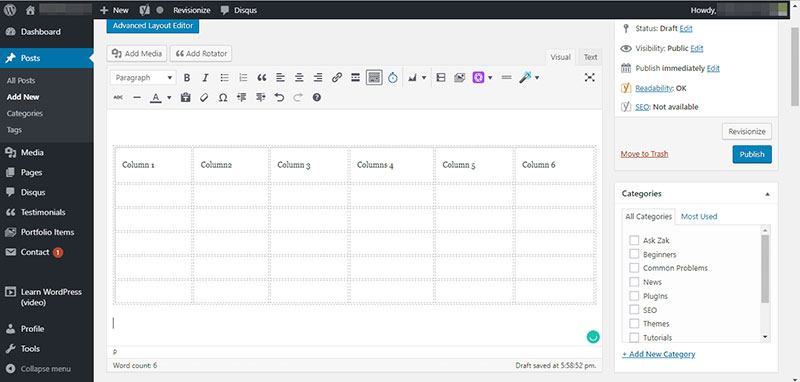
Add the Shortcode to a Page or Post
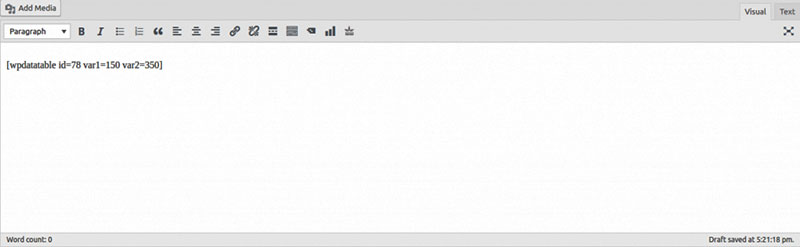
Adding the table to a page or post is now very easy. Select where it should go and paste the shortcode into the page’s editor.
Continue editing the page and optimizing the content.
Publish
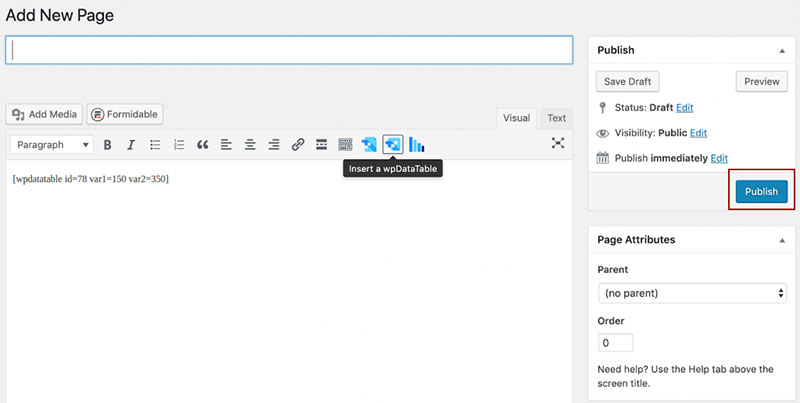
When finished, click the Publish button. The page and the table should look something like the example.
It will be perfect, consistent, and aligned. The data in the table is easy to read and understand.
Website visitors will have the option to export the data in a variety of formats. They can also filter the data on the website
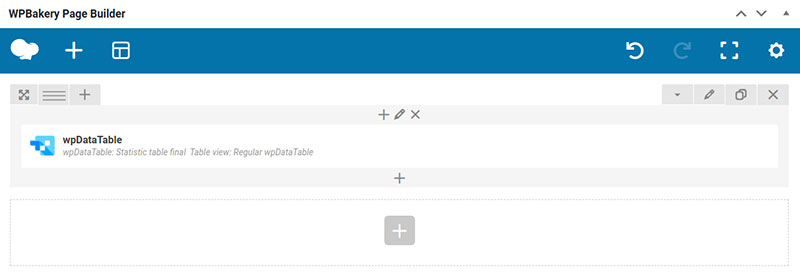
There is also an integration with wpBakery and Elementor. Any table created with wpDataTables is exportable to these page builders.
How to Create WordPress Tables without a Plugin
It is possible to make WordPress tables without the help of plugins. This article discusses three: using Google Sheets or Google Docs, Tables Generator, and Block Editor.
Using Google Docs or Sheets
This starts by creating a new Google Documents or Sheet. It doesn’t matter which one.
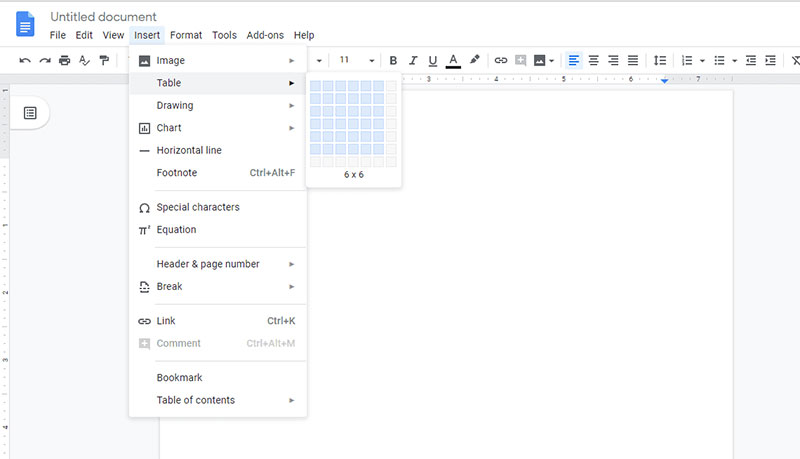
This guide assumes the use of Docs. After creating the document:
- Go to Insert
- Click Tables
- Select the number of rows and columns
- Press Enter
- Fill in the data
- Select the table
- Copy it
- Paste it into the WordPress editor
With that, the element is ready for publishing.
The downside of this method is that there are very few customization options. It does not have many choices for styling.
Also, the resulting tables are not very responsive. These types of data tables are usually very difficult to read on mobile devices.
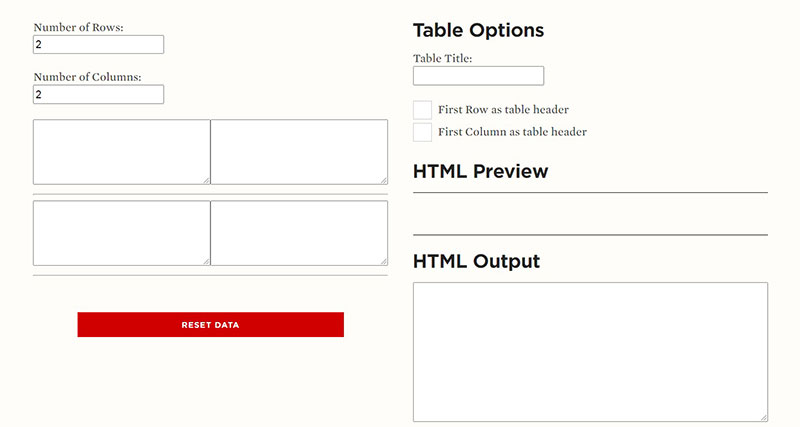
Using Table Generators
The basic coding behind WordPress tables is HTML-based. Added to that are CSS styles to make them look nice.
So making data tables without a plugin requires some coding and not everyone knows how to do that. For that reason, many depend on plugins and online table generators.
They create and make up a data table in one of these generators to make the HTML code for it. Then copy and paste the product into the WordPress website.
Some better online generators create responsive tables that work on different screen sizes. Some others also add styling but usually, the possibilities are limited.
Yet, they are very useful. Some good ones are Responsive Table Generator Tool and Rapid Tables.
Creating Tables in the WordPress Block Editor
To do this:
- Make a new post or page or continue editing an existing one.
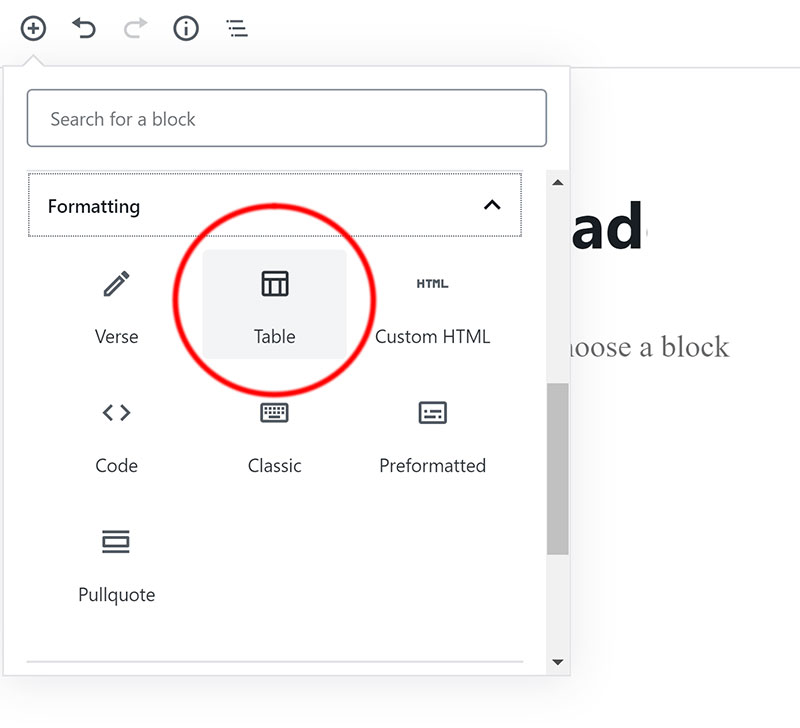
- In the editor, click on the +-sign to add a new block.
- Click Table under Formatting. Or search for it in the Search for a Block field.
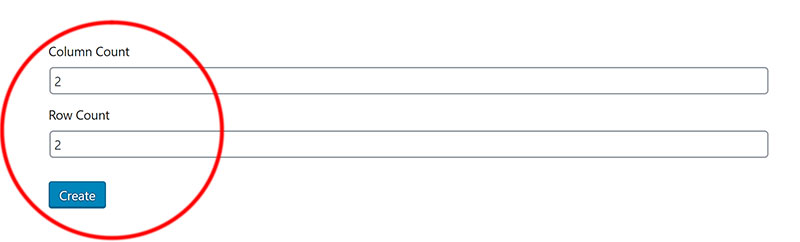
- Choose the number of columns and rows for the table. The default is 2×2.
- Enter the data into the cells. The cells automatically resize based on the content.
Or set the cell size to a specific size using the option on the right.

- Add a header and footer in the options section on the right. The example shows a table with a header and a grey background color.
Change the color under the Color Settings tab.
These three methods for creating data tables and using them in WordPress work well. But they also have many limitations.
For example, there are no advanced features. They do not produce responsive tables and they often cause technical issues.
FAQ on making a data table in WordPress
Can you create a data table in WordPress without a plugin?
Absolutely. WordPress has got your back with its inbuilt editor – think basic but functional. You can whip up a simple table using the Gutenberg blocks or even dive into the text editor if you fancy some HTML. But, if you’re aiming for more pizzazz, a plugin’s your go-to.
What’s the best plugin for creating data tables in WordPress?
Talk about choices! TablePress is the crowd favorite – it’s user-friendly, offers customization, and handles data like a pro. People swear by wpDataTables for its advanced features like responsive designs or Excel integration. Your call, try a few, stick with what clicks.
How can you import data from Excel or CSV into a WordPress table?
Most plugins got smooth moves for this. With a couple of clicks, you import CSV files straight into your data table builder and bam, your WordPress table’s now a data beacon. Keep an eye on formatting though, don’t let it slip through the cracks.
Is it possible to make responsive data tables for mobile users in WordPress?
Indeed. Today’s WordPress table plugins are savvy like that. They shimmy right into responsiveness, making sure your tables look sharp on any gadget. Forget scroll-fests or pinching and zooming; it’s smooth viewing on phones and tablets.
Can you add sorting and search functionalities to a WordPress table?
You bet. Sortable WordPress tables aren’t just some wizardry; they’re standard with top plugins. Searching, sorting, filtering – your audience gets the power to sift through data with ease. Makes for a dynamic experience, and keeps them coming back for more.
How do you customize the style of a WordPress table?
Flex those creative muscles because styling’s a breeze with CSS. If code’s not your jam, plugins offer custom table styling options. You’ll be tweaking colors, fonts, and borders, aligning your table’s vibe with your site – no sweat.
What if you need to update the data in your WordPress table regularly?
Fear not, for the edit function is here. With a visual table editor, you’re in control. Update, change, revolutionize – and your content stays fresh. Keep that data flowing; your audience appreciates the latest scoop.
Can WordPress tables handle large amounts of data without slowing down the site?
It’s all about the right tool for the job. Opt for plugins optimized for performance, and they’ll handle those heavy data sets like a champ. Your site stays zippy, and your users stay happy.
How do you ensure that the WordPress data tables are accessible to everyone?
Accessibility is key. Go for semantic HTML tags, caption your tables for context, stick to a clear layout. That’s how you make sure screen readers and all your users get the same stellar experience.
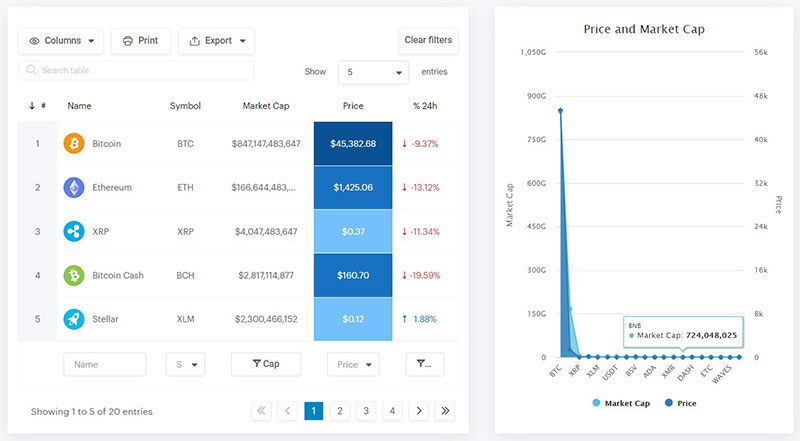
Are there ways to visualize data, like creating charts, from a table in WordPress?
Absolutely, we’re talking the full monty here – some plugins not only create tables but turn that data into charts in a snap. Lay back as those bars, pies, and lines paint the full picture for your audience. It’s data meets art.
Conclusion
Stepping back, it’s clear – mastering how to make a data table with WordPress is a game changer. It’s not just about the rows and columns; it’s about delivering a user experience that sticks. You’ve got the tools, the know-how, and let’s face it, that data isn’t going to organize itself.
From selecting the right table plugin to designing a table that screams “look-at-me” on any device, you’re setting the stage for information to be devoured. Interactive, responsive, and heck, even good-looking – it’s the trifecta of data table excellence.
Remember, consistency is king. Keep styles aligned, maintain data flow, and stay sharp on the updates. That way, your message never dulls, and your tables always shine. Now, get out there. Create, customize, and captivate with your tables. They’re not just a part of your site; they’re the heartbeats of engaging content.
If you liked this article about how to make a data table, you should check out this article about how to publish an Excel spreadsheet on the web.
There are also similar articles discussing examples of data tables, pricing table examples, statistical tables, and weather tables.
And let’s not forget about articles on comparison tables, product comparisons, table UI design, and WordPress Excel spreadsheet plugin.