Changing fonts in WordPress can completely transform the look and feel of your website. Imagine your site standing out with a unique, eye-catching typography that captures your brand’s essence. Whether you’re aiming to enhance readability or make a bold statement, mastering font customization in WordPress is essential.
In this guide, you’ll learn how to change fonts in WordPress, tapping into the vast array of Google Fonts, utilizing powerful plugins like Easy Google Fonts and Fonts Plugin, and diving into custom CSS tweaks.
With this knowledge, you’ll navigate through the WordPress dashboard, explore the Customizer, and use theme editors with confidence.
By the end, you’ll be equipped to seamlessly integrate custom fonts, adjust typography settings, and elevate your website’s visual appearance.
Ready to dive into the world of WordPress font customization? Let’s get started, ensuring your website not only looks professional but truly resonates with your audience.
Table of Contents
How to Change Fonts in WordPress Themes
Let’s look at the following scenario. You want different font combinations for your website, but something is stopping you to move forward.
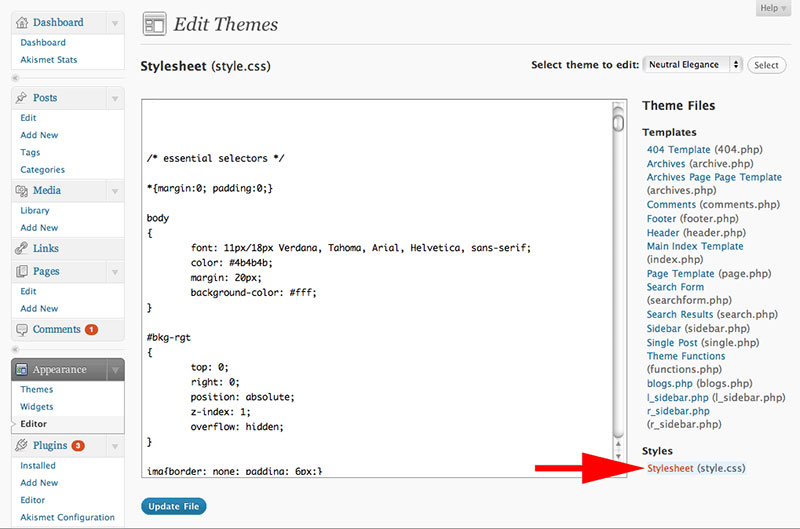
Changing fonts in themes can be challenging because they usually come with preset fonts that are used in various parts of the theme. You need to locate the CSS script that is setting the font for the specific area, whether it be the footer, header, body, or other parts.
Some pre-coding will be required if you want to use a completely new font. First, choose a licensed font for your website, and then upload it to the server. At the top of the style.css, you’ll also need to define the font family. Here’s an example of how the code might look:
@font-face {font-family: Museo300; src: local(‘Museo300-Regular’), url(“fonts/Museo300-Regular.ttf”) format(‘truetype’); font-weight: normal;}
How to Change Fonts in WordPress Globally with the Customization Feature
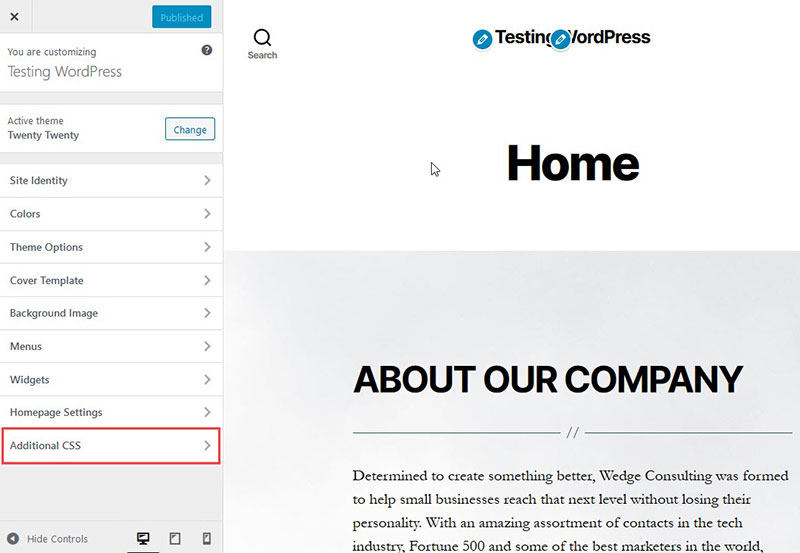
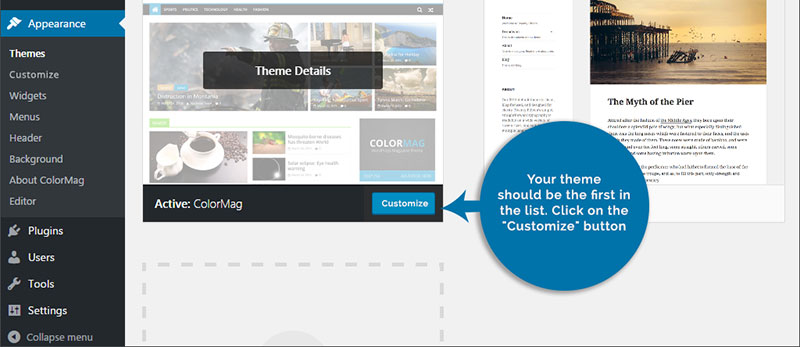
Changing fonts with the customization feature is straightforward. First, log into your WordPress profile and access the dashboard click on Appearance, and then Customize.
Another way to access this area is by logging into your WordPress dashboard, click on the site name at the top left, then click on the Customize button.
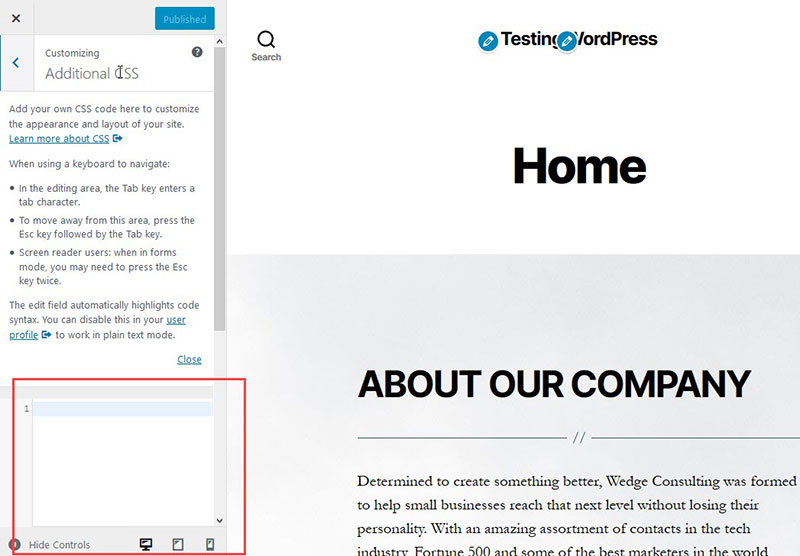
Then, scroll down to the left-hand side and locate the field where you can add additional CSS code. Click on it to add the code. Here’s an example of the code:
* {font-family:”Courier New”, Courier, monospace}Copy
When you add the * at the start, it will add the font to the whole site. When you paste the code, it’ll instantly change. When you are ready to make the changes, click on the Publish button.
How to Change Fonts in WordPress in Specific Areas of the Theme
Themes come with preset fonts in various areas, and you’ll require different fonts for different areas on your site, which adds customizability. Identifying themes in different areas is challenging.
You’ll find a font for the body that’s separate from the rest, which can be used to determine the fonts not defined by a tag, class, or div.
body {font-family: Verdana, Arial, Helvetica, Futura, sans-serif; font-size: 1em; padding:0; margin:0; }
You’ll probably find the fonts in the various CSS classes: content, post, entry, and post-entry.
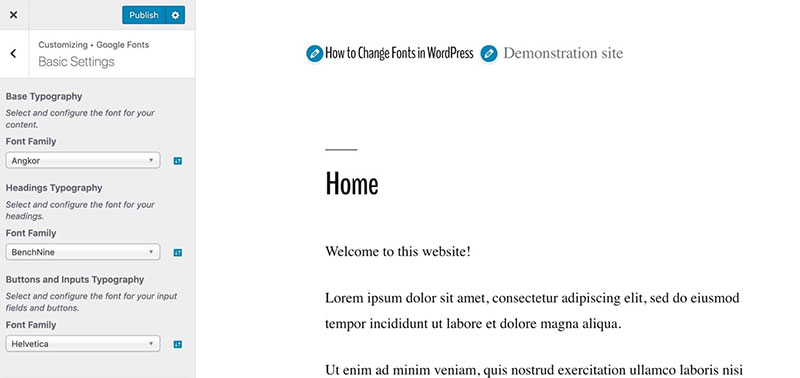
Add Custom Fonts
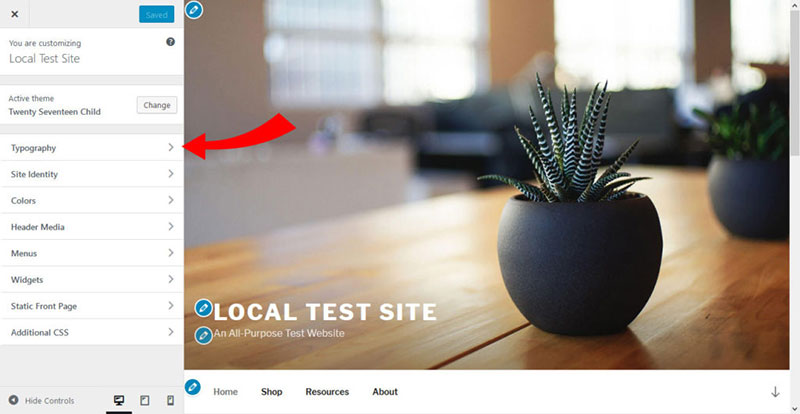
Adding custom fonts is one of the best ways to change headers and the base font. Go to Design > Customize > Fonts.
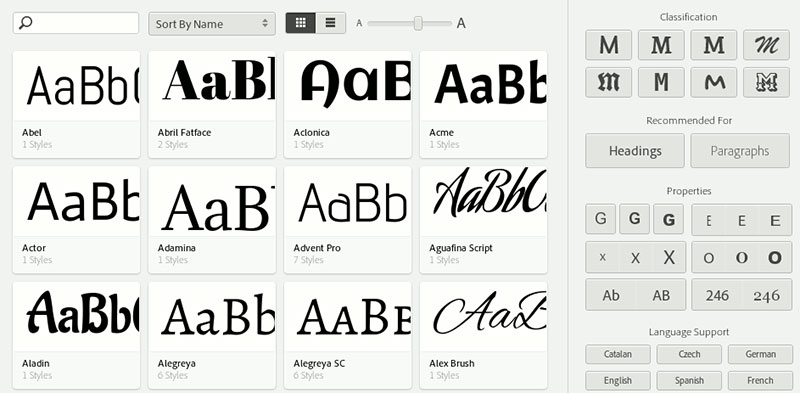
Changing to a custom font is easy. There are many great fonts found on Google Fonts, Typekit, and lastly with WordPress premium subscription or higher.
How to do it:
- Go to Design>
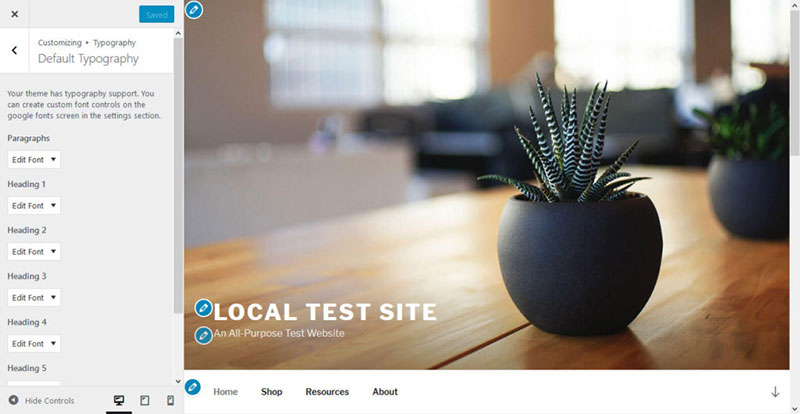
- Click on Fonts in the Customize section. Then, click on the drop-down menu to see the options available under the Headings option.
- If the fonts here are not visible, then the theme probably doesn’t offer the option to change fonts to custom fonts. In that case, find another theme that does offer this option.
- Fonts will often come in pairs, one for headings, and one for the body. For headings, it’s essential to choose a font that is appealing for the titles, widget titles, comment headers, and other areas of the The base font will be the font for the body text so make it as legible as possible.

- You’ll see a live preview before you can choose a font.
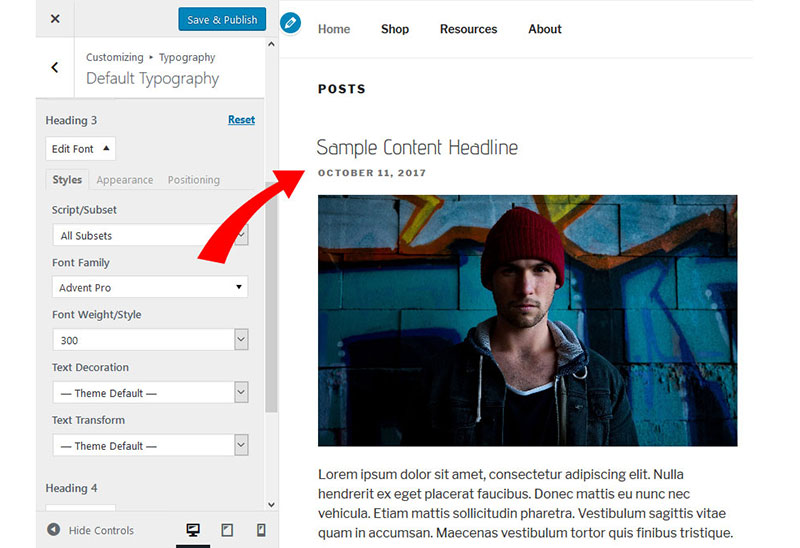
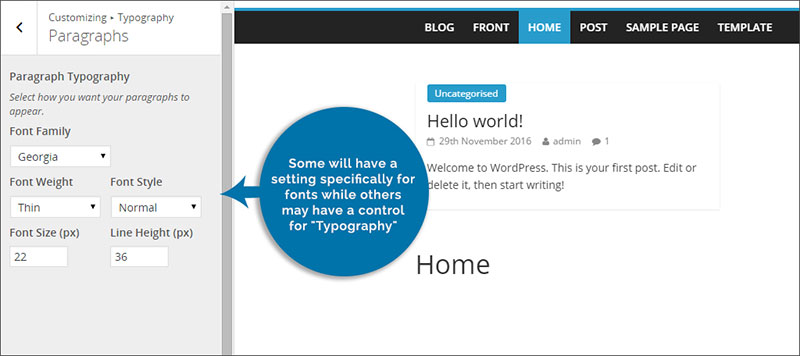
How to Adjust Font Size and Style
To adjust the Font Style, click on the option left of the font. You’ll have different styles available, depending on the font chosen.
To adjust the Font Size, go to the size option below, and adjust the font size. Make it appropriate for headings, or, for the body, which is simple to do from the drop-down menu.
WordPress premium subscription or higher, allows changes to the font size in the CSS code.
How to Save Fonts
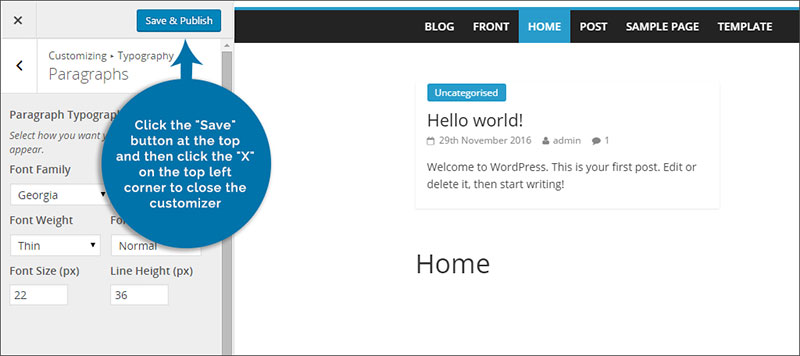
When you’ve finished the customization options, the font is saved in two ways: by clicking on Publish your site, or on Save draft.
After saving, wait for a couple of minutes for the fonts to show up on the blog. If they don’t show up, try to clear your browser’s cache to make sure it’s the latest version of the site.
How to Change Fonts
Here’s how to change fonts in WordPress once you’ve created a custom font.
Change custom fonts by going to Design, and then to Customize. Then, go to Fonts, select a different Header or Base Font. You can also switch back to the default font by clicking on the X, which is located right of the custom font name.
To complete the font changes, click on Publish or Save Draft.
Again, it could take a few minutes for the fonts to show up, and clearing the browser’s cache is essential.
Resetting Fonts
To reset fonts simply press on the X next to the current font you use.
How to Enqueue Fonts
To correctly add the fonts for WordPress, you’ll need to alter various files; most importantly, the functions.php file, or the function_wp file; enqueuer_script and wp_enqueue_style.
With code snippets, simply change the font without entering the code into the files. Just add them to the header via a function.
Wp_enqueue_script and wp_enqueue_style are similar files, so it’s better to change the style file, depending on what your font provider offers.
Google Fonts will give fonts as style sheets, so add them like this:
function add_google_fonts() {
wp_enqueue_style( ‘google_web_fonts’, ‘https://fonts.googleapis.com/css?family=Open+Sans|Roboto’ );
}
add_action( 'wp_enqueue_scripts', 'add_google_fonts' );
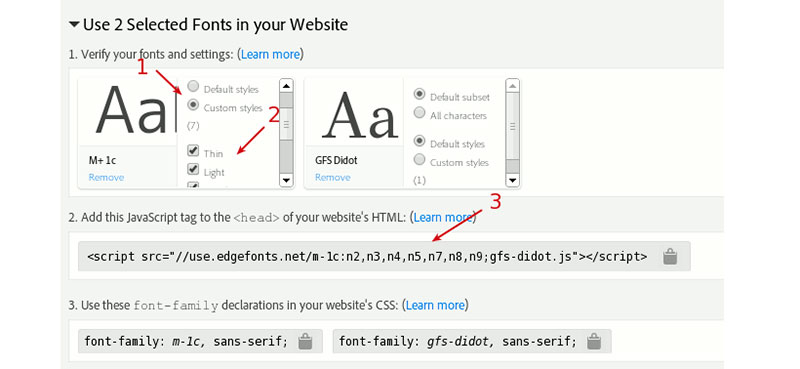
Other fonts, like the Adobe Edge Web Fonts will come in the form of Javascript files. The code would look like this:
function add_adobe_fonts() {
wp_enqueue_script( ‘adobe_edge_web_fonts’, ‘//use.edgefonts.net/open-sans.js’ );
}
add_action( 'wp_enqueue_scripts', 'add_adobe_fonts' );
Once you know where to make the font changes, this function becomes simple.
How to Change the Font Size
Adjusting the font size is fundamental, simply by adjusting the heading sizes. While using a visual editor, all the options are found under the tab called “Paragraph”.
Usually, the font sizes are controlled by the style.css file, which will enable access to the font sizes.
Using the right headings in articles is essential for creating a satisfactory user experience as well as making it more SEO friendly.
FAQs about changing fonts in WordPress
How do I change fonts in WordPress?
To change fonts in WordPress, navigate to the WordPress dashboard, head to Appearance > Customize, and look for the Typography section. You can also use plugins like Easy Google Fonts or Fonts Plugin to add custom fonts. Customize via theme editor for advanced options.
Can I use Google Fonts in WordPress?
Yes, you can use Google Fonts in WordPress. Install the Easy Google Fonts plugin or add the font via the Theme Customizer. You can also add custom CSS to the style sheet if you prefer manual integration.
How do I add custom fonts to my WordPress site?
To add custom fonts, upload the font files to your site via FTP. Then, use custom CSS to reference these fonts. Alternatively, use plugins like Fonts Plugin or the Customizer to add and manage these fonts easily.
What are the best plugins for changing fonts in WordPress?
Some of the best plugins for changing fonts include Easy Google Fonts, Fonts Plugin, and Use Any Font. These plugins offer a user-friendly interface for integrating and customizing fonts directly from your WordPress dashboard.
How can I change the font size in WordPress?
To change the font size, go to Appearance > Customize > Typography. Adjust the font size settings for different elements like headers and paragraphs. Alternatively, use custom CSS in the theme editor to specify precise font sizes for specific elements.
Is it possible to change fonts without a plugin?
Yes, it’s possible to change fonts without a plugin by using custom CSS. Access your theme editor, find the style sheet (style.css), and add the necessary font rules. This method requires some knowledge of CSS.
How do I use Adobe Fonts in WordPress?
To use Adobe Fonts, sign in to your Adobe account and create a web project. Add the provided embed code to your theme header. Then, use custom CSS to apply these fonts to your website’s elements.
Why aren’t my font changes appearing in WordPress?
If font changes aren’t appearing, clear your browser cache and any caching plugins. Ensure you’ve saved and published changes in the Customizer. Check your CSS for any conflicts or errors that might be overriding your settings.
Can I change the font for specific parts of my WordPress site?
Yes, you can change the font for specific parts using custom CSS. Target the specific elements (like headers or paragraphs) and apply different font rules. Use the theme editor to add these custom styles.
How do I change fonts in WordPress themes like Divi or Astra?
For themes like Divi or Astra, use the built-in theme customizer or page builder settings. These themes offer extensive typography options, allowing you to change fonts, sizes, and styles directly through their interfaces.
Conclusion
Changing fonts in WordPress might seem like a daunting task, but it’s simpler than it appears. By mastering how to change fonts in WordPress, you unlock the potential to transform your website’s look and feel, making it unique and engaging.
Leveraging tools like the WordPress Customizer, Google Fonts, and powerful plugins such as Easy Google Fonts and Fonts Plugin, you can seamlessly integrate custom fonts into your site. The Customizer offers a straightforward way to tweak your theme typography, while plugins provide a robust solution for more intricate font customization without needing to delve into custom CSS.
If manual customization is your style, utilizing the theme editor and editing the style sheet can give you precise control over your site’s typography. Whether you’re incorporating Adobe Fonts or tweaking font sizes, these methods ensure your site’s text is visually appealing and perfectly aligned with your brand’s identity.
If you enjoyed reading this article on how to change fonts in WordPress, you should check out this one about how to download the WordPress media library.
We also wrote about a few related subjects like how to find the page ID in WordPress, how to embed a WordPress iframe, how to eliminate render-blocking JavaScript and CSS in above-the-fold content, how to stop a DDoS attack and how to hide page title in WordPress.