The transition from HTML to WordPress isn’t just a migration; it’s a transformation that brings your static website into the dynamic world of WordPress CMS. Imagine your site not only looking great but also being easier to manage and customize. This is where the magic of HTML to WordPress conversion shines.
As someone deeply entrenched in web design, I’ve seen the incredible benefits of moving from static HTML to WordPress.
It’s not just about better aesthetics but improved functionality, easier content updates, and powerful integrations. WordPress offers a robust Content Management System that simplifies your workflow.
In this article, you’ll discover how to convert HTML to WordPress step by step.
From setting up your WordPress installation to integrating custom WordPress themes and ensuring everything is pixel-perfect. By the end, you’ll master converting a static HTML website to WordPress, enhancing both your website’s performance and user experience.
Table of Contents
How To Convert HTML To WordPress: Quick Workflow
Here are the key steps to convert an HTML website to WordPress:
Manual conversion (requires coding skills)
- Install WordPress on your server and create a new theme folder in the
wp-content/themesdirectory. - Create the required PHP files for your theme, including index.php, header.php, footer.php, style.css, archive.php, and functions.php.
- Copy the HTML code into the appropriate PHP files. For example, put the main content in index.php, the header in header.php, etc.
- Customize the PHP files to integrate WordPress functionality like the loop, sidebars, menus, etc.
- Style the theme by linking the CSS file and making any necessary CSS changes.
Other options
- Install a pre-made WordPress theme and manually migrate your HTML content into it.
- Use a child theme adapted from an existing WordPress theme as a starting point.
- Hire a WordPress conversion service to recreate your site for you.
Why Should You Convert HTML to WordPress?
The reasons why a person should convert HTML to WordPress are quite diverse. Here is a selection of the most important ones:
- Converting to WordPress gives you full control over each detail of your website. Whenever you don’t like a part of your site, you can easily tweak it to your liking.
- WordPress sites are much easier to access, manage, and maintain compared to static HTML sites. This is a very important reason to do an HTML to WordPress migration.
- By converting your HTML template style to WordPress, you will end up with a unique theme that no other person using the CMS will own.
- WordPress helps with Search Engine Optimization and will ensure you get your website discovered by more people.
- As a website developer, your work will be reduced in half because WordPress will handle most of the activities that were unnecessarily time-consuming before.
Moving from Static HTML to WordPress: The Methods
Now that you have all the reasons to convert HTML to WordPress, you can proceed to learn how to do it.
There are two methods you can choose from: the manual method, which involves doing everything all by yourself, from scratch; and the child-theme method, which involves using a basic WordPress theme and tweaking it according to your needs.
Choosing a method depends on your experience with coding, how much time you want to invest in this task, as well as on your own preferences. Each of these methods will be presented in the sections below, where you will learn how to convert HTML to WordPress.
The Manual Method
1. Create a new theme folder
Create a new folder on your desktop where your theme files will be stored. Name this folder anything you like (it will represent the theme’s name). Create these files in your preferred code editor and leave them open:
- style.css
- index.php
- header.php
- sidebar.php
- footer.php
2. Copy the existing CSS code to your new stylesheet
Once you’ve created the files, you can move on to copying your CSS code. Those who want to duplicate their sites and relocate them to WordPress will have to export and import the CSS code of their previous site. CSS is responsible for how the site looks, so edit the style.css file by adding the following lines of code to it:
/*
Theme Name: Replace with your Theme's name.
Theme URI: Your Theme's URI
Description: A brief description.
Version: 1.0
Author: You
Author URI: Your website address.
*/
Replace the required information with your own, add the remaining CSS lines and you’re set. Don’t forget to save the file. You are now free to close style.css.
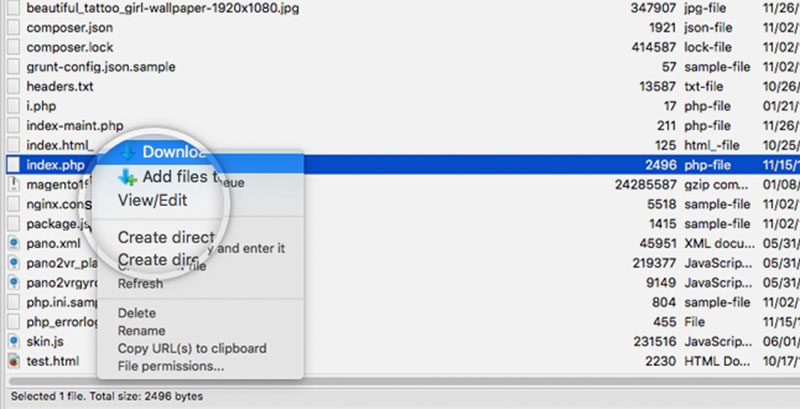
3. Get your current HTML code
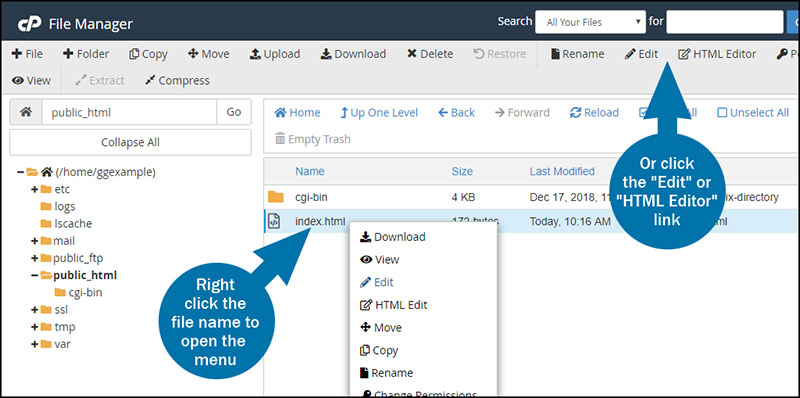
Go to your site’s index.html file and highlight all the content from the beginning of the document to the div class=”main” tag. This section needs to be pasted into the header.php file you created in step 1.
Go back to the index.html file and highlight everything inside the class=”sidebar” element. Copy the content and paste it in the sidebar.php file you created. Do the same for the footer one, with all the content after the sidebar element.
For the index.php file, select all the content that is left after highlighting and paste it in the new file, save, and leave it open for the next step.
4. Edit the index.php file
To finalize your index.php file, copy these lines of code and paste them at the top of the document:
<?php get_header(); ?>
Then, at the very bottom of your index.php file, place these lines of PHP.
<?php get_sidebar(); ?>
<?php get_footer(); ?>
The file is not finished yet because you need to create a post loop, which represents some PHP code that WordPress needs in order to display your website’s blog posts or articles correctly. Add the following code lines within the file’s content section:
<?php if ( have_posts() ) : ?>
<?php while ( have_posts() ) : the_post(); ?>
  <div id="post-<?php the_ID(); ?>" <?php post_class(); ?>>
    <div class="post-header">
       <div class="date"><?php the_time( 'M j y' ); ?></div>
       <h2><a href="<?php the_permalink(); ?>" rel="bookmark" title="Permanent Link to <?php the_title_attribute(); ?>"><?php the_title(); ?></a></h2>
       <div class="author"><?php the_author(); ?></div>
    </div><!--end post header-->
    <div class="entry clear">
       <?php if ( function_exists( 'add_theme_support' ) ) the_post_thumbnail(); ?>
       <?php the_content(); ?>
       <?php edit_post_link(); ?>
       <?php wp_link_pages(); ?></div>
    <!--end entry-->
    <div class="post-footer">
       <div class="comments"><?php comments_popup_link( 'Leave a Comment', '1 Comment', '% Comments' ); ?></div>
    </div><!--end post footer-->
    </div><!--end post-->
<?php endwhile; /* rewind or continue if all posts have been fetched */ ?>
    <div class="navigation index">
       <div class="alignleft"><?php next_posts_link( 'Older Entries' ); ?></div>
       <div class="alignright"><?php previous_posts_link( 'Newer Entries' ); ?></div>
    </div><!--end navigation-->
<?php else : ?>
<?php endif; ?>
Once done, save the file, close it, and move on to the next step.
5. Upload your new theme
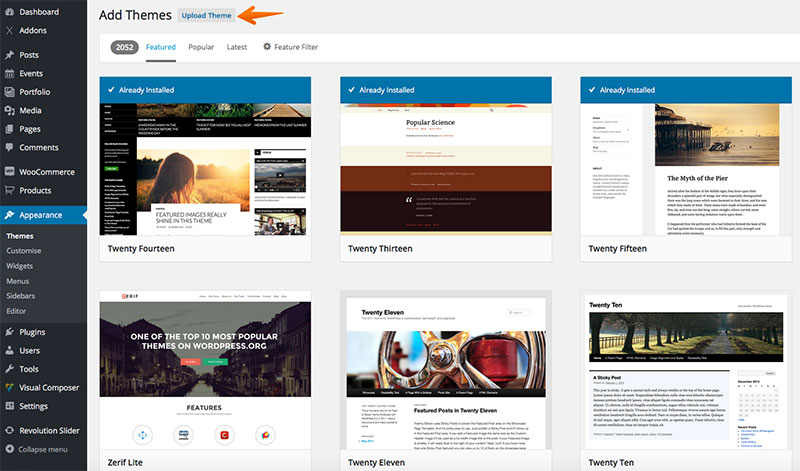
Once your theme folder is ready, you need to upload it to your site and complete the HTML to WordPress conversion. To do that, navigate to the folder where you installed WordPress and place the folder you’ve just created in /wp-content/themes/.
Go to your WP Admin page, Appearance and then Themes to see whether the theme name shows up in the list or not. If it does, you’ve done everything correctly and you can activate it. If it doesn’t, carefully read all the steps on how to convert HTML to WordPress again.
There’s also this useful video guide by Traversy Media that you should check out:
Using a WordPress Child Theme
If the steps mentioned in the previous step seem too complicated for your level, this is a method that requires less knowledge in the field of coding. It is easier to manage and will take less time as well.
To convert HTML to WordPress faster, you can use a child theme from an existing theme. Child themes are named this way because they are built on a second theme, which is the parent one.
1. Pick the theme
First of all, choose a theme that is suitable for your HTML design. Look for a child theme that is similar to your existing website. Look for the structure it has, so you won’t have to dig into coding too much.
You should opt for a starter theme because they rely on very basic lines of code.
2. Create a new theme folder
Just as in the previous case, you’ll have to create a new theme folder. The only difference is that you’ll name the folder the same way as the parent theme on which your child theme is based and add the suffix “-child” to it.
For instance, if your theme is called Twenty Nine, you will call the folder “twentynine-child”. Make sure that you add no spaces within the name.
3. Set up a new stylesheet
Next, create the style.css file inside the folder and add these lines of code:
/*
Theme Name: Twenty Nineteen Child
Theme URI: http://example.com/twenty-nineteen-child/
Description: Twenty Nineteen Child Theme
Author: John Doe
Author URI: http://example.com
Template: twentynineteen
Version: 1.0.0
License: GNU General Public License v2 or later
License URI: http://www.gnu.org/licenses/gpl-2.0.html
Tags: light, dark, two-columns, right-sidebar, responsive-layout, accessibility-ready
Text Domain: twenty-nineteen-child
*/
Keep in mind that this is an example. You will have to replace the information with your own. Save the file after finishing.
4. Create the functions.php file
Once you have the style.css file, you can activate the theme as it is. However, to make the website look and work better, you will have to use the parent theme’s functions and styles. For this, you need to create the functions.php file.
Use these lines of code and save the file:
/*
Theme Name: Twenty Nineteen Child
Theme URI: http://example.com/twenty-nineteen-child/
Description: Twenty Nineteen Child Theme
Author: John Doe
Author URI: http://example.com
Template: twentynineteen
Version: 1.0.0
License: GNU General Public License v2 or later
License URI: http://www.gnu.org/licenses/gpl-2.0.html
Tags: light, dark, two-columns, right-sidebar, responsive-layout, accessibility-ready
Text Domain: twenty-nineteen-child
*/
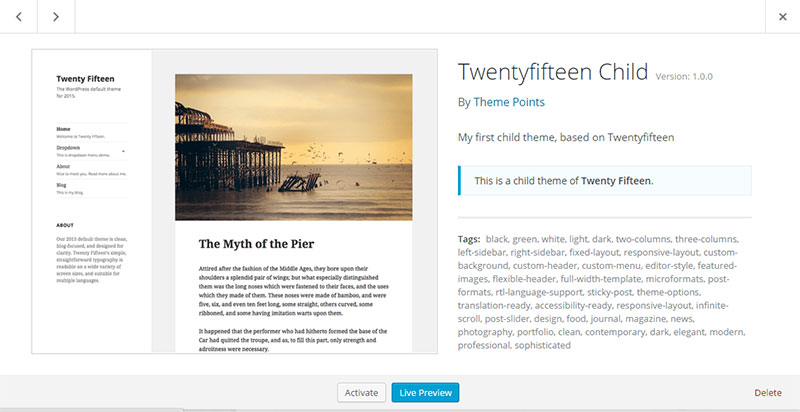
5. Activate the child theme
Finally, you need to activate the theme. Zip up the folder and add it to WordPress by navigating to the Appearance menu, Themes and then click “Add New”. Upload the zipped file there. Another option would be to drag the folder in wp-content/themes.
FAQs about converting HTML to WordPress
What tools are needed to convert HTML to WordPress?
To convert HTML to WordPress, you’ll need a text editor (like Sublime Text or VS Code), WordPress installed on a server, FTP access, and a basic understanding of PHP, CSS, and JavaScript. Tools like Elementor or Divi Builder can simplify the process.
How do I prepare my HTML files for conversion?
First, organize your HTML, CSS, and JavaScript files. Ensure your code is clean and follows best practices. Separate reusable components. This step sets the foundation for integrating them into the WordPress theme structure efficiently.
What is the first step in converting HTML to WordPress?
Start by setting up a local or live WordPress installation. Then, create a new theme folder in the wp-content/themes directory. This folder will house your custom WordPress theme files, including your HTML code.
How do I integrate HTML into a WordPress theme?
Break down your HTML into WordPress template files like header.php, footer.php, and index.php. Use PHP functions to replace static content with dynamic WordPress content. This ensures your site is fully functional within the WordPress CMS.
How do I convert static HTML content to dynamic WordPress content?
Replace static content with WordPress template tags and functions. For example, use <?php the_content(); ?> to display page content. This change enables dynamic content management, making updates easier via the WordPress dashboard.
How do I handle CSS and JavaScript during the conversion?
Enqueue your CSS and JavaScript files using functions.php. This method adheres to WordPress best practices, ensuring your styles and scripts are properly loaded and conflict-free within the WordPress theme framework.
What are common issues faced during HTML to WordPress conversion?
Typical issues include broken CSS, incorrect PHP tags, and missing template files. To resolve these, ensure your file paths are correct, use WordPress Codex for guidance, and test each part of your site thoroughly during development.
How do I add additional functionality to my WordPress site?
Enhance your site with WordPress plugins. Whether you need SEO tools, contact forms, or social media integration, plugins from the WordPress plugins repository can add robust features to your converted site.
Can I convert HTML to WordPress without coding skills?
Yes, tools like Elementor and WPBakery allow you to visually build pages without extensive coding. However, a basic understanding of HTML and WordPress can be incredibly helpful for troubleshooting and customizations.
How do I ensure my converted WordPress site is SEO-friendly?
Use plugins like Yoast SEO, structure your content with semantic keywords, and ensure your site is fast and mobile-friendly. Proper use of meta tags and structured data will also help your site rank better in search engine results.
Conclusion
Transforming a static site involves understanding how to convert HTML to WordPress, a process that opens the door to dynamic content management and enhanced functionality. This guide walked you through the essential steps, from setting up a WordPress installation to integrating custom WordPress themes.
By breaking down HTML into WordPress template files, using PHP for dynamic content, and enqueuing your CSS and JavaScript correctly, you’ve learned to merge the best of static and dynamic web worlds.
Tools like Elementor and WPBakery can simplify this journey, but having a solid grasp of HTML, CSS, and WordPress basics makes the process smoother.
Embracing the power of WordPress CMS ensures your site is not only visually appealing but also user-friendly and easy to manage. With plugins from the WordPress plugins repository and a solid understanding of WordPress theme frameworks, your site is poised for better performance and scalability.
Remember, every HTML to WordPress conversion is a step towards a more robust and flexible web presence, offering an improved user experience and easier content updates.
If you enjoyed reading this article on convert HTML to WordPress, you should check out this one about WordPress developer salary.
We also wrote about a few related subjects like best code editor, WordPress training, JavaScript libraries, and Brackets extensions.