Whether you’re a seasoned developer or a novice blogger, the idea of your website experiencing downtime during a theme change can be terrifying.
The importance of maintaining your site’s user experience and performance cannot be overstated. That’s why learning how to change a WordPress theme without going live is crucial.
By following the steps outlined in this guide, you’ll discover the secrets to using a staging site for WordPress, ensuring safe theme customization, and leveraging theme switching plugins to test your changes. You’ll learn to navigate the WordPress dashboard, manage theme previews, and execute a seamless transition.
Expect to delve into the setup of a staging environment, the intricacies of WordPress theme management, and the tools required to prevent any downtime.
By the end of this article, you’ll be equipped to update your WordPress theme confidently, keeping your site secure and live.
Table of Contents
Important Steps Before Changing WordPress Themes
It won’t take long to change your WordPress theme as the steps are quite easy. However it is important to make sure your WordPress site doesn’t lose any data and still runs smoothly.
For those reasons, it is best to take the following precautions:
Decide on the New WordPress Theme
There is a wide variety of WordPress themes available online. Some are simple, while some come with lots of enhancing elements such as author boxes.
This can make choosing a new theme overwhelming and challenging.
To decide which WordPress theme to use, create a small selection of WordPress themes that would work best for your site. Choose from the selection and customize it after installation.
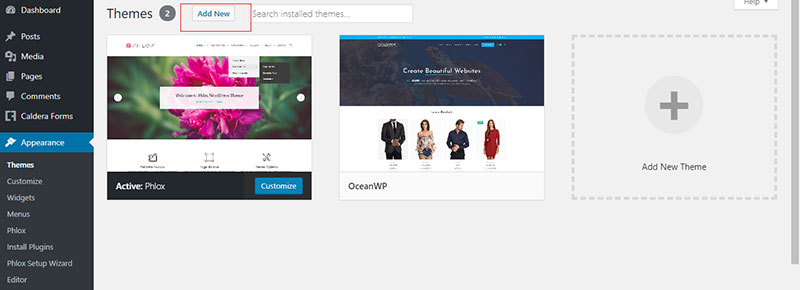
WordPress has its own directory of themes. Users can also look for the newest ones by going to ‘Administration’ then ‘Appearance’.
Select ‘Themes’ and click the ‘Add New’ option.
Copy Code Snippets from the Current Theme
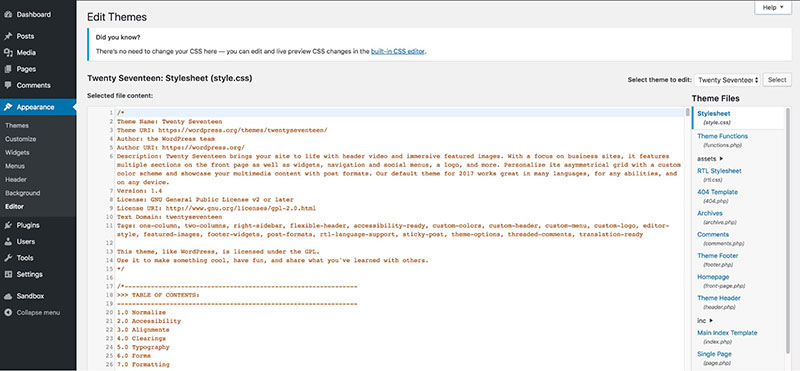
When switching to a new WordPress theme, there’s no need to re-type source codes. WordPress offers different snippets options.
Copy the code snippets of the current theme and put them in Notepad. Then insert the snippets in the functions.php file or use a plugin.
Check Page Load Time
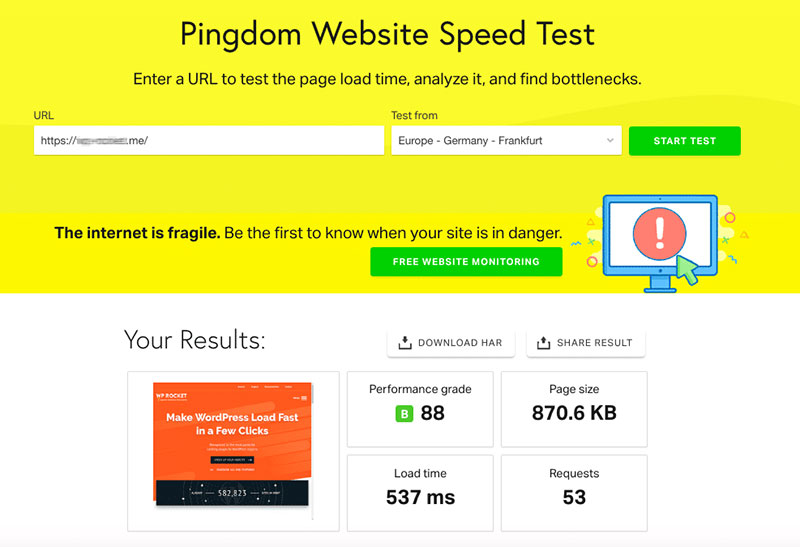
One of the best ways to optimize a WordPress site is to reduce the loading time. The faster a website loads, the better.
Thus, test the current load time of your website before changing the WordPress theme. Then compare the page load time in the new theme.
Save Your Analytics Tracking Code

A common problem when changing to a new theme is losing the analytics tracking code.
WordPress doesn’t have built-in analytics. So users need to install Google Analytics onto their WordPress site.
To customize the WordPress theme, users can add code snippets for Google Analytics, Adsense, Sitemap, and Google Search Console.
Do this by copying your analytics tracking code. Next, insert it in the functions.php file, or use plugins.
Have a Full Backup of the Website
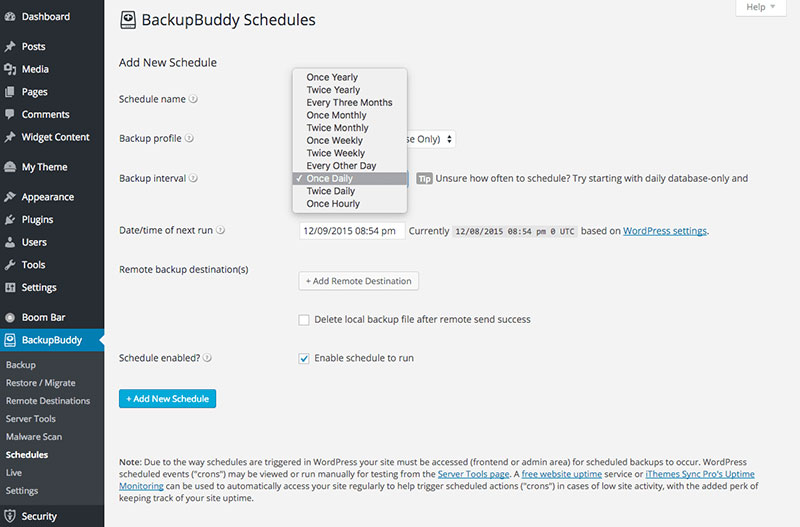
The most recommended step before making any changes to a website and to all programs is to have a full backup. Make sure to back up all your pages, posts, plugins, media, and database if any.
Having a backup makes it easier and faster to customize new themes and optimize them.
Copy Sidebar Widgets
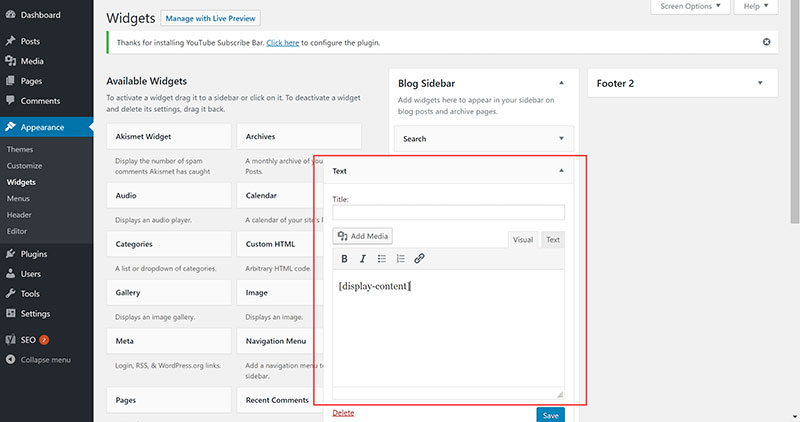
Sidebars hold and display various widgets on a website. These can include social media links, ads, subscription,s and contact forms. When you build a website, these are important elements that will come in handy in the future.
Make sure to copy all the custom code of your widgets to use them again on the new WordPress theme.
Activate Maintenance Mode
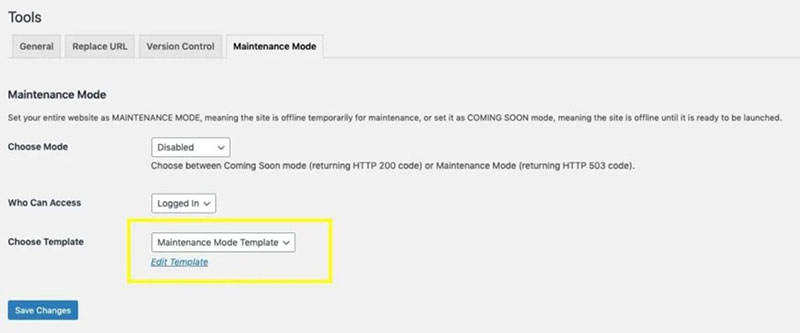
WordPress features Maintenance Mode. It tells site visitors that the website is temporarily unavailable due to ongoing updates and changes.
It enables website owners to run a user-friendly page rather than a broken site. This builds a positive brand image.
It also allows site owners to inform visitors that the site will be back in service soon.
How to Change a WordPress Theme without Going Live
There are three ways to change a WordPress theme without going live:
- using the live demo option
- a plugin
- a WordPress staging site
Live Demo
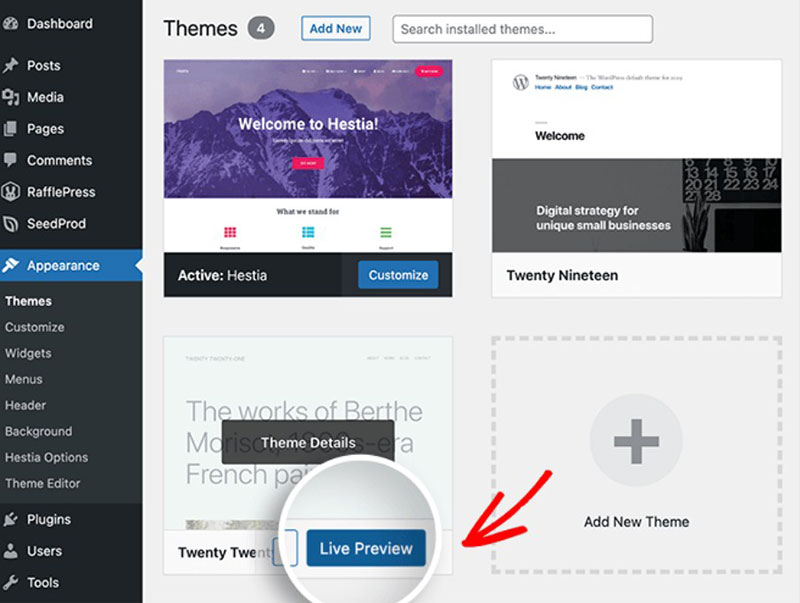
WordPress features a live demo option when users change their WordPress theme. Every WordPress theme offers a live demo before installing it.
- From the WordPress dashboard, go to ‘Appearance’.
- Select the ‘Theme’ option and look for a new theme using the search bar.
- Having chosen a theme, click the ‘Live Demo’ option to test it out.
- If satisfied with the chosen theme, click ‘Install’. Users can now customize their new WordPress theme.
Follow these steps to try out different themes.
An important reminder, do not click the ‘Activate’ and ‘Publish’ buttons. This will prevent any changes from being applied on your live site.
Use the Theme Switcha Plugin
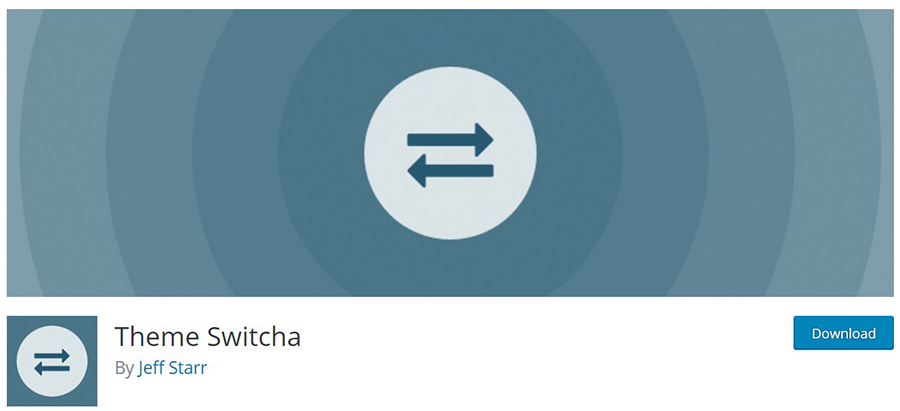
Another way to change WordPress themes without going live is to use the Theme Switcha Plugin.
Switcha Plugin is a free WordPress plugin. It generates a private preview of WordPress themes.
To install the plugin:
- From your WordPress dashboard, go to ‘Plugins’ then click ‘Add New’.
- Users can either search for the plugin on the search bar or upload it.
- Upload the plugin and activate it.
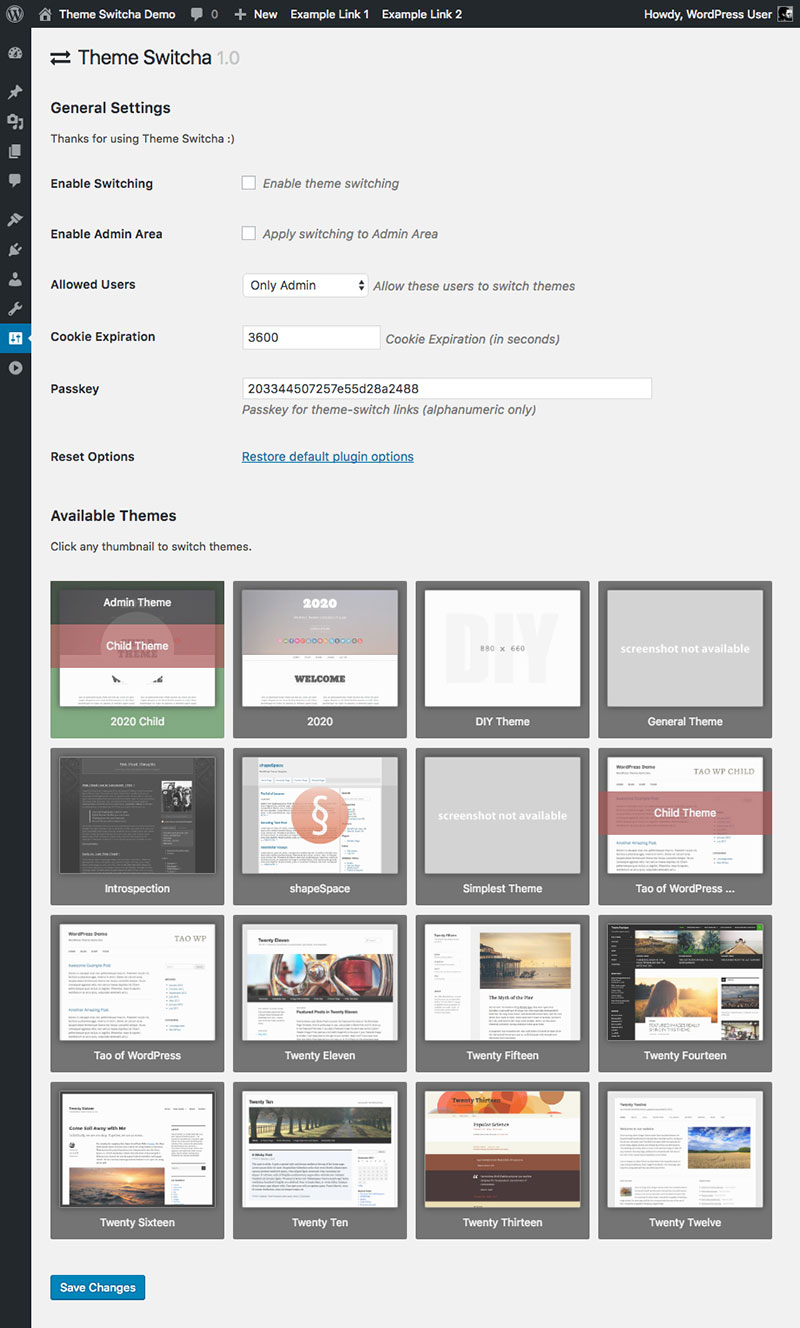
- On the admin panel, click ‘Settings’ then go to ‘Theme Switcha’.
- Select ‘Enable Switching’ then click ‘Save Changes’ at the bottom of the page.
Now, one may switch privately to different themes by clicking on the theme thumbnails. Once you’ve chosen a WordPress theme, click ‘Activate’.
WordPress Staging Site
Making any changes to a WordPress site runs the risk of losing data and affecting user experience. Especially for WooCommerce shops where sales, orders, and other business transactions take place.
Many WordPress web hosting services offer to clone WordPress sites in a staging environment. This allows site owners to try out a new theme before going live.
Staging Environment
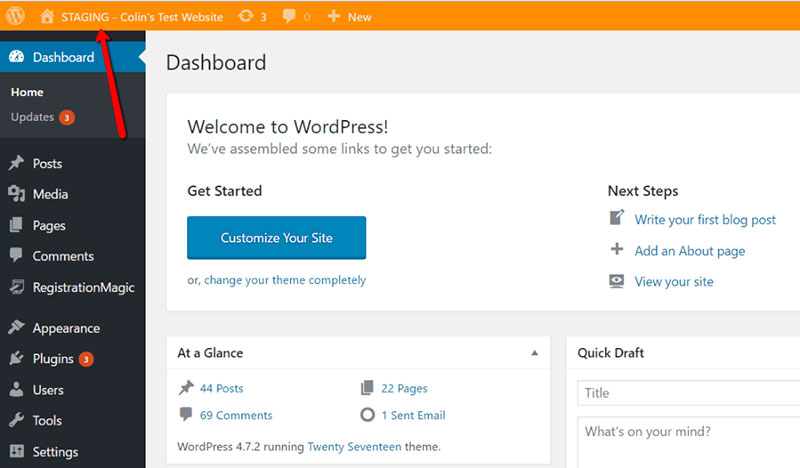
A staging environment enables website owners to edit web content, plugins, and test out WordPress themes before publishing them.
It does so by creating a staging site which is an offline cloned copy of their WordPress site. Here, users can basically make any changes without applying them on a live site.
A staging environment means users can keep their site running. At the same time, they can customize their website and fix any errors behind the scenes.
Once all editing of the WordPress theme is complete, they can publish it to apply the changes online.
Push Changes in Staging Site Live
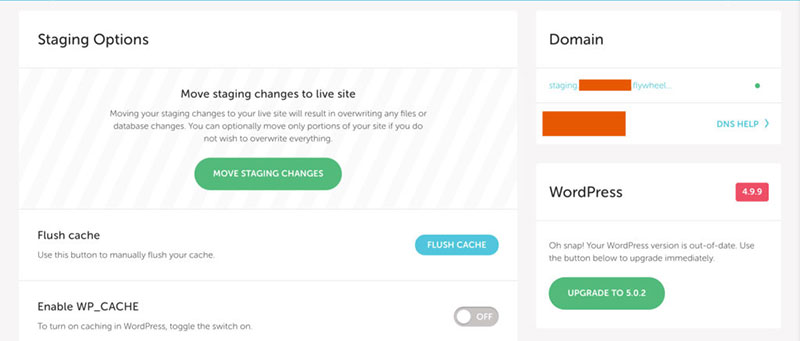
After customizing the new theme and fixing any bugs in the staging site, it is now ready to go live. It means replacing your current live site with the customized staging site.
This step is very simple and easy if using the staging service of the web host.
NOTE: Any new content on the live site will be overwritten if the editing in the staging site is ongoing. So it is important to make sure that all new content is already placed in the staging site before going live.
If trying a new theme on a local WordPress site, make sure to backup your website before uploading it to the server. Once finished, the new theme will now apply to the live site.
FAQ about changing a WordPress theme without going live
What is the safest way to change a WordPress theme?
The safest method to change a WordPress theme is by using a staging site. This allows you to make all necessary adjustments without affecting your live site. Once you’re satisfied with the changes, you can push the updates to your live site, ensuring website performance and user experience remain intact.
Can I preview a new theme without activating it?
Yes, you can preview a new theme without activating it. Use the Theme Preview Mode in your WordPress dashboard. This lets you see how your site will look with the new theme, allowing you to make tweaks before going live. This feature is crucial for safe theme customization.
What plugins help in switching themes safely?
Plugins like Theme Switcha or WP Staging are excellent for safely switching themes. These plugins enable you to create a staging environment or preview themes without affecting your live site. They are essential tools for managing WordPress theme updates and website migration.
How do I set up a staging environment?
To set up a staging environment, use plugins such as WP Staging or your hosting provider’s built-in staging tools. These tools clone your site, allowing you to test changes. This approach ensures safe website updates and prevents any disruptions on your live site.
What steps should I take before changing a theme?
Before changing a theme, back up your entire site. Use plugins like UpdraftPlus for BackWPup. Test the new theme in a staging environment. Ensure all plugins and customizations are compatible. This preparation minimizes risks and ensures a smooth website redesign.
How can I test my new theme’s performance?
To test your new theme’s performance, use tools like Google PageSpeed Insights or GTmetrix in your staging site. These tools help you measure load times and identify performance issues. This ensures that the website performance remains optimal when the new theme goes live.
Can I customize my new theme before making it live?
Yes, you can customize your new theme in a staging environment. Use the WordPress Customizer or relevant theme options to tweak design elements. This process ensures that all customizations are complete and functional before updating your live site, maintaining a seamless user experience.
What is the role of maintenance mode in theme changes?
Maintenance mode is crucial during theme changes. It temporarily hides your site from visitors while you make updates. Use plugins like WP Maintenance Mode to display a custom message. This prevents user disruption and maintains site downtime prevention during the transition.
How do I ensure all plugins work with the new theme?
To ensure all plugins work with the new theme, test them in a staging environment. Check for compatibility issues and update plugins if necessary. This step ensures smooth integration and functionality, avoiding potential conflicts that could disrupt your site’s WordPress updates.
Conclusion
By using a staging site, you can test and perfect your changes without any risk to your live site. Leveraging theme switching plugins and understanding the nuances of WordPress theme management ensures a seamless transition. The use of WordPress backup tools adds an extra layer of security, safeguarding your content and settings.
Throughout this guide, we’ve covered setting up a staging environment, customizing your new theme, and ensuring all plugins function properly. By following these steps, you maintain optimal website performance and user satisfaction. Remember, thorough testing and careful planning are key to a successful theme change.
Ultimately, mastering these techniques empowers you to handle WordPress updates with confidence, ensuring your site remains professional, functional, and visually appealing. Embrace these strategies, and transform your approach to website development and maintenance.
Don’t worry. It is possible to test a WordPress theme without making any interruptions on your live site.
However, that doesn’t mean it’s ok to be careless when switching to a different theme.
Some WordPress themes might not cause any changes or losses to a website. But in a few instances, a new theme might alter some elements on a WordPress site causing it to malfunction.
So before switching to a new theme, let’s say a hair salon WordPress theme, it is important to keep the following steps in mind. They help prevent unwanted site changes and outline how to change a WordPress theme without going live.
If you enjoyed reading this article on how to change a WordPress theme without going live, you should check out this one on how to edit categories in WordPress.
We also wrote about a few related subjects like how to delete WordPress themes, how to make a phone number clickable in WordPress, how to watermark images, how to check the WordPress version, creating a comparison table with WordPress plugins, how to upload an HTML file in WordPress, where are WordPress pages stored and how to justify text in WordPress.
