Do you plan to start your own WordPress Multisite network? If yes, you should know that WordPress is equipped with a built-in feature that lets you create multiple websites using the very same platform. This article presents all the needed details related to setting up a WordPress multisite network. The process is not complicated as long as you follow all the steps you find here.
Table of Contents
Table of Contents
- Understanding what is WordPress Multisite
- Features within the WordPress Multisite network
- The perfect candidate for a WordPress Multisite network
- Getting started with a multisite network in WordPress
- What network settings are required for WordPress Multisite?
- Understanding multisite network admin screens
- How to manage sites in WordPress Multisite?
- WordPress Multisite domain mapping – the basics
- How does hosting work for WordPress Multisite?
Understanding what is a WordPress Multisite
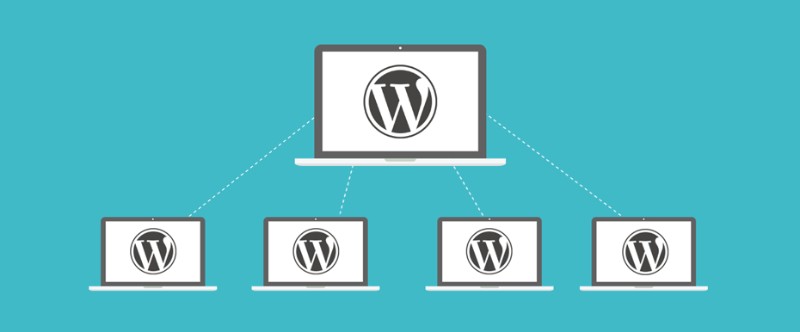
First of all, it is important to define what is WordPress Multisite. This is a feature that involves the creation of a network of sites instead of a single one, by using only one WordPress installation.
By using this feature, a new user lever is available. This level is called the Super Admin and he is the one who controls the network. The Super Admin can access both the primary website and the subsites. He can manage the sites from the network admin area, that other user cannot access.
Each website within the multisite network can have its own subsets of users, their own plugins or themes. They do not depend on the primary website. The only thing that all the subsites share with the main site is represented by the database. The database has different tables for each subsite.
The wp-content folder contains the same plugins and themes for all sites within the multisite structure, but each has its own network enable option.
Features within the WordPress Multisite network

WordPress multisite comes with the following features regarding the network:
- Your WordPress network can contain multiple sites from one single installation.
- Your networks can include subdomains like http://this.example.com and directories like http://example.com/this/.
- Other users can join the WordPress Multisite network and they can simply create an account and add their own blogs into it.
- The person who has the Super Admin role can install themes and plugins that are available for all websites within the network. However, subsite admins can’t add themes or plugins to the network.
- Super Admins can make changes for all website themes if they want to, while subsite admins are not allowed to make such changes.
Benefits of using a WordPress Multisite network
People who want to manage multiple sites on WordPress should always opt for this feature, considering how difficult it is to manage more than one standalone websites. The advantages of using a WordPress Multisite network instead are:
- Managing multiple sites from one dashboard without complicated processes involved
- Each site which is part of this network can have a different admin, who has control over that site in particular
- As a Super Admin, you have the power to make changes in terms of plugins and themes, such as activating and deactivating them as you please
- When WordPress updates arrive, they are far easier to manage, as everything can be handled from one single dashboard
Downsides of using a WordPress Multisite network
As in any other situation, there are some downsides to think about as well. This is a list of the disadvantages that may appear after the WordPress Multisite setup:
- Both the main site and the subsites share the same resources. If one website goes down, the entire network goes down
- Managing traffic is quite complex for beginner users and the numbers can affect all the websites present in the network
- If one website gets hacked, the entire network of websites is hacked
- WordPress plugins are not always responsible for multisite networks
- Not all hosting providers support WordPress multi domain, which limits the options of a user in terms of providers
The perfect candidate for a WordPress Multisite network

The reasons for starting a WordPress Multisite network are various. Owning a couple of WordPress websites does not necessarily mean that such a network is required. There are tools like ManageWP or InfiniteWP that can help website managers to keep things organized with standalone websites.
In other cases though, the scenario is too complex to use such tools and creating a WordPress Multisite network becomes a necessity. Here are some situations:
- Magazine websites that reached a point where each section could become a website on its own
- Business websites that require different subsites for each of their location/branch
- Government/NGO websites that require subsites for each department or region
- A network of blogs that could be handled on multiple subdomains
- Educational websites that allow students to create their own blog using the institution’s server
Getting started with a multisite network in WordPress

Once you figured out that you need to install WordPress Multisite, it’s time to learn how to do it. First of all, you need to understand that you can’t set up WordPress multisite just like in the case of a plugin. WordPress Multisite is a feature within the platform that can be enabled for sites.
You need to flip the feature on and start working on your multisite network right away. You won’t see an enabling switch on your dashboard unless you set things up beforehand. It is paramount to understand that WordPress Multisite is suitable only for some purposes. If you want to manage multiple standalone websites using a tool, this is not the option you are looking for.
Start by installing WordPress. Connect to your website using an FTP client. One of the most popular is FileZilla. Continue by editing the wp-config.php file. You need to add the following lines of code before the reminder found at the bottom.
/* Multisite */define('WP_ALLOW_MULTISITE', true);
After including these lines in the file, save it and go back to your WordPress website. Log in and navigate to Network Setup, found under Tools. Now you can start configuring your WordPress Multisite network. Here are the steps required to do so:
Start on the network setup screen, where you can choose one of the two options: having your websites on their own subdomains or subdirectories. Make a well-informed choice because this is an option that will affect the structure of your WordPress network and it can’t be changed later.
Choosing subdomains involves changing your DNS settings to allow WordPress Multisite domain mapping, which will also be discussed later in this article.
- Go to the section which includes network details, name your network and add an admin address. Once you are ready, click on Install.
WordPress will send you to the next screen which involves copying and pasting some code to the wp-config.php and .htaccess files.
- In order to find these files, navigate to your WordPress root directory. When you find them, connect to the website using the FTP client mentioned before and edit the files by pasting the code provided by WordPress.
After saving and uploading the files, you need to login to your website’s WordPress admin area. Once you log in, you should be able to see the WordPress Multisite network option in the admin bar.
How to enable subdomains?
To enable subdomains, you need to create one named “*”. If your website is named www.john.com, the subdomain’s name will be *.example.com. Once you set things up, make sure that the subdomain points to the directory where your WordPress is installed. Creating a wildcard subdomain should help. For that, you need to:
- Login to the cPanel dashboard. Navigate to Domains and Subdomains. Once you do that, you will be required to enter text in the subdomain field. Type “*” in the field. Make sure that the document root field is pointing to the WordPress directory. This directory is represented by the host of the wp-config.php file. Click Create once the subdomain is ready.
What network settings are required for WordPress Multisite?
Another step to convert WordPress to multisite is setting up the network. Navigate to My Sites, which can be found in the admin bar on WordPress. Click on Dashboard, which is the dashboard where you will manage the WordPress Multisite network. Here you can either add or delete websites, install plugins, themes and manage the role of each user.
In order to change the Multisite network changes, go to Settings and then Network Settings. Here is where you control what users can create accounts and websites within the network. You also have the option to leave registration disabled. You can add users manually to your websites later.
You should also edit the emails that WordPress sends when a user creates a new site in your network. All changes that you make here will affect all the subsites present on the network. There is no room for mistakes. Here is a short description of each type of network setting you can make:
- Registering: changing this setting will alter the possibility of creating a new website within the WordPress Multisite network. From here, you can also grant admins of subsites the capability to assign other users to manage their subsite
- New Site: you can create custom messages for all admins of the subsites, which will be received when content begins to be published within the Multisite network
- Uploading: you can manage what the admins and users publish in terms of content. You can decide what content can be or cannot be uploaded to the subsites, as well as specifying the maximum allowed size for the content files.
- Language: you can change the default language of all websites included in the WordPress network
- Menu: you can turn the menu off and on to either let admins pick their own plugins for the subsites or forbid them this action. Leaving the feature off will mean that the Super Admin is the only one that can determine what plugins or themes are enabled on the subsites
Understanding multisite network admin screens

After you set up WordPress Multisite, you will notice that several extra screens are added to the admin dashboard. These are required for managing the network and some people may get confused when they see it for the first time. These screens can be exclusively accessed by the Super Admin, who is the one in charge of the changes that happen within the network.
The admin screens are similar to the standard ones that all WordPress users are familiar with, but some features may be missing or new. Subsite admins won’t be able to install new themes and plugins, but they can choose to enable the ones that have been installed on the entire WordPress Multisite network.
This is probably the most complex admin screen. The rest contain settings that are similar to the default WordPress dashboard.
The database is different when installing a WordPress Multisite
Once you set up WordPress Multisite, you will notice a huge difference in the way your database tables look. This is probably the biggest change from managing one single website to managing a multitude of them. A standard WordPress installation includes no less than eleven database tables, all used for storing one site’s content and settings.
In a WordPress Multisite network, on the other hand, nine of these databases are duplicated according to the number of subsites that it contains. If you own nine subsites, for instance, you will notice 81 more tables in your database.
This is the factor that keeps the information organized for each separate subsite that your network has. If you don’t work with your WordPress database a lot, you won’t notice this change, as it is simply something that happens behind the scenes to keep data organized.
How to manage sites in a WordPress Multisite?

Multisite WordPress sites can be managed by using the Sites screen. You can find this settings screen under Multisite Dashboard. From here, you can add new subsites or delete existent ones. You can also deactivate a subsite or archive one.
What happens if I deactivate a website?
Deactivating a website simply makes it invisible to all people who are trying to access it, while also displaying a message.
The website won’t be visible to the admin either. The Super Admin is the one who controls what happens with the subsites, so he can also mark subsites as spam. Deleting a subsite removes it from the entire WordPress Multisite network.
Other settings you should consider
New subsites
When creating a new subsite, you simply need to put together the web address, the blog title and then assign a person to manage the site. This site shows up when the admin first logs in to the platform.
You can configure the settings of the websites you create by accessing Sites and then All Sites. Click Edit and make the changes you consider relevant. You can change roles whenever, as well as enable/disable an admin’s access to certain actions.
Users
You can’t modify much regarding users, but you can control what their roles at. From the Users module, you can also add new users or delete existent ones from the entire network or just one subsite. It is the same as for a regular WordPress site.
Themes
Assigning a theme to a WordPress Multisite network is easy. You can select what themes to use for each subsite and activate them individually. You can grant admins the possibility to change themes on their subsites as well.
Plugins
As for plugins, they can’t be set individually for each subsite. You can activate plugins for the entire WordPress Multisite network, which means that all subsites that are a part of this network will be affected by the change you make. Picking a plugin for each subsite, in particular, is not possible. Admins can choose to deactivate plugins on their subsites, even though you activated plugins on all of the subsites.
Updates
WordPress Multisite updates are similar to regular WordPress ones. The core updates must be installed to keep the websites safe from hackers. Whenever the update notification shows up, apply it as soon as possible. The update will be applied to your entire network, so you don’t need to log in individually to each subsite to apply the update.
WordPress Multisite domain mapping – the basics
Once the WordPress Multisite is installed, you can continue adding new subsites to the network. Of course, adding a lot of websites can become quite messy in time. You can use subdomains in the names of the websites, but this is often not convenient for certain users. WordPress Multisite domain mapping can help in such a situation.
It is a process that allows you to allocate a custom domain to one subdomain existent in your network. Domain mapping is currently a native feature of WordPress, which means you no longer have to install separate plugins to deal with mapping. Granting a custom domain name for each website is a process that takes some knowledge. The information required will be presented below:
Purchasing a new domain
First of all, you need to purchase a domain name. Choose a web hosting company that you prefer and search for a domain name that fits your needs. Add this domain name to your account.
You don’t need to use a plugin for a WordPress Multisite domain mapping process, but there are some available on the market if you plan to do heavy work with the network. Such plugins help with website monetization, as it helps with domain resale and mapping services.
Installing an SSL Certificate
Each subsite on a WordPress Multisite network should have an encrypted login. Installing an SSL Certificate will do the job. You simply have to select this while completing your custom domain installation.
DNS mapping
This step depends on what web hosting company you select previously. It is usually a simple process, so it doesn’t require much tech knowledge. Let’s take BlueHost for example. The process would normally look like this:
- You need to log into your web hosting account
- Go to the domain’s management system
- Look for the option that allows you to assign a domain to the cPanel account
- Select the domain you are looking for and add it to the Multisite network
- Select the option that turns the domain into an Addon one
- Attribute the domain a unique directory
- The main site file is Public_html/ and the directory should look like public_html/[name]
- Attribute a subdomain name to the website (not visible for users)
- Assign the domain
Add a new custom domain to WordPress
After performing all the steps above, you can finally go back to WordPress. Go to Sites, and then Add New. You need to fill the URL field with the custom domain that you previously assigned. Follow the given instructions for setting up a new subsite. Assign users, apply themes, plugins and so on. Basically, you start over the process that was described above.
How does hosting work for a WordPress Multisite?

Some people believe that web hosting doesn’t affect the way a WordPress Multisite network works. Well, you should know that you always need to select a reliable web hosting companies to make sure that nothing goes wrong with your sites.
WordPress extended knowledge
When you own a WordPress Multisite network, it would be recommended to expand your knowledge in regard to WordPress. Because you are no longer running one single hosting plan for one single WordPress website, you need to get informed about the options you have.
Choose a web hosting provider that can handle WordPress Multisite hosting. Also, if you are not tech savvy, look for web hosting companies that provide support throughout the process.
Whenever you encounter problems, web hosting specialists will be there to deliver the needed advice. As mentioned before, a WordPress Multisite network is trickier to deal with if one single subsite goes down.
All the network will go down and you may suffer financial loss if the network is monetized, not to mention that regular website visitors will notice the event. Good web hosting companies can solve any issues quickly and provide you with the support you need in such situations.
Security
Secondly, pay tremendous attention to the performance and security you obtain in exchange for what you pay. Many cheap web hosting companies offer services that are not protected in any way and they are not as performant as they need to be. Depending on your WordPress Multisite network’s purposes, you should opt for a web hosting company that is capable of meeting the standards you set.
For instance, if you want to create a small network that only includes a few blogs, a company that uses cloud hosting should be enough. On the other hand, if you plan on expanding your network quite a lot in the future, you should opt for a better hosting plan from the very first start. Look for web hosting companies that offer more bandwidth and storage for an accessible price. Reputable web hosting companies also include great security and performance.
FAQs about WordPress multisites
1. What is WordPress multisite?
Users can develop and administer many WordPress sites from a single WordPress installation thanks to a feature called WordPress multisite. As a result, customers are able to build numerous websites with unique domain names and administer them all from a single dashboard.
2. How do I install WordPress multisite?
Users must edit their wp-config.php and .htaccess files before proceeding with the standard installation process to set up WordPress multisite. By adding a few lines of code to their wp-config.php file and following the setup instructions in the WordPress dashboard, customers can activate the multisite after the installation.
3. What are the benefits of using WordPress multisite?
WordPress multisite offers a number of advantages, such as simpler multi-site management, lower costs (because users only need to pay for one hosting account), and increased scalability. Moreover, managing user access and roles as well as sharing plugins and themes across numerous sites is made simple with multisite.
4. Can I use different themes on different WordPress multisite sites?
Users can use various themes on various WordPress multisite sites, yes. Users can activate or deactivate specific themes for each site, and each site can have its own theme.
5. How do I create a new site on WordPress multisite?
Users must access the WordPress dashboard and select the “My Sites” dropdown menu in order to build a new site on WordPress multisite. They can then choose “Network Admin” and then “Sites” from the list. After that, they can click “Add New” and enter the site’s information.
6. Can I use different plugins on different WordPress multisite sites?
Users can use various plugins on various WordPress multisite sites, yes. Users can manually activate or deactivate plugins for each site, and each site can have its own collection of plugins.
7. Can I manage multiple WordPress multisite sites from a single dashboard?
Users can really control numerous WordPress multisite sites from a single dashboard. Users can access a “Network Admin” dashboard after enabling multisite, which enables them to administer all of their sites from a single location.
8. How do I disable WordPress multisite and revert to a single site installation?
Users must delete the lines of code they added to their wp-config.php file during the multisite setup process to turn off WordPress multisite and go back to a single site installation. Then, they can delete any extra sites they made and eliminate any multisite-related settings that are still there in their WordPress database.
9. Can I transfer a single site to WordPress multisite without losing any data?
Users can move a single site without losing any data to WordPress multisite, yes. In order to accomplish this, they can create a new site on their multisite installation, export their data from their single site installation, and then import it into the new site.
10. How can I manage user access and roles across multiple WordPress multisite sites?
With the built-in user management features in the WordPress dashboard, users may control user access and responsibilities across many WordPress multisite sites. As a result, they may control user rights and access levels across the entire multisite network and assign various roles to various individuals on various sites.
Ending thoughts on this WordPress multisite guide
Hopefully, the tips you have found in this article will help you set up your own WordPress Multisite network. It is not a difficult process considering that is now an integrated feature of WordPress. With a little research, you should be able to put together an efficient network.
If you enjoyed reading this article on WordPress multisite, you should check out this one about how to change font color in WordPress.
We also wrote about a few related subjects like WordPress stuck in maintenance mode, website maintenance cost, how to password protect WordPress site, how to disable comments in WordPress, WordPress header, WordPress dashboard login and WordPress tagline.


