Editing the footer in WordPress can transform your site’s professionalism and functionality. Whether you’re dealing with widgets, links, or branding elements, making changes to the footer can seem daunting if you’re unfamiliar with WordPress’s flexibility. This article will guide you through the process of customizing your site’s footer effectively.
I’ll show you how to access the footer.php file and manipulate HTML and CSS to achieve your design goals. Additionally, you’ll learn how to use the Theme Customizer and various footer plugins for more dynamic edits. By the end, you’ll have the knowledge to modify the footer section effortlessly, improving your site’s appearance and usability.

Key areas we’ll cover include:
- Accessing footer settings in the WordPress dashboard
- Customizing footer widgets and footer credits
- Implementing changes via Elementor and WPBakery
- Using code snippets in
functions.phpfor advanced tweaks
Stay tuned to master the fundamental aspects of footer customization in WordPress.
Table of Contents
1. By Using the WordPress Customizer
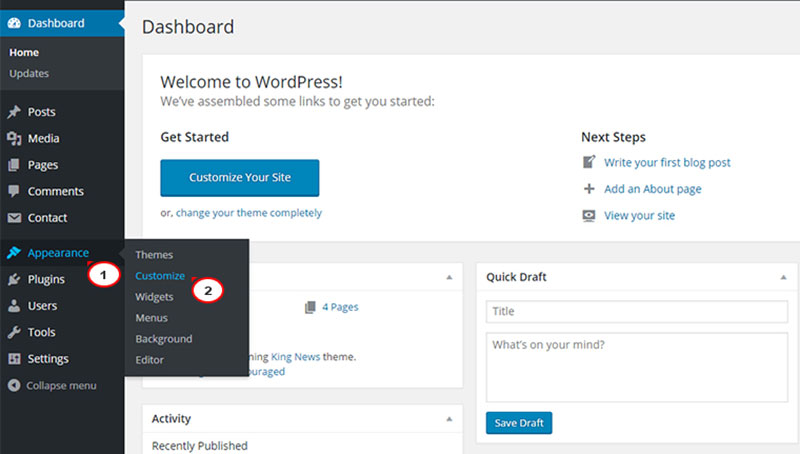
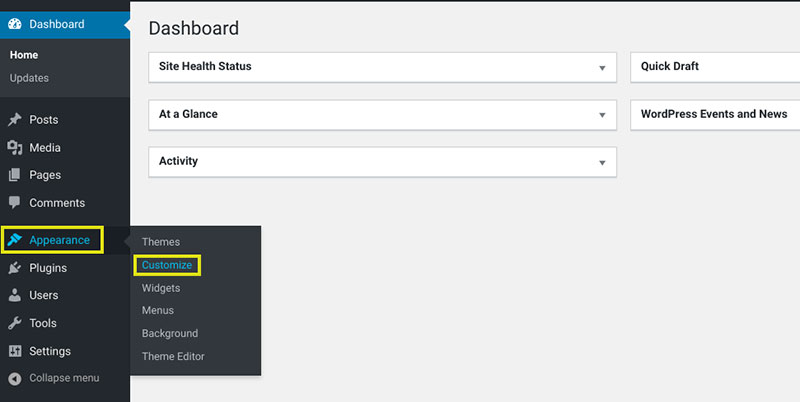
If you wondered how to edit the footer in WordPress and you are also a beginner in using the WordPress dashboard, use the WordPress Customizer. This might save you time while you’re still learning how to work in WordPress editor.
To find WordPress Customizer, go to Themes settings. It should be in the main admin sidebar. There should be an option to edit the footer there. After you click on it, you will get a live preview of your WordPress site. The preview will be on the right and the footer customizes settings on the left side of your screen. Having a preview will make the editing much easier.
There are various options to choose from in Customizer to edit and make changes to your footers. Here you will find WordPress widgets, theme settings, and WordPress Menus. A specific theme might use all of these options to customize footers while some themes use just one or two.
In this article about how to edit the footer in WordPress, we will explain all three of these footer editing options.
WordPress Widgets
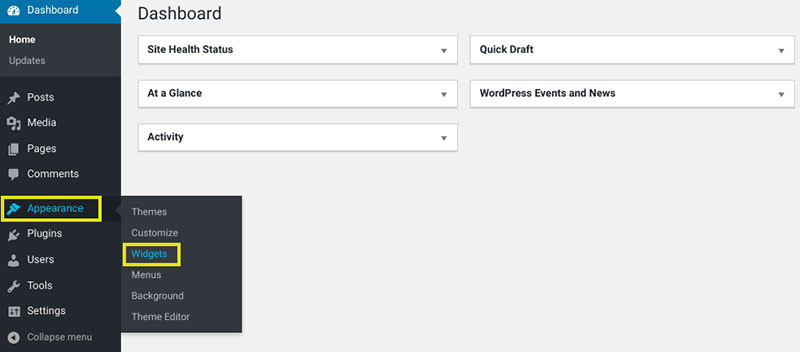
To customize footer content, you may use special built-in widget systems. Many WordPress themes have them. These widgets are content blocks the can be placed in footers or sidebars, but in other places on your WordPress website too. By adding, removing, and editing WordPress widgets placed in some of those areas, you will be able to control that part of the footer content.
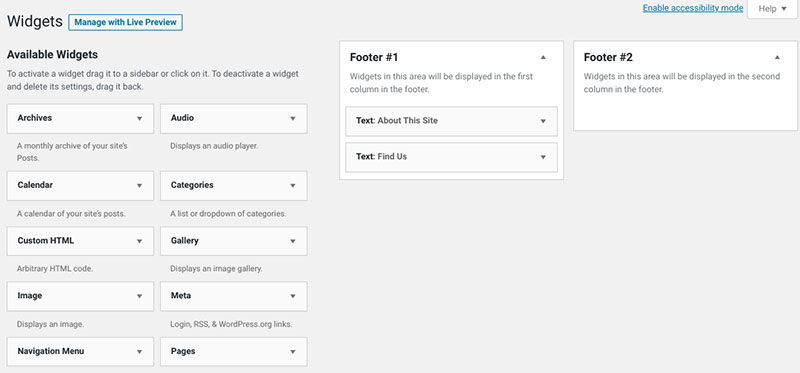
You may use a WordPress Widget plugin to add some extra types of widgets if you require more widget options. Adding widgets is easy. You may add a widget simply by clicking on its title in the list of all the widgets offered. Once you select one, drag it with the cursor to the footer section. After you select where you want to place it, click the Add Widget button.
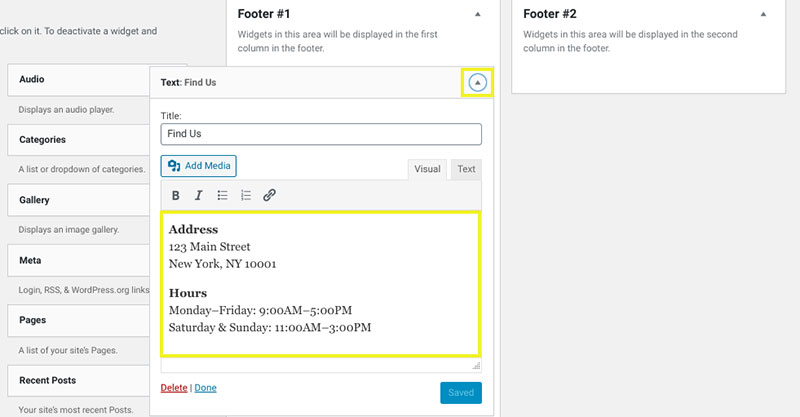
If you, by any chance, change your mind and don’t want or like that widget, just select Delete. After you apply all the changes you want, don’t forget to save the changes and hit the Publish button.
Theme Settings
If you are not good with programming languages and working with code, this type of settings a way to edit for you. Using the theme settings is also good if you don’t want to use a plugin. Here is the list of all the elements you can edit with the theme customizer:
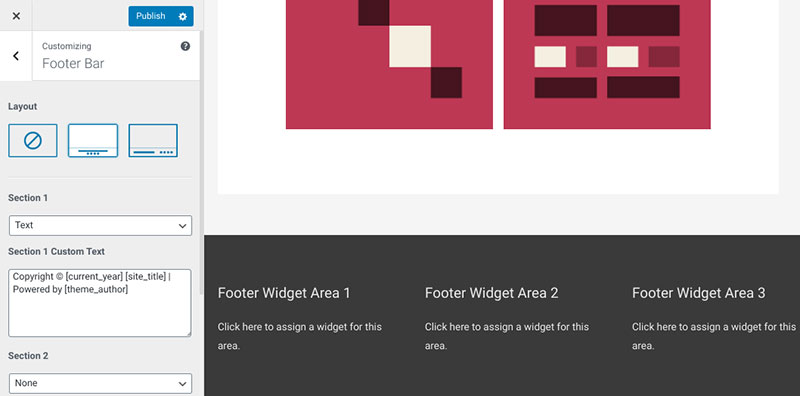
- Change footer background
- Add extra columns and rows
- Alter the text color
- Pick which elements will be shown in the mobile version of the website
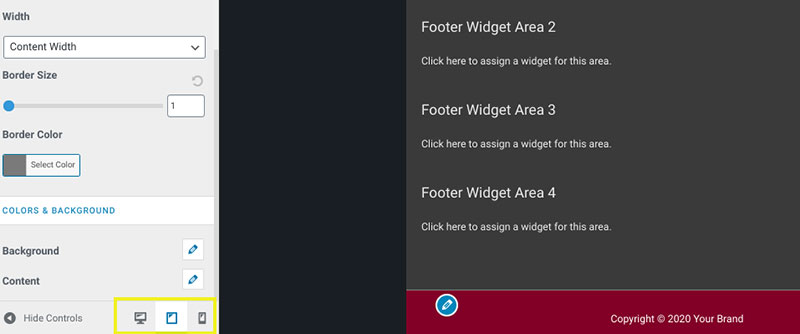
As we already mentioned, you will have a live preview on the right side while using the theme customizer. Don’t forget the changes apply differently among different WordPress themes.
WordPress Menu
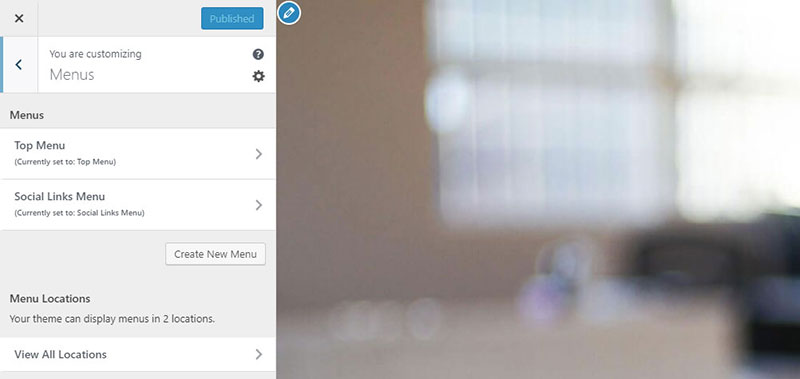
Another method to edit the footer and create a footer menu is with the WordPress menu system. This also depends on what theme you use and how a specific theme was built. This means that some themes offer you only partial control of the footer.
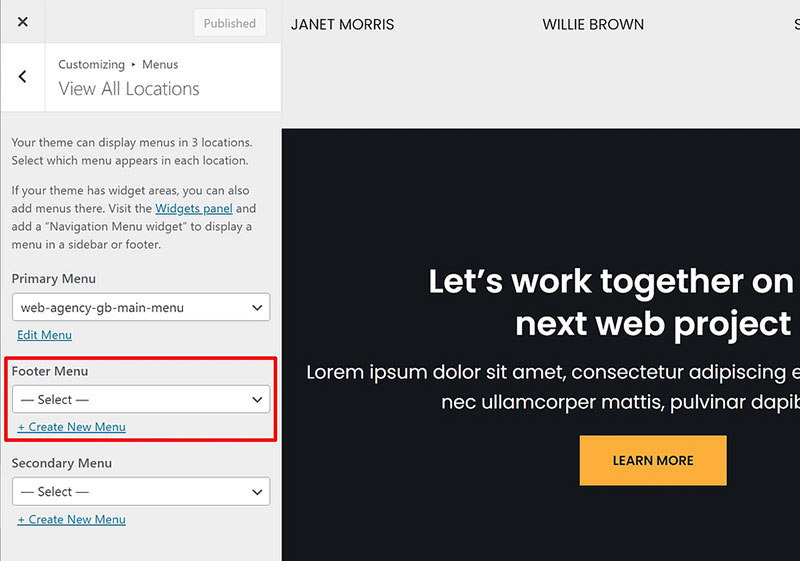
One of the options is selecting a menu that already exists on your WordPress website. The other one is to click the link and create an entirely new menu. If you decided to create a new menu, add it using the customizer. Don’t forget to save and click the publish button after you finish.
2. Edit the Footer Code
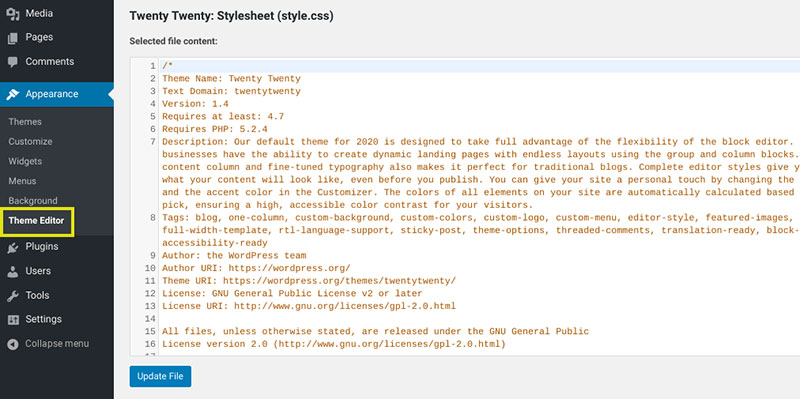
If you created a footer and you still don’t like it, there is another method to customize it. This other method to edit the footer will require you to use code. If you know the code, this will be easy for you, a plain technical solution. Go to the footer.php file to make all the changes you need to.
To edit the text in the footer.php file, look for it in your WordPress theme folder. Be sure not to erase any lines of the code from the file.
One of the safe options is to create a child theme and apply changes to the code of the corresponding footer.php file. Another one is to insert text comment on the code in this file. Just comment on the code without removing any lines of code that are already there. Make sure you’re logged in to the WordPress Admin dashboard first.
If you have difficulty finding this text file of your WordPress theme, here’s what to do:
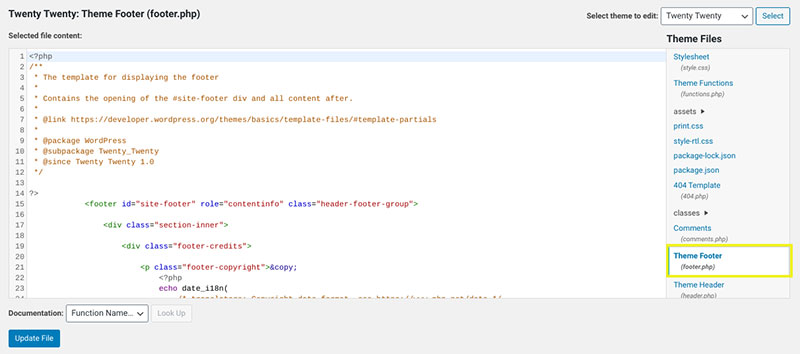
- Go to Appearance and find the Theme Editor option.
- Look for a file named Theme Footer (it should be in the list on the right)
- Click it to open and add the code you edit the footer.php.
- After you make all the changes, click the Update File button to finish.
3. Insert Plugins

The plugin is good if you want to edit the footer (and header) in your WordPress website without using the customizer or code. You can add and edit both header and footer of your website using the free plugin. The plugin proved to be a very useful tool as it has over 900.000 active installations on the market.
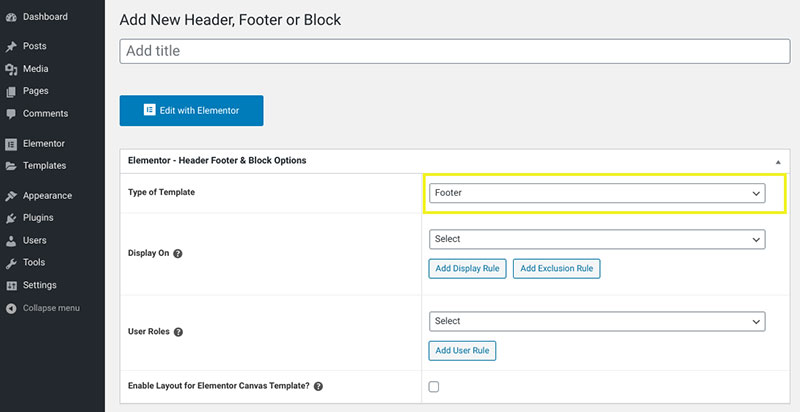
To start, if you want to add this amazing tool to your WordPress dashboard you must install it.
- Go to Plugins and select Add new.
- Search for Insert footer or Elementor footer.
- Click Install now and then click the Activate button.
- The plugin settings should appear under the WordPress settings area. There should be three key editing options: Header, Body, and Footer. You will need the 3rd one.
- Copy and paste the code you need in the footer section of your WordPress website.
- Paste the code in the plugin settings.
- Click Save changes after you finish the editing.
4. Remove Powered by WordPress Link

The small link that says “Powered by WordPress” in the footer is not a widget. It is for this reason that users are so puzzled about how to change it. Most of the WordPress themes have this link like some kind of watermark or signature. The text is either “Powered by WordPress” or “Proudly powered by WordPress” and it is included by default in most of the WordPress themes.
This text in the footer area also includes a link to the self-hosted WordPress.
There are some easy tips on how to hide this watermark. One way is to modify the text by editing the WordPress theme.

Another method is to click on the Remove Footer Credit. You can do this with one of the free WordPress plugins. This is a good choice if you don’t want to deal with editing the WordPress theme.
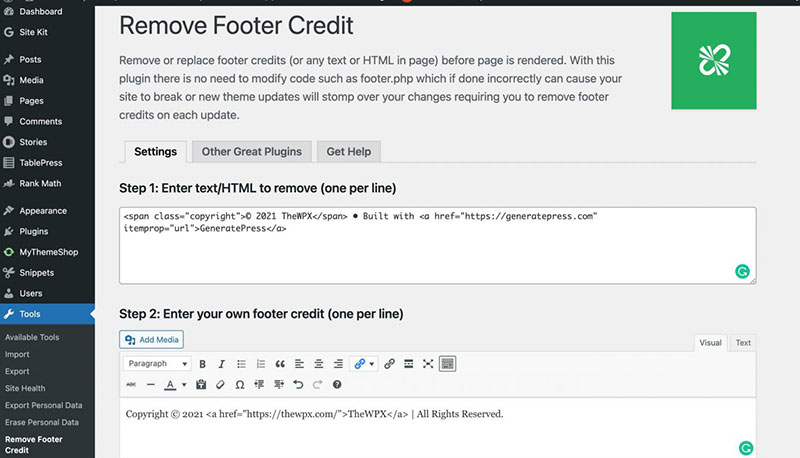
You will need to go to your site and install the needed plugin. After you do, type the text or HTML code you wish to delete from the footer. You will see the box where you need to insert this text.
You may then insert your own, custom footer link if you want to. It is not necessary, you may leave it blank. Save all the changes you made and reload the page to see the changes you’ve made.
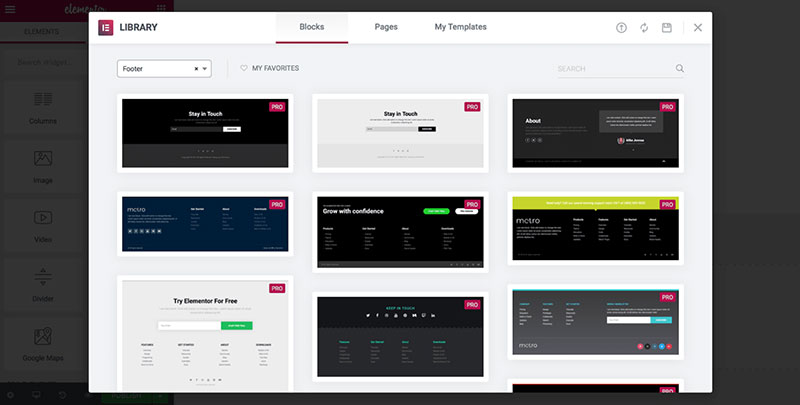
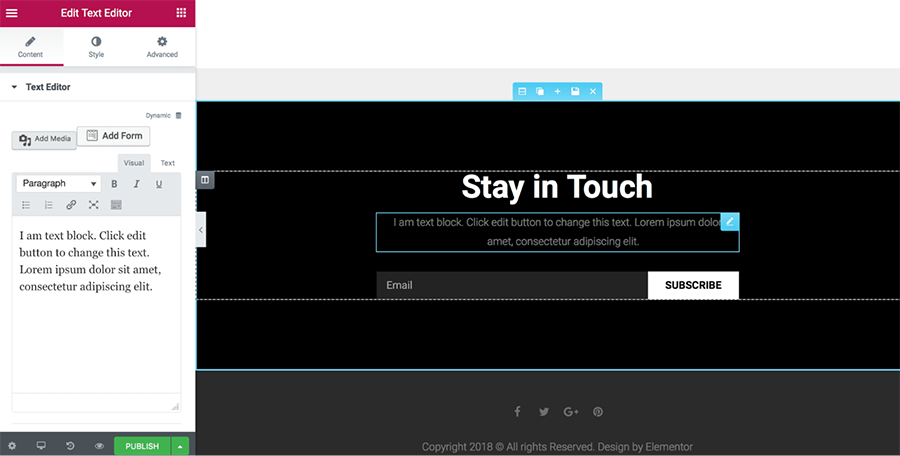
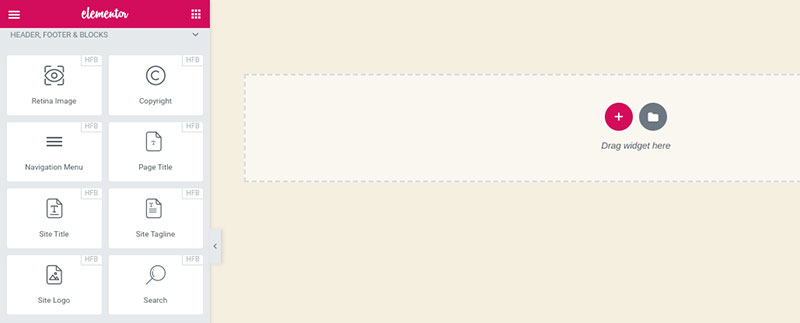
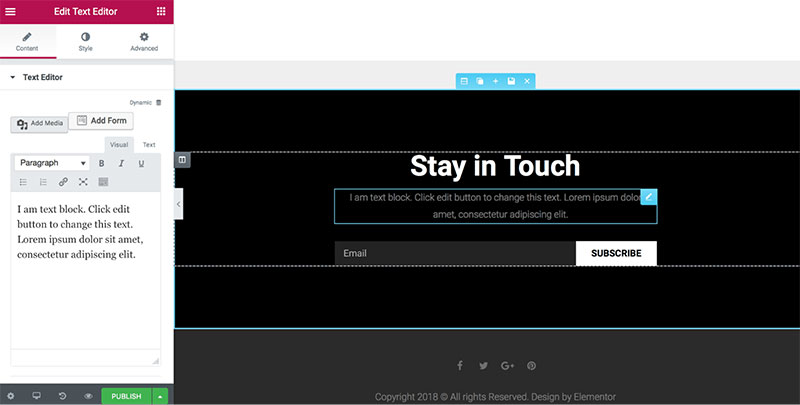
You can even take editing the footer a step further. Develop your own entirely unique WordPress footer. You don’t need any specific technical knowledge or programming abilities to achieve this. Instead, you can build a perfect footer for your WordPress site using a visual, drag-and-drop editor. Simply drag and drop the widget into the footer area.
In general, all the methods to edit the footer are not that difficult. As you can see in this article there are various options to edit your WordPress footer. But always pay attention to what theme is applied at the moment.

There are various options for different skills and requirements. We recommend you always have a backup before you make any alterations to your WordPress site. Have the original file stored somewhere in case something unexpected occurs. We hope this article about how to edit footer in WordPress will be useful for you. With learning some of the basic methods you will surely create amazing WordPress sites.
FAQ on editing the footer in WordPress
How do I access the footer settings in the WordPress dashboard?
To access the footer settings in WordPress, navigate to Appearance > Customize. Look for the section labeled “Footer” or “Footer Settings”. Here, you can adjust various elements like footer widgets, footer menu, and footer background color without coding.
How can I change the footer text in WordPress?
To change the footer text, head to Appearance > Editor, then select footer.php. Look for the text you want to change and modify it directly in the code. Alternatively, some themes allow you to update footer text via the Theme Customizer.
What is the easiest way to add links to the footer in WordPress?
Adding links is straightforward. Go to Appearance > Menus and create a new menu for the footer. Add your desired links, assign the menu to the footer menu location, and save. The links will appear in your footer widget area.
Can I use a plugin to edit the footer in WordPress?
Yes, many plugins facilitate footer customization. Popular options include Elementor, WPBakery, and Footer Putter. These plugins offer drag-and-drop functionality for editing the footer layout and adding widgets, making the process simple even if you’re not familiar with coding.
How do I edit the footer.php file?
From your WordPress dashboard, go to Appearance > Editor and find footer.php in the list of theme files. Open it and make your desired changes using HTML and PHP. Save your changes and check the site to ensure everything looks correct.
How can I remove the footer credit in WordPress?
To remove the footer credit, locate the footer.php file in Appearance > Editor. Search for the text representing the credit and delete or comment it out. Some themes also provide a setting under Theme Customizer to remove or customize the credit line.
What are footer widgets, and how do I edit them?
Footer widgets are small informative blocks placed in the footer section. To edit them, go to Appearance > Widgets. You can add, remove, or modify widgets using drag-and-drop functionality. Common widgets include text blocks, menus, and social media icons.
How do I change the footer background color in WordPress?
To change the footer background color, navigate to Appearance > Customize. Look for the “Footer” section and find the color settings. Pick your preferred color using the color picker tool. Save your changes to see the new footer background color applied.
Can I edit the footer for a WordPress child theme?
Yes, editing the footer for a child theme follows the same steps as for a parent theme. Access the footer.php file within the child theme directory via Appearance > Editor. You can also override any footer styles by editing the child theme’s CSS.
What can I do if my changes to the footer don’t show up?
If your changes don’t show up, clear your browser cache and the WordPress cache if you have a caching plugin installed. Also, ensure you saved changes in footer.php. Check if your theme settings are overriding the changes and adjust accordingly.
Conclusion
Editing the footer in WordPress is a crucial task that can enhance your site’s look and functionality. We’ve covered various methods for how to edit the footer in WordPress, from using the Theme Customizer to modifying the footer.php file directly. If you prefer not to code, footer plugins like Elementor or Footer Putter offer simplicity and effectiveness.
Customizing the footer widgets adds a layer of flexibility, allowing you to integrate elements like social icons, footer menus, and even copyright texts. Also, don’t overlook the importance of footer background color adjustments and the use of child themes for safer changes.
Whether you’re editing via the WordPress dashboard or tweaking CSS and HTML directly, these steps empower you to make your footer align with your site’s identity. With these actionable tips, you can confidently make the necessary adjustments to improve both aesthetics and user experience on your WordPress site.
If you enjoyed reading this article on how to edit the footer in WordPress, you should check out this one about how to check the WordPress version.
We also wrote about a few related subjects like how to watermark images, creating a comparison table with WordPress plugins, how to upload an HTML file in WordPress, where are WordPress pages stored, why is WordPress so hard to use and how to delete WordPress themes.