Ever found yourself tangled in the web of URLs within your WordPress site? Streamlining permalinks isn’t just about aesthetics—it’s about enhanced SEO optimization and a better user-friendly URL structure. Imagine a scenario where outdated or cryptic URLs are turning visitors away. This is where the magic happens: learning how to change permalinks in WordPress.
Engaging, isn’t it? Permalinks—those permanent URLs for your posts and pages—are pivotal for both search engines and users. They dictate how your audience navigates your site, affecting everything from web traffic to search engine rankings.
By the time you finish reading, you’ll be a maestro in handling WordPress post URLs. Ready to dive in? Let’s unravel:
- Navigating the WordPress dashboard settings.
- Crafting custom URL slugs.
- Updating the notorious .htaccess file.
- Ensuring smooth URL redirection.
Stay with me; let’s turn those chaotic links into sleek, streamlined SEO-friendly URLs!
Table of Contents
How to change permalinks in WordPress: Quick workflow
Changing the Permalink Structure for the Entire Site
- Log into your WordPress Dashboard.
- Navigate to Settings → Permalinks.
- Choose a Permalink Structure:
- Options include:
- Plain
- Day and name
- Month and name
- Numeric
- Post name
- Custom structure (define your own format using tags like
%year%,%monthnum%,%postname%, etc.)
- Options include:
- Save Changes:
- After selecting your desired structure, click the “Save Changes” button to apply the new settings.
Changing Permalinks for Individual Posts or Pages
- Access the Post or Page:
- In the Dashboard, go to Posts or Pages and select the item you want to edit.
- Edit the Permalink:
- In the post or page editor, locate the permalink section, usually near the title.
- Click on the URL slug to edit it.
- Confirm Changes:
- After editing, click the Update button to save your changes. You can then view the post or page to confirm that the new permalink works correctly.
Changing Permalinks for Media Items
To change permalinks for media items, you can:
- Replace the Media File:
- Download the media file, rename it to your preferred structure, and upload it back to the Media Library. This will generate a new URL.
- Use a Plugin:
- Consider using a plugin that allows for more flexibility in managing media URLs without needing to delete and re-upload files.
Changing the permalink in WordPress:
Permalink structure:
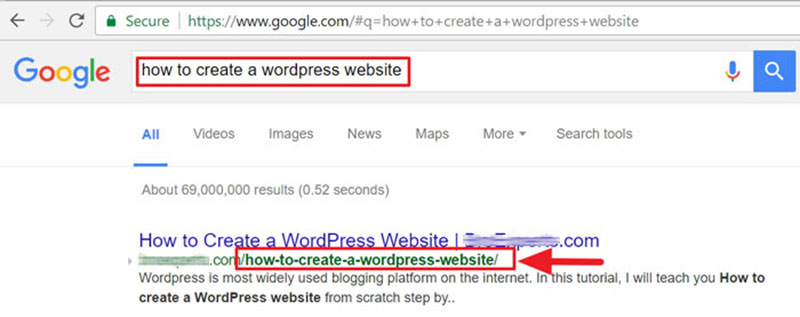
A permalink is actually a short term for the “permanent link”. If you click on the URL, it will lead you to a page on the website.
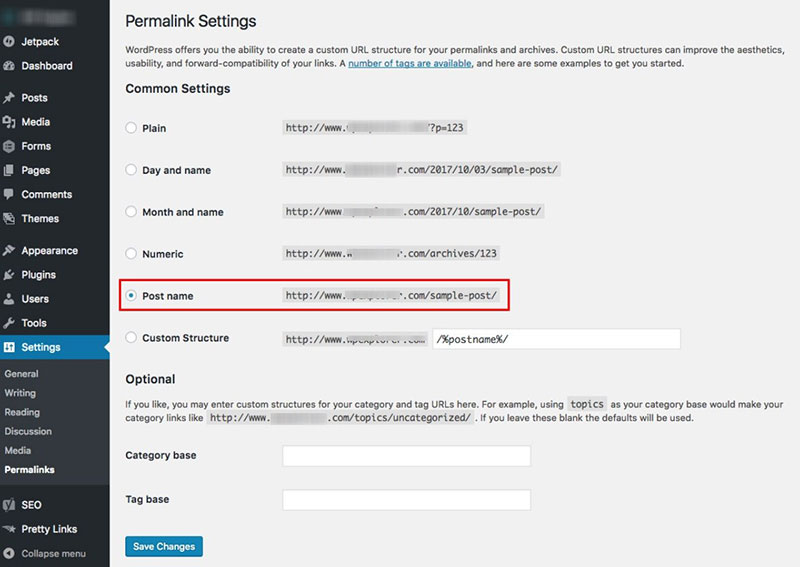
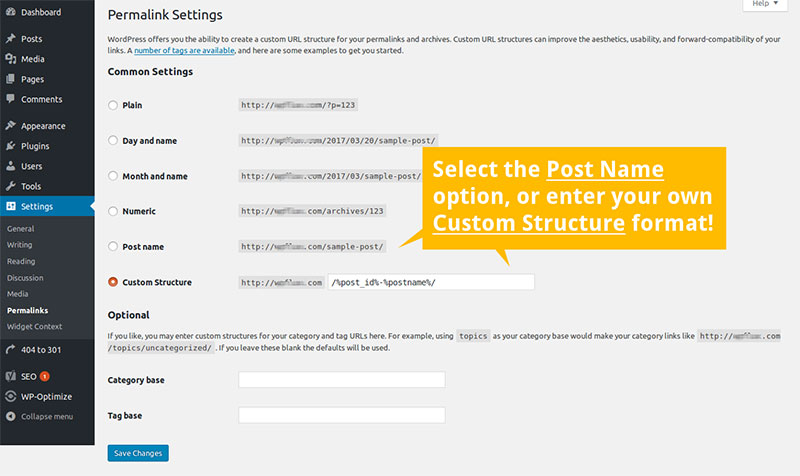
To change the permalinks, go to WordPress permalink settings. Search for the main settings menu of the WordPress admin area. The five custom permalink structures that WordPress exposes as common settings are visible. After installing WordPress, the Plain permalink structure is enabled by default.
The number in the default permalink tells WordPress where the content may be located in your database. To be more exact, the number corresponds to the ID of the table entry in your WordPress database’s table. If you modified the table prefix during the installation process, the number will be different.
Decide on a New Permalink Structure
It is important to know how to change permalinks in WordPress properly since this is a significant decision. You should not make any modifications unless you are very certain of your choice. The syntax of your new permalink structure is the first decision you must make. When selecting a new structure, you must create selections about what will be included in the link’s syntax. Do you want to mention something like a date?
If so, how much of it do you want to be displayed within the link? You can obtain some suggestions for your new structure from WordPress’s permalinks tutorial. In general, most users prefer the Post name option, while news-related sites may desire to include dates. In any case, after you’ve decided on your new structure, it’s time to update your permalinks.
It is important to know WordPress does not automatically choose an SEO-friendly permalink. All new WordPress blogs and websites should use SEO-friendly permalinks. However, if you already have a website that receives traffic from search engines, updating permalinks may have an impact on your SEO results.
Change Permalink Structure in WordPress
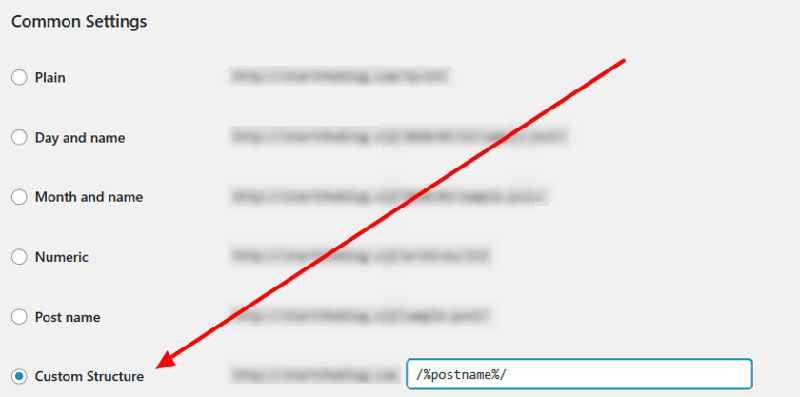
Once you’ve decided on the syntax, go to your dashboard’s Permalinks menu and make the necessary changes. Simply go to Settings > Permalinks in your WordPress back end and make your choice from the settings screen.
After you’ve made your choice or utilized tags to construct your own custom structure, click the ‘Save’ button. Your permalinks have been updated. Also, after this, all of your internal URLs will be updated with the new syntax.
Fix broken links
The simple step is to change the structure of your permalinks. But now you have to cope with the aftermath. Every reference to your previous links, whether inside your content or on third-party websites, is now broken. Another unintended consequence is that any text indexed by search engines is likewise wrong. There is an easy solution to this problem: put up redirects.
Setting up redirects on your website is a straightforward solution to this problem. A redirect effectively instructs each browser that arrives at your site using an outdated permalink-structured URL where to get the necessary information. It also informs search engines that the change is permanent. You should definitely additionally tweak your page to catch any broken internal or manual links that you discover.
Your text will be rewritten by QuillBot. Begin by writing or copying something here, and then push the button.
Using the Simple Redirects Plugin
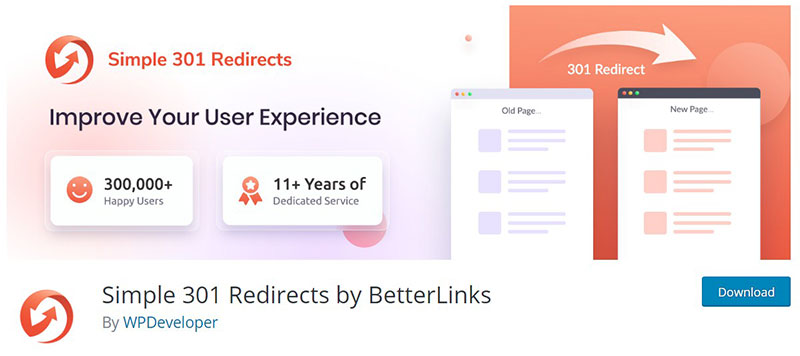
Simple Redirects plugins are one option for quickly creating redirects on your WordPress site. When you install and activate the plugin, it adds a new menu to your dashboard’s Settings section.
Simple redirect settings
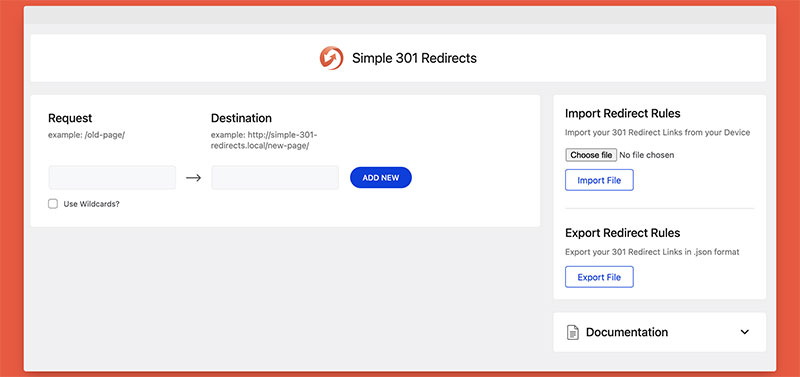
With these plugins, there isn’t much to be concerned about. One of the Redirects settings windows is named Request, while the other is titled Destination. This is essentially where you insert the old permalink structure and the new permalink structure. You simply need to fill in the details after your domain name in these fields.
The Request field specifies the WordPress configuration for the Month and Name permalink structures, whereas the Destination field specifies the WordPress configuration for the Post name permalink structure. Save your modifications once you’ve added these two fields. This will now direct any search engine traffic that comes into the old URLs to the correct location.
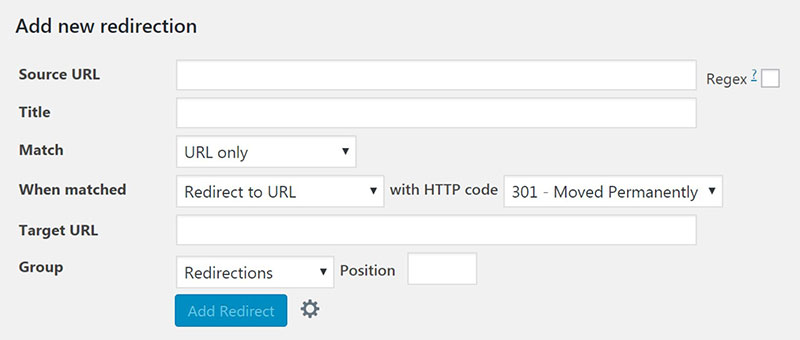
Using the Redirection Plugin

The free Redirection plugin is another suggested plugin for adding and managing redirects. To begin using Redirection, you must first install it in your WordPress dashboard. Then go to Tools > Redirections to point your site’s pages and posts to their new links. Simply input the old permalink in the Source URL area and the new permalink in the Target URL box, then click Save.
URL redirection
Permalinks are not intended to be modified. However, it is not always possible to maintain the URL of a web page the same. Fortunately, there is a simple solution to this dilemma. URL redirection guarantees that all efforts to find an old URL are redirected to the new location of the page. It’s similar to forwarding your mail once you move.
With the aid of numerous WordPress plugins such as Redirection, you can effortlessly set up page redirections. This utility uses redirects to automatically transfer internet visitors from an old URL to a new one. This ensures that no website traffic is lost as a result of a broken link.
Change the Slug for Individual Post or Page
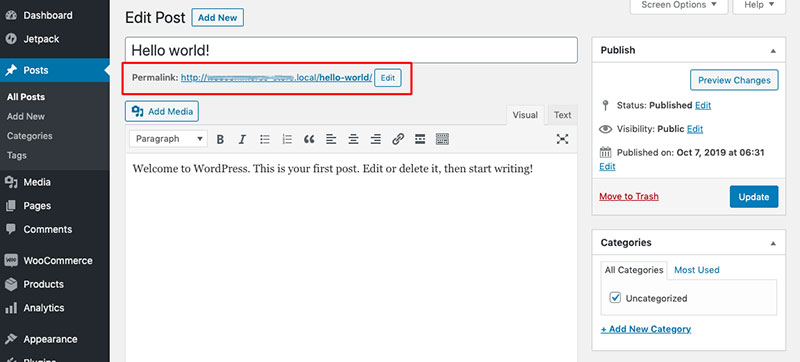
The technique for changing the URL slugs for individual articles and pages is likewise straightforward. Open the editor for the page or post on the back end of your website. Below the title area in the Classic Editor, you’ll see its Permalink. Simply select Edit, and then alter the URL’s end to anything you want.
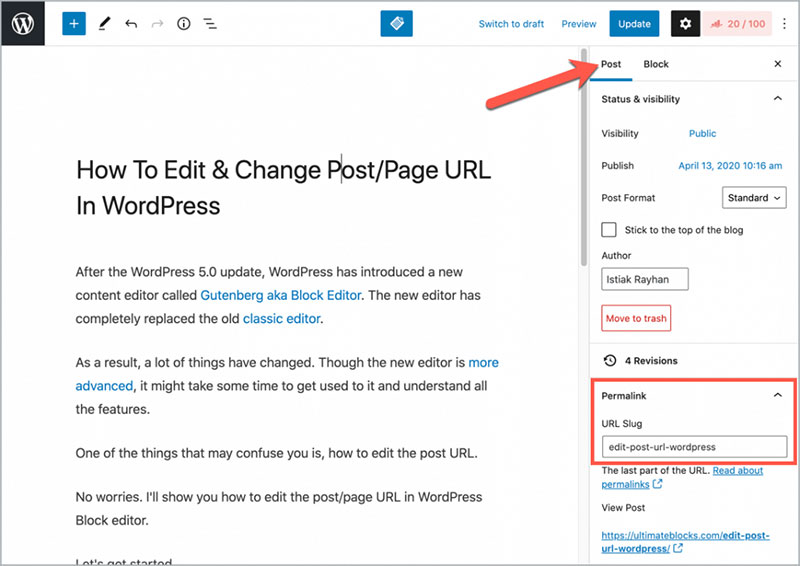
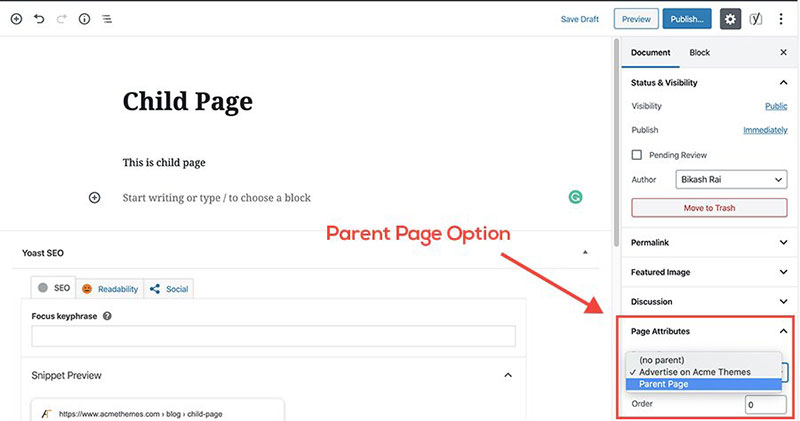
Make sure you’re in the Document tab in the right-hand sidebar of the Block Editor and then look for the Permalink section. You may modify the URL of your post or page before or after posting it, although it’s preferable not to modify it afterward unless absolutely essential. This may cause all future uses of the old URL to fail.
Parent/child pages
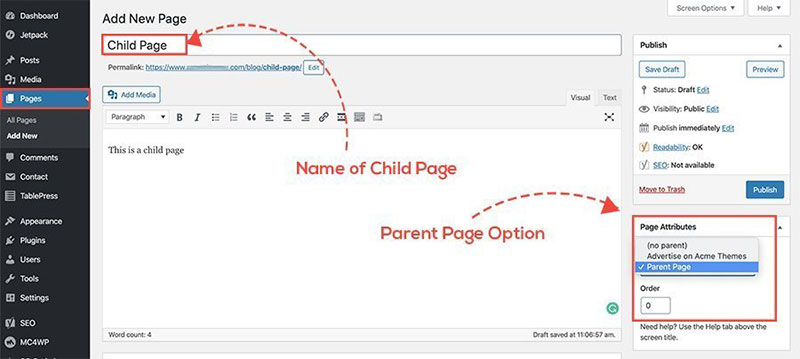
Parent/child pages are a whole other factor that might influence URL structure. These are pages on your website that adhere to a specific structure. For instance, when you visit a ‘regular’ or parent web page, the URL structure is the same. Yet, when you access a child page, there is an extra dimension to the URL structure. This is called a breadcrumb, and it assists your reader in fully understand if they’re on the page.
This is referred to as a breadcrumb, and it assists your reader in understanding where they are on your website as well as how to return to any earlier portions (such as the parent page).
While a WordPress plugin may be used to eliminate the parent-page aspect of the URL, it is recommended to leave it in place. This is for the advantage of both your users and search engines.
FAQ on WordPress permalinks
Can I Change Permalinks Without Affecting SEO?
Absolutely, changing permalinks can boost your SEO if done right. Use 301 redirects to guide old URLs to new ones, ensuring search engines and users don’t hit a dead end. Plugins like Yoast SEO can help automate this process, maintaining your site’s integrity.
Is It Safe to Change Permalinks on an Established Website?
Yes, but caution is crucial. Back up your site first. Update internal links to avoid broken paths. Test new URL structures on a staging site if possible. Using WordPress plugins to manage redirects can make this transition smoother.
How Do I Update Permalinks in WordPress?
Navigate to your WordPress Dashboard, go to Settings, then Permalinks. Choose your new structure or customize your own. Save changes. This updates your .htaccess file instantly. It’s a quick way to enhance your site’s URL hierarchy and SEO optimization.
What Are Custom Permalinks?
Custom permalinks let you create tailored URLs for specific posts or pages, enhancing both SEO and user experience. They appear more user-friendly and relevant, integrating keywords that naturally boost search engine queries.
Will Changing Permalinks Break My Links?
Yes, if you don’t manage the change correctly. Implement 301 redirects to keep traffic flowing smoothly. This ensures search engines and visitors are gracefully redirected to the updated URL, safeguarding web traffic and search engine rankings.
Can I Change Permalinks Without Coding?
Absolutely. WordPress makes it beginner-friendly. Go to Settings > Permalinks to adjust the URL structure. Use plugins like Yoast SEO or Redirection for managing any complex routing, ensuring your site’s seamless transition.
Why Should I Consider Changing My Permalinks?
Updating permalinks can lead to a more user-friendly URL structure, improved SEO optimization, and better site navigation. Clear, concise URLs enhance both user experience and search engine discovery, making your content easier to find and understand.
What’s the Best Permalink Structure for SEO?
The ideal structure often includes the post name and relevant keywords. This makes the URL both SEO-friendly and intuitive for users. In the WordPress dashboard, opt for the Post name option or create a custom path reflective of your content.
Do I Need a Plugin to Change Permalinks?
Not always, but plugins can streamline the process. Yoast SEO, for instance, offers redirect management, preventing broken links. For extensive site changes, plugins simplify multiple URL updates and ensure compatibility with the WordPress CMS.
What Happens to My Old URLs After Changing Permalinks?
Old URLs will lead to a 404 error unless you set up 301 redirects. This tells search engines and users where the new content resides. Ensure all internal links update accordingly to maintain a seamless web traffic flow and user-friendly experience.
Conclusion
Mastering how to change permalinks in WordPress can elevate your site’s SEO and enhance user experience. By tailoring your URL structure, you make your content more accessible and engaging for users and search engines alike.
To wrap it up:
- Navigate to Settings: Your go-to for updating permalinks.
- Implement 301 Redirects: Crucial to maintain web traffic and avoid broken links.
- Leverage SEO Plugins: Plugins like Yoast SEO streamline the process.
Changing permalinks isn’t just a tactical move; it’s strategic. Better URL structures lead to improved search engine rankings and a more user-friendly site. Be meticulous: test changes, update internal links, and monitor your traffic.
Your site deserves a seamless navigation experience, both for visitors and search engines. Use WordPress tools wisely, and watch your site’s engagement soar.
Now, armed with this knowledge, go ahead and transform your site’s URLs. The benefits are tangible, immediate, and rewarding. Let’s make those links work for you!
If you enjoyed reading this article on how to change permalink in WordPress, you should check out this one about how to make a phone number clickable in WordPress.
We also wrote about a few related subjects like how to serve scaled images in WordPress, how to embed a Facebook video in WordPress, how to delete WordPress themes, how to scan the WordPress database for malware, how to upload an HTML file in WordPress, how to do a WordPress database cleanup, how to find and replace an URL in a WordPress database and how to hide the author in WordPress