Picture this: A customer clicks that final “purchase” button, and then… they’re staring at a bland screen that shouts “Transaction Complete.” Anticlimactic, right? That’s exactly why the WooCommerce redirect after checkout is more than a tiny tweak—it’s a game-changer.
Let’s dive into a world where creating a seamless post-purchase redirect isn’t just about shuffling folks on to the next page. It’s about crafting a journey that raises eyebrows—in a good way.
You’re about to arm yourself with the know-how to send customers off with a high five, directing them to a custom thank you page or maybe even some specially-curated content.
We’re not just optimizing a checkout flow here. We’re elevating the customer experience, turning one-time buyers into loyal fans.
By the end of this read, you’ll have the blueprint to harness those crucial moments after a sale. Get ready to explore checkout confirmation pages, custom redirect plugins, and the savvy use of WooCommerce hooks.
This article created by our team at wpDataTables will guide you on how to implement the WooCommerce user redirect to a custom page after checkout.
Table of Contents
The WooCommerce Redirect After Checkout Code Snippet
The code snippet below allows for the redirect to a custom page after the user has completed a purchase when using the Subscription add-on plugin. Simply add the snippet to the active child theme function.php and replace the URL in the function wo_redirect() to the appropriate page.
This snippet is frequently used when website owners want to show customers a welcome page after checkout. Welcome pages are great ways to educate customers, upsell a product, and canvas for referrals.
add_action( 'woocommerce_thankyou', 'bbloomer_redirectcustom');
function bbloomer_redirectcustom( $order_id ){
    $order = wc_get_order( $order_id );
    $url = 'https://yoursite.com/custom-url';
    if ( ! $order->has_status( 'failed' ) ) {
        wp_safe_redirect( $url );
        exit;
    }
}
Hey, did you know data can be beautiful too?
wpDataTables can make it that way. There’s a good reason why it’s the #1 WordPress product table plugin for creating responsive tables and charts.
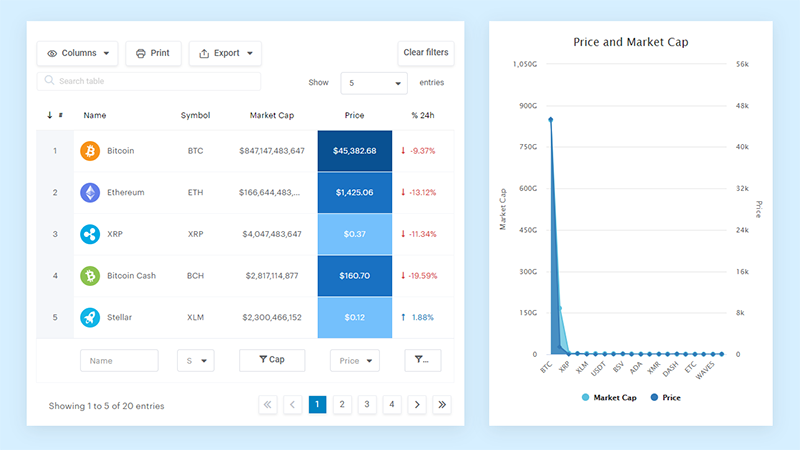
And it’s really easy to do something like this:
- You provide the table data
- Configure and customize it
- Publish it in a post or page
And it’s not just pretty, but also practical. You can make large tables with up to millions of rows, or you can use advanced filters and search, or you can go wild and make it editable.
“Yeah, but I just like Excel too much and there’s nothing like that on websites”. Yeah, there is. You can use conditional formatting like in Excel or Google Sheets.
Did I tell you you can create charts too with your data? And that’s only a small part. There are lots of other features for you.
Setting Up a WooCommerce Thank You Page, by Overwriting WooCommerce Templates
To redirect the user after an order has been placed, you need to use the template redirect hook and a callback function with the redirect URL. In a quick summary here are the necessary steps:
First, it is good practice to check if the user is on the checkout page, order page, or on the order received page before you create the custom redirect after checkout.
Redirecting customers to a custom page automatically after the order is placed needs the template_redirect() function.
Add the template_redirect action hook for example
-? add_action('template_redirect', 'your_callback_function');
Create the callback function you referenced in the template redirect hook above, noting that the name in the call back function and the hook should match.
In the callback function, use the wp_redirect() function to add the page where you want the user to be redirected after successful checkout. Always add an exit after the wp_redirect function to avoid redirect problems.
This code is added to your functions.php file in the theme. Locate that file and open it in the editor to add this action hook for WooCommerce redirect after checkout.
Save the changes or update your theme functions.php or the plugin file and you will have successfully created the redirect to the preferred page after WooCommerce checkout.
Customizing The WooCommerce Thank You Page with Filters
Let’s start customizing the WooCommerce Thank You page with a few quick code changes.
Changing the Thank You Page Title
Instead of creating a custom ‘Thank You’ page, you might just want to change the title of the page.
You can add the below snippet with a plugin or in the theme’s functions.php file.
<?php
add_filter( ‘the_title’, ‘woo_title_order_received’, 10, 2 );
function woo_title_order_received( $title, $id ) {
if ( function_exists( ‘is_order_received_page’ ) &&
is_order_received_page() && get_the_ID() === $id ) {
$title = “Thank you for your order! :)”;
}
return $title;
}
WooCommerce provides the function is_order_received_page() in includes/wc-conditional-functions.php file.
Personalize the Title
You can enhance your website by personalizing the ‘Thank You’ page title to include details like the customer’s name or welcoming them in their native language.
You can add the below code with a plugin or in your theme’s functions.php:
<?php
 add_filter( 'the_title', 'woo_personalize_order_received_title', 10, 2 );
function woo_personalize_order_received_title( $title, $id ) {
    if ( is_order_received_page() && get_the_ID() === $id ) {
                global $wp;
         // Get the order. Line 9 to 17 are present in order_received() in includes/shortcodes/class-wc-shortcode-checkout.php file
        $order_id  = apply_filters( 'woocommerce_thankyou_order_id', absint( $wp->query_vars['order-received'] ) );
        $order_key = apply_filters( 'woocommerce_thankyou_order_key', empty( $_GET['key'] ) ? '' : wc_clean( $_GET['key'] ) );
        if ( $order_id > 0 ) {
            $order = wc_get_order( $order_id );
            if ( $order->get_order_key() != $order_key ) {
                $order = false;
            }
        }

        if ( isset ( $order ) ) {
            //$title = sprintf( "You are awesome, %s!", esc_html( $order->billing_first_name ) ); // use this for WooCommerce versions older then v2.7
                $title = sprintf( "You are awesome, %s!", esc_html( $order->get_billing_first_name() ) );
        }
    }
    return $title;
}
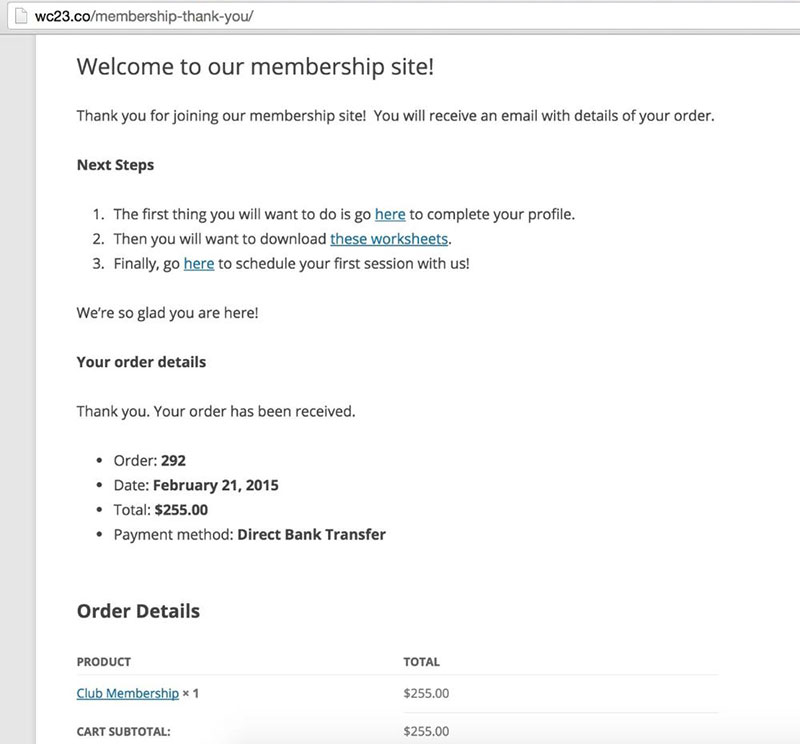
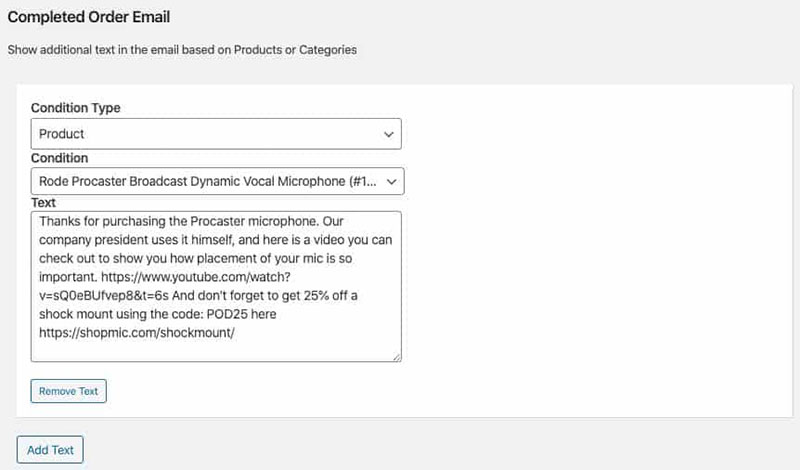
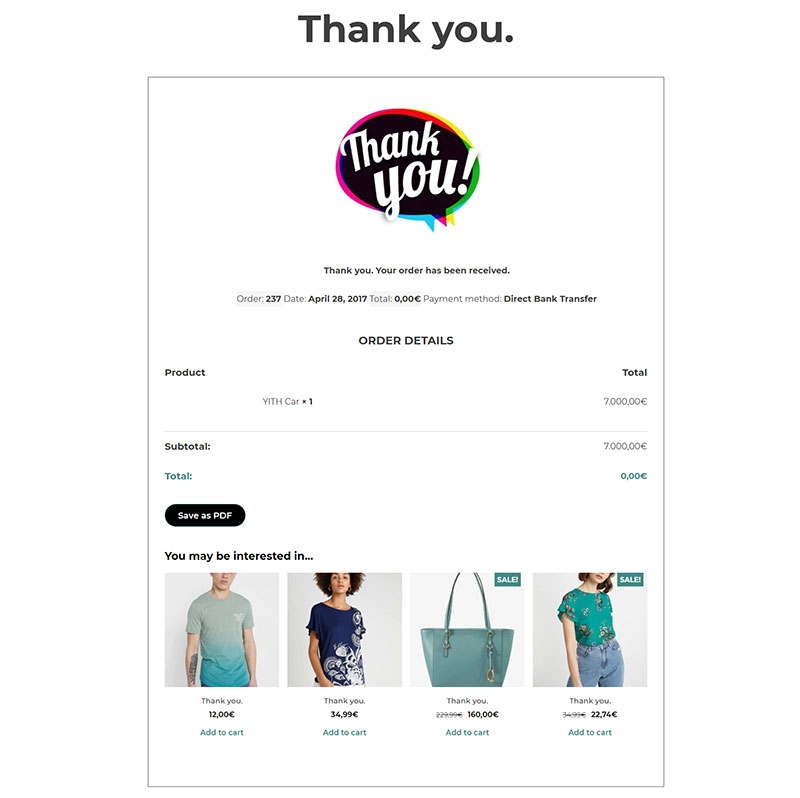
Changing the Text Before Order Information
The filters available in WooCommerce allow you to change the text shown on the ‘Thank You’ page. The default text that is shown before the order information is “Thank you. Your order has been received.”.
This text comes from the file templates/checkout/thankyou.php. The filter available to change this text is: woocommerce_thankyou_order_received_text
<?php
add_filter(‘woocommerce_thankyou_order_received_text’, ‘woo_change_order_received_text’, 10, 2 );
function woo_change_order_received_text( $str, $order ) {
$new_str = $str . ‘ We have emailed the purchase receipt to you.’;
return $new_str;
}
The above code will append the text “We have emailed the purchase receipt to you.” to the existing text.
If you want to overwrite the text completely, you simply need to avoid chaining together the $str variable to your message variable $new_str.
$new = ‘We have emailed the purchase receipt to you.’;
If you want the customer to download a form, this is when the instructions can be added.
<?php
add_filter(‘woocommerce_thankyou_order_received_text’, ‘woo_change_order_received_text’, 10, 2 );
function woo_change_order_received_text( $str, $order ) {
$new_str = ‘We have emailed the purchase receipt to you. Please make sure to fill <a href=”http://localhost:8888/some-form.pdf”>this form</a> before attending the event’;
return $new_str;
}
👉 Learn how you can solve common WooCommerce product table challenges and manage and present your product data with ease with wpDataTables.
I Don’t Code – Is There a Trustworthy Plugin for That?
Writing code is a skill but these plugins can be used to achieve the same result.
This example is for the WooCommerce Redirect Thank You plugin.
Installing the Plugin
After installing the WooCommerce Redirect Thank You plugin, you can create your ‘thank you’ pages. You may want to set up a general thank you page appropriate for global usage, or you can design pages to showcase specific products.
This allows for cross-selling, up-selling, discounts, or coupons, all of which could promote future sales. In the ‘Thank You’ coding example shown above an up-sell with a coupon offer has been implemented using a WooCommerce block.
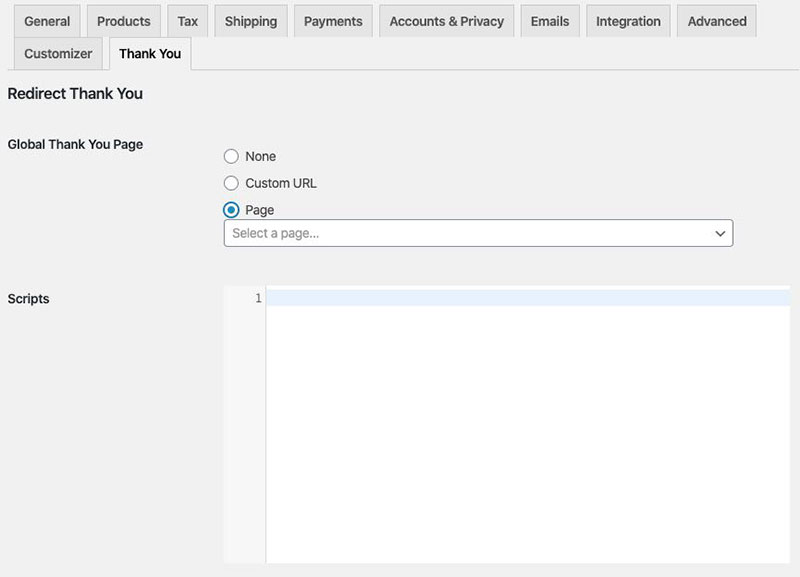
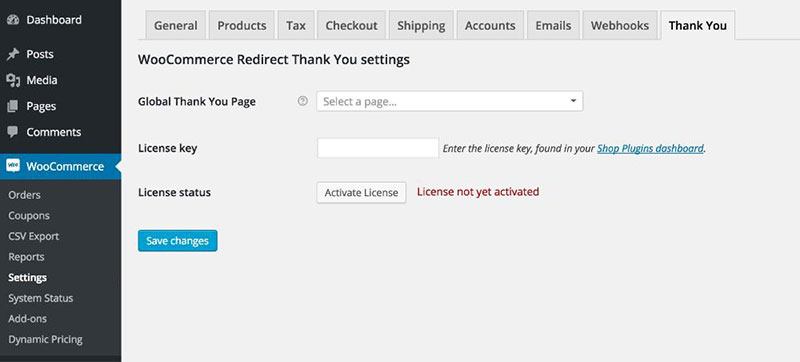
In the WordPress dashboard, hover over WooCommerce and click on Settings, next select the ‘Thank You’ tab.
(Optional) If you want to set a global ‘Thank You’ page that customers will be sent to on order completion, you can set that page with this setting. This option overrides the WooCommerce order completed page setting.
In the license key field, add the license key sent in the order confirmation email. This will activate notifications of new versions of the plugin and allow automatic updates from your WordPress dashboard.
Other Plugins
YITH Custom Thank You Page for WooCommerce
Boxy WooCommerce custom redirect after checkout

FAQ on WooCommerce redirect after checkout
How do I set up a WooCommerce redirect after checkout?
Well, you dive into your WooCommerce settings, straight to the ‘Advanced’ section. Here, add your preferred URL to the ‘Checkout’ page settings. It’s like telling your customers, “Hey, there’s more to see!”—sending them to a custom thank you page or wherever your business heart desires.
Can I redirect customers to a different page based on the product purchased?
Absolutely! With the right snippet of PHP code, using those nifty WooCommerce hooks, you can play traffic controller. Guide your customers to specific landing pages that resonate with the product they’ve just snagged. It’s a slick way to personalize their journey.
Is there a plugin to help with post-checkout redirects in WooCommerce?
Oh yeah, there’s a plugin for that. Actually, there’s more than one! You want to look for a custom redirect plugin that caters specifically to WooCommerce. Install it, tweak a few settings, and voilà—you’re crafting post-sale magic.
How does redirecting users after checkout improve customer experience?
Imagine you’ve just bought something online. It’s nicer to see a page that says, “Thanks, let’s keep this party going,” rather than a dead-end, right? That’s how you turn a one-time buy into a “let me bookmark this store” moment.
Will my redirects affect WooCommerce’s order confirmation emails?
Fear not, your emails will sail through, unaffected. We’re talking about customer-facing pages here, not the behind-the-scenes mechanics of WooCommerce’s email system. Your customers will get their confirmations just fine—smooth as silk.
Is it possible to redirect to an external URL after WooCommerce checkout?
You bet. But hey, let’s keep it relevant. Whether it’s an affiliate page or a survey, external doesn’t mean “out of context.” Keep it tied neatly to your customer’s purchase, and the external URL will feel like a natural next step.
Can I track the success of my WooCommerce checkout redirects?
Tracking is like keeping an eye on breadcrumbs; you wanna know where they lead. Use tools like Google Analytics for this tracking extravaganza. Set up a goal for your redirect URL—it’ll tell you a story in numbers about your customers’ post-checkout adventures.
Does redirecting customers after checkout affect my store’s SEO?
Nah, quite the opposite. Done right, SEO entities such as a well-thought-out “Thank You” page can even boost your online presence. It’s all content, amigo, and content is king in the land of SEO.
How can I test if my WooCommerce redirects are working without disturbing my customers?
Testing? It’s a backstage pass. Set up a staging environment or use a plugin that allows for safe testing. No customer ever needs to see the wizard behind the curtain pulling the levers and turning the dials.
What’s the best way to create a WooCommerce redirect after checkout for a multilingual site?
Hold onto your translator’s hat. You’ll want a redirect setup that’s language-aware. Consider plugins that play nice with language tools or bring in dynamic redirects based on the language your customer is using. Happy customers, no matter the tongue they speak.
Conclusion
Crafting that WooCommerce redirect after checkout, it’s kind of like the final note in a symphony, isn’t it? The crescendo that leaves shoppers with just the right impression. We’ve navigated the twists and turns of custom thank you pages, skimmed over the cool waters of seamless customer experiences, and we’ve danced with PHP snippets under the pale moonlight of WooCommerce hooks.
And as the curtains draw to a close, what’s the takeaway? Well, it’s that the path customers tread post-checkout is as crucial as the path they take to get there. Redirects—they’re the secret handshake between your store and a shopper’s curiosity. It’s not just about waving goodbye but more about guiding ’em to a place where they feel… appreciated, yeah?
So, let’s recap this custom redirect after purchase jam session. Keep it relevant. Keep it personal. And let each redirect URL be a step further into your brand’s embrace. As for you? You’re now the maestro of post-checkout redirects. Let that baton lead the way.
If you enjoyed reading this article on WooCommerce redirect after checkout, you should check out this one about how to set WooCommerce related products.
We also wrote about a few related subjects like how to set up WooCommerce test mode, WooCommerce grouped product, WooCommerce variable product, WooCommerce appointments plugins, WooCommerce product variations, how to export WooCommerce orders, how to change the WooCommerce number of products per page, WooCommerce hide the category from shop page and the best WooCommerce extra product options.