Table of Contents
Video tutorial
Example of table based on JSON
The JSON (JavaScript Object Notation) format was first introduced as a simple way to serialize and stringify objects or arrays for use in JavaScript snippets. JSON eventually proved to be so convenient, that it became wide-spread, and used as a standard for various web services. Many online platforms can return data in this format, and it is easy to generate it manually in most programming languages used in the web. wpDataTables also supports the JSON format as an input data source.
In this example, we will use a sample JSON file with data for 100 imaginary employees. You can download this file for re-use via this link.
Let’s view the table first, and then go through the step-by-step tutorial on how to create it.
By default, this format will work only up to a certain limit (no exact limit, but 3.000 – 5.000 cells is a good example). If you have a larger file, the page load time will increase. However, with the new caching option that was implemented in wpDataTables 5.0, this issue is resolved for large tables linked to an existing data source.
Instructions to create the table
You first need to prepare the JSON data source. Make sure to follow these three simple rules:
1. The data set should not be empty; it should contain at least 1-2 rows.
2. The returned JSON should exactly follow the format highlighted above: an array of objects with the same set of fields, where each object would be parsed as a row, and each object field as a cell.
3. The JSON should be available via an URL that wpDataTables can access.
In this example, we will use a sample JSON data set available through this link. You can copy and paste it to your new wpDataTable to follow the steps of this tutorial.
Create a wpDataTable and paste the URL of your JSON data source
Now, we need to create a wpDataTable based on the JSON data source that we prepared.

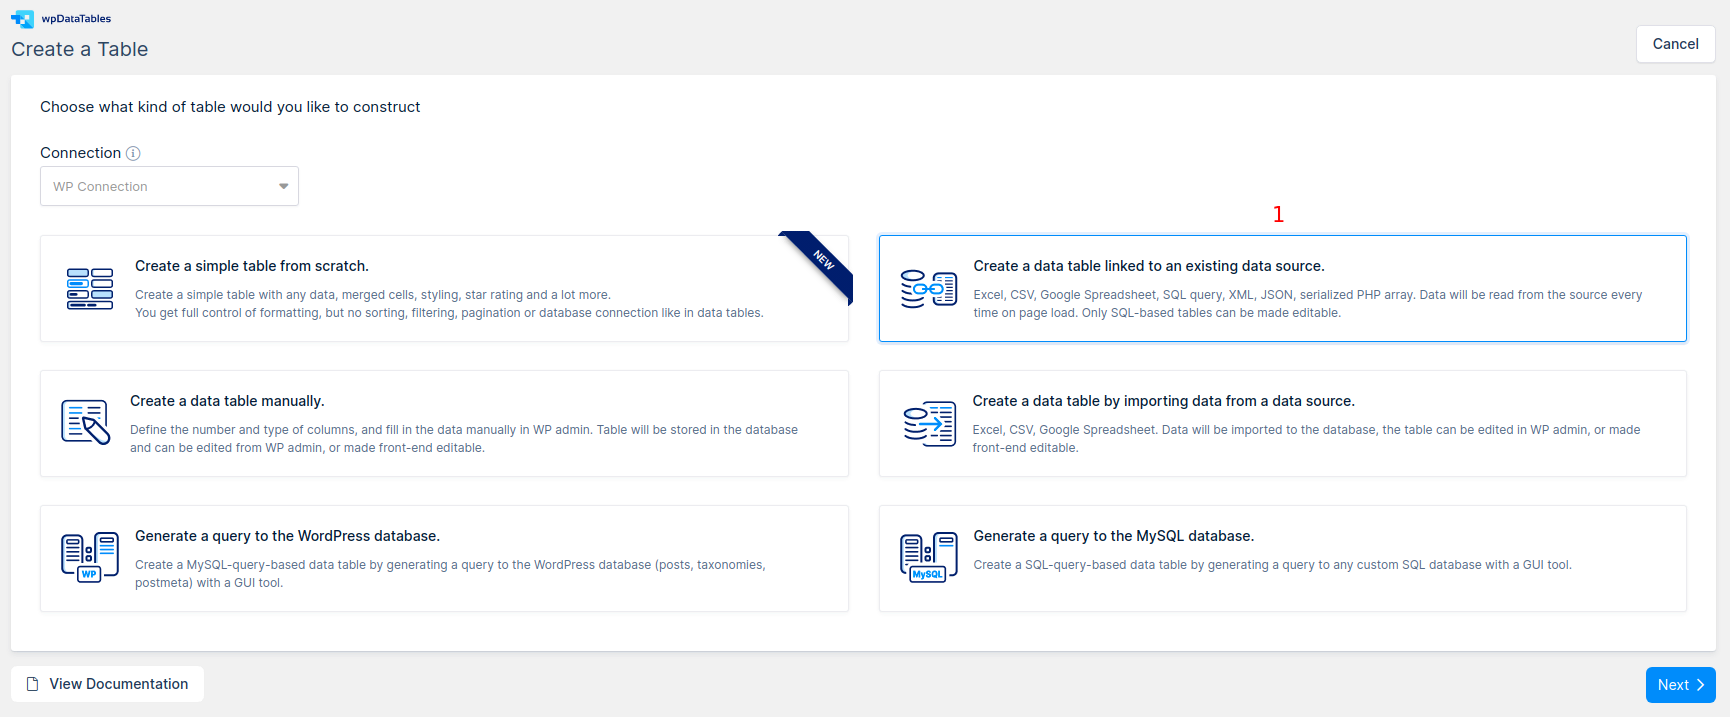
1. Go to wpDataTables -> Create a Table and choose the option Create a data table linked to an existing data source.

2. Provide a name for the new wpDataTable in wpDataTable name input to help you identify it.
3. Choose the JSON file option in the Input data source type select box.
4. Paste the URL of your JSON data set to the Input file or URL input field.
5. Press Save Changes. wpDataTables will read the table data and initialize the column metadata from the provided URL so you can get the live preview for the table.
Define additional settings for the table and columns (Optional)
Your wpDataTable has now been created and is ready to be used, but you might want to define some additional settings for the table in general or some of its columns.
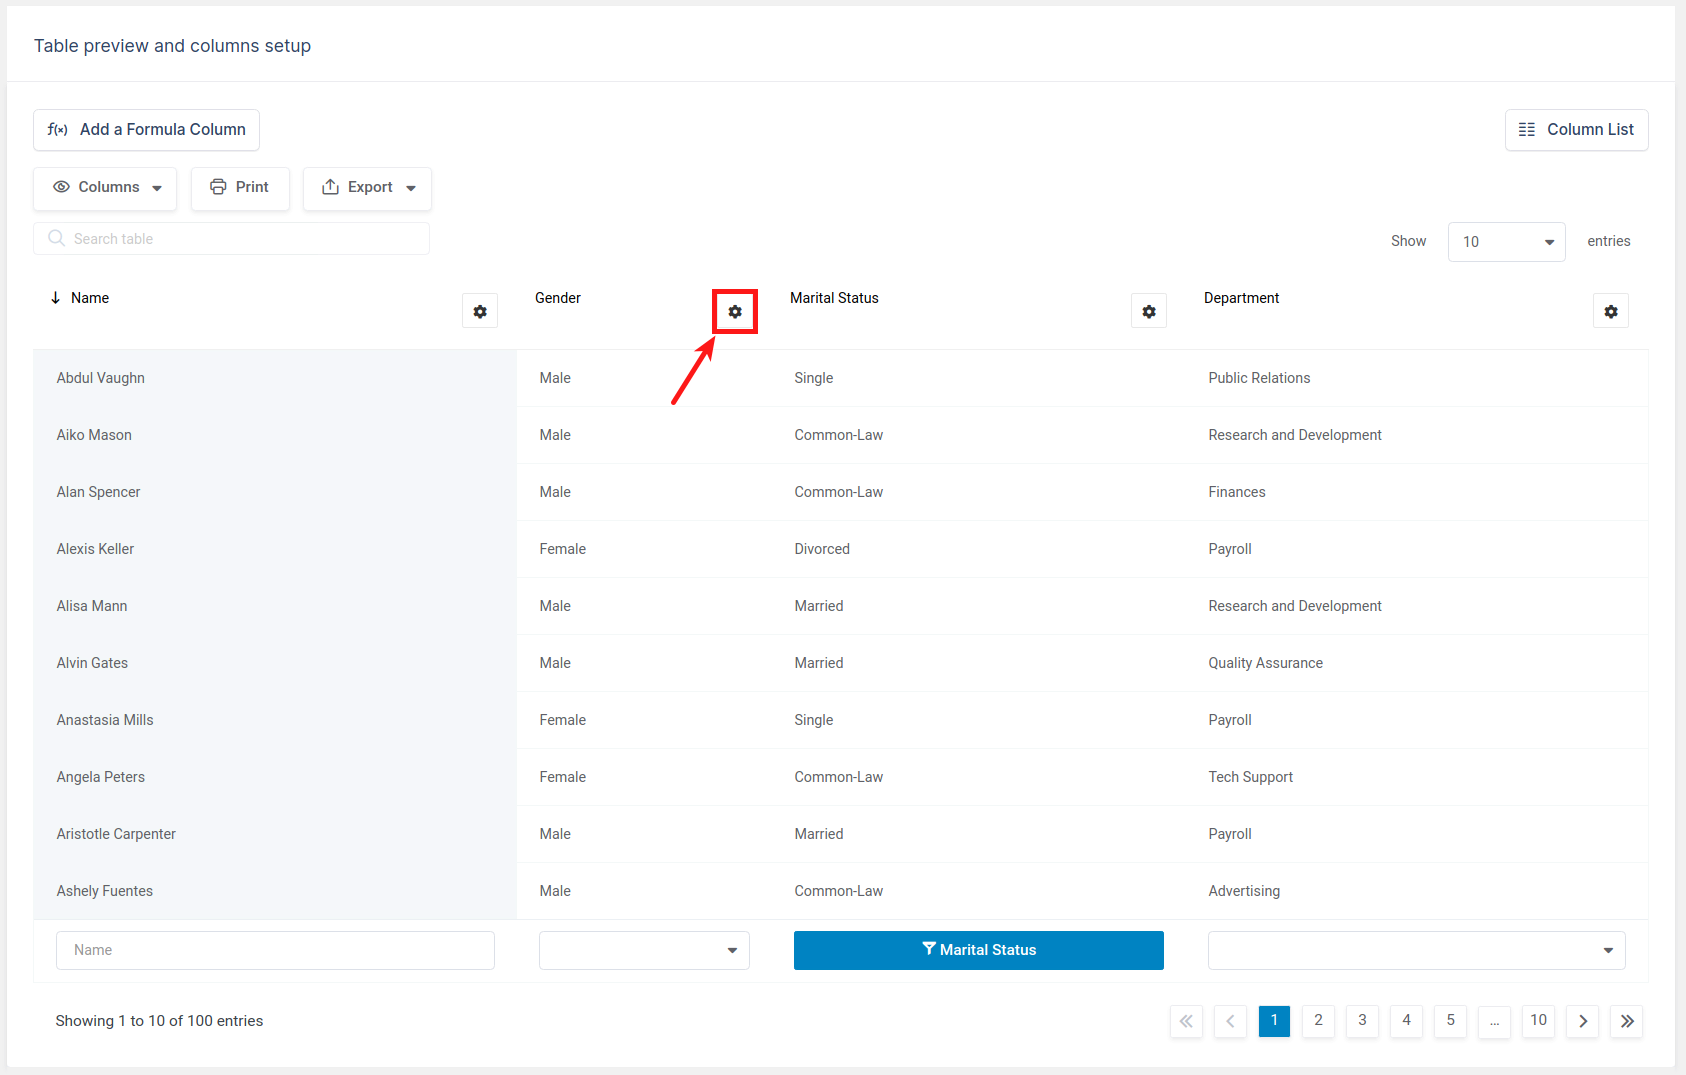
To achieve that you will need to open Column settings. Let’s say, as an example, that we want to change the filter type for the Gender column.
There are 2 ways to do that:
1. By clicking on the Column settings button

2. Or by clicking on the “Column list” button on top of the table.
In this dialog, you can quickly rename, reorder, or toggle visibility for columns, turn on/off sorting, filtering or a global search for columns.

Now you can click on the Filtering tab and for the filter type select the Select box for Gender column.

Insert the wpDataTable in WordPress Post or Page

When all the preparations are finished, and the configuration is done, you just need to insert the table to your post or page.
1. Open or create a new post or page.
2. Put the cursor in the position where you wish to place the wpDataTable.
3. Click the “Insert wpDataTable” button in the editor.
4. Locate the wpDataTable that you created in steps 1-3 and click OK.
5. Save the post or page and open it in the front-end to see the result.
As an alternative, you can paste the generated wpDataTable shortcode manually.
If you are using Gutenberg editor, Elementor, or WPBakery page builder, you can check out the section for Adding wpDataTables shortcodes on the page.
Read more
- Creating non-editable wpDataTables based on Google Spreadsheets
- Creating non-editable wpDataTables based on CSV files
- Creating wpDataTables based on MySQL queries
- Creating editable wpDataTables manually
- Creating non-editable wpDataTables based on XML feeds
- Creating non-editable wpDataTables based on serialized PHP arrays
