
Back to school sale! Save up to 50%
Grab Yours

How to create editable tables manually in WP Admin

Creating tables manually

One of most common uses of wpDataTables is to create tables, and fill them with data taken from the WordPress admin panel, without accessing or having any pre-existing data source available (Excel, CSV, Google Spreadsheet, MySQL DB, etc.). The editable table you create will be stored in MySQL, and you will be able to edit it at an any later time, or make it available for editing from the front-end.

We’ll go through the table creation process together, and explain all the available options as we proceed.

To start creating a table manually, open your WordPress admin panel, go to wpDataTables -> Create a Table, choose the second option “Create a table manually”, and click “Next“:

Configure table structure

You will be shown the wizard step that will assist you to create the table structure (Note: if during any step, you notice that you’ve made a mistake, click “Previous” and go back):

Going through the elements in detail:

  1. Table name input – here you can define a table name that will enable you to identify this table among any other wpDataTables. This table name can be redefined at any later time.
  2. Number of columns input – provide the number of columns that your table will have (e.g. enter 10, if you plan to have 10 columns). Another option you can use to change the column numbers is to add them with the + button (element #9) or remove them with the X button (element #8). You can always add or remove columns later, after the table has been created.
  3. Column block – column blocks represent columns of your future table; one block stands for one column.
  4. Column header – with this input, you define the header that will identify the column; it will be visible in the frontend.
  5. Column type – this input defines the data type of the column, the filter type for the column, and the editor input type.
  6. Editor predefined value. This is an optional input, that allows you to define a default value of the column which will be pre-filled in the editor inputs, and in the filter inputs (this can be disabled). If the column type is One-line selectbox, or Multi-line selectbox, and some possible values are defined (see point #7), this input will become a dropdown of the possible values.
  7. Possible values. This is a “taggable” input, which appears only for One-line selectbox and Multi-line selectbox types. Here you can define all the possible values, separating them with a comma.
  8. “X” / Remove column block button. This button removes a column block. Using it can be more convenient than changing the column number with an input.
  9. Add column button. This button adds one more column block.
  10. Create the table. This is a dropdown button with options to choose an editor type. After choosing one, it creates the table on the MySQL side, creates a wpDataTable, and opens the chosen editor type, from which you can start editing the table data.

Column type options:

  • One-line string. This is the most “simple” text type. It is suitable for short strings. The generated column will have a “string” (“text”) data type, a one-line text input filter type, and a one-line text input editor input type in the editor.
  • Multi-line string. This text type option is suitable for longer strings. The generated column will have a string data type, a one-line text input filter type, and a multi-line editor (“memo”) input type.
  • One-line selectbox. This option is for columns, in which cells can have one of several possible options as a value (e.g. colors: “red”, “green”, “blue”). The generated column will have a string data type, a select box filter, and a select box editor input.
  • Multi-line selectbox. This option is for columns, in which cells can have several of possible options as a value at one time (e.g. purchased modules: module 1, module 2, module 3). The generated columns will have a string data type, a select box filter, and a multi-selectbox editor input.
  • Integer. This option is for integer numeric columns. The generated column will have an integer data type, a number filter, and a text/numeric editor input.
  • Float. This option is for float numeric columns. The generated column will have a float data type, a number filter, and a masked text/numeric editor input.
  • Date. This option is for date columns. The generated columns will have a date data type, a date range filter, and a datepicker editor input.
  • DateTime.  This option is for DateTime columns, when both the date and the time is necessary. The column will have a DateTime data type, a DateTime range filter, and a DateTime editor input.
  • Time. This option is for having the time stored in the column in either a 12H or 24H format. The column will have a Time data type, a Time range filter and a Time editor input.
  • URL link. This option is for URL link columns. The generated columns will have a URL link data type, a text filter, and a text editor input with URL validation.
  • E-mail link. This option is for E-mail columns. The generated columns will have an e-mail link data type, a text filter, and a text editor input type with E-mail address validation.
  • Image. This option is for image columns. The generated columns will have an Image data type, no filter, and a text editor input.
  • Attachment. This option is for attachment columns. The generated columns will have a “URL link data type”, no filter, an a “Browse media library” input to attach files.

Configuring an example table

Let’s configure an example table and fill it in with some data.

We use this configuration for columns (a dummy clients table):
  1. Company name, type: a one-line string
  2. Sector, type: a one-line selectbox, possible values are: “Architecture, Business Consulting, Construction, Technology, IT”
  3. Yearly revenue, type: float
  4. Client since, type: date

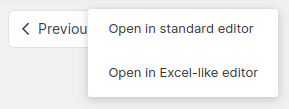
When you have finished configuring the table, click “Create the table”. A dropdown will open with options to open the table in a standard editor or an Excel-like editor.

You can dynamically filter or edit the table by using placeholders as predefined filtering values or predefined editing values.

Inserting table on post or page

wpDataTable shortcode

If you have an older version of WordPress (prior to WordPress 5), you will have this editor by default, but if you updated your website to WordPress 5+, you can still use this editor with the help of the Classic Editor Plugin.

Once you’ve filled in some values in the table, the procedure of inserting it in your post or page is simple. Open (or create a new) post or page, place the cursor in the position where you would like to insert the table, click the “Insert a wpDataTable” button in the editor, and locate the newly-created table.

Another option is to copy&paste the table shortcode manually (you can see it in the back-end editor).

If you are using Gutenberg editor, Elementor, or WPBakery page builder, you can check out the section for Adding wpDataTables shortcodes on the page.

That’s it! Not complicated at all!

BUT FIRST!

Subscribe to our Newsletter

Be the first to learn about updates and new features. Once you have provided your email address, the download will commence shortly


By continuing, I accept Privacy Policy and T&C
Mail Box