

Table of Contents
In order to use the Google Charts Geo Charts, you first need to configure a new project and a new app on Google’s Cloud Console. You can access this console by clicking here.
In the top left, either select an existing project from the list or create a new project. Start by clicking on the section highlighted in the screenshot below (please note that the “Google API” is the name of the project, so on your end, it can say anything).
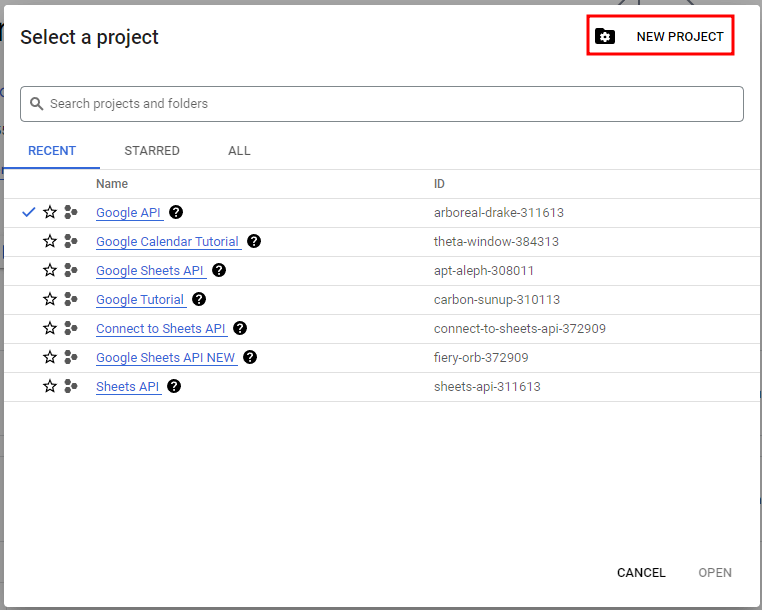
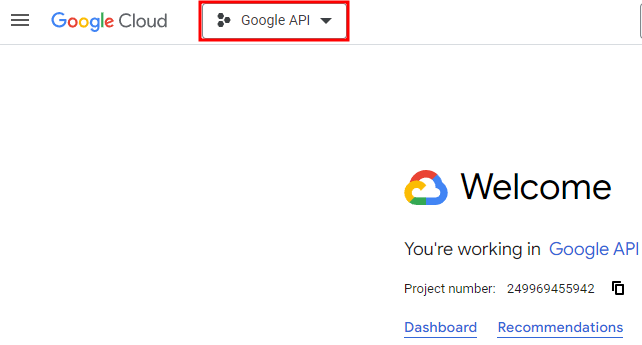
If you’re selecting one of the existing projects, simply select it from the list that appears in the popup window, and if you’re creating a new project, click on the “NEW PROJECT” option in the top right corner of the popup.
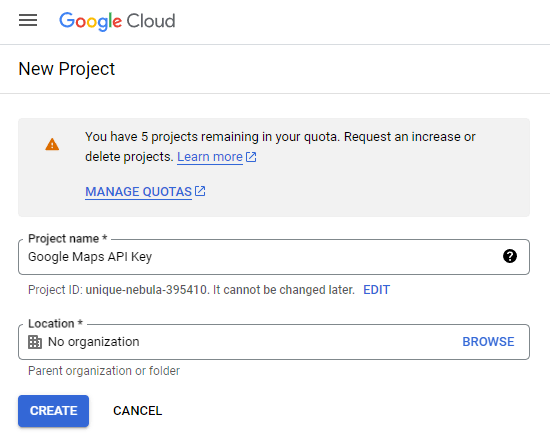
In this tutorial, we’ll be creating a new project. On the next window, define the name of the project (for example “Google Maps API Key”) and choose the location.
If you’re logged in with your company’s account (G-Suite), in the Location section select your organization and if you’re logged in with a personal account, select “No Organization”.
After selecting the location, click on “CREATE”.
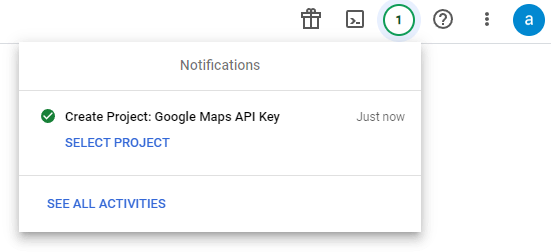
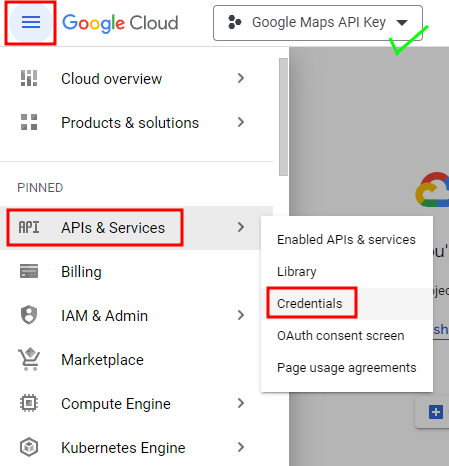
Verify that the correct project is selected and then click on the burger menu in the top left corner.
From the menu, select APIs & Services -> Credentials:
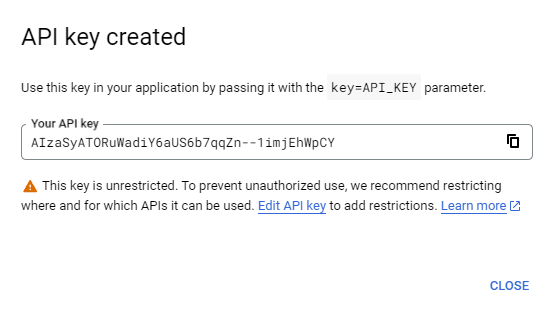
The key is automatically created in a popup window and at this time you can copy it in Notepad and close the popup.
Once you create a project, you’ll see it loading in the top right corner of the screen. As soon as the project is created, you can click on the “SELECT PROJECT” button to select the project.
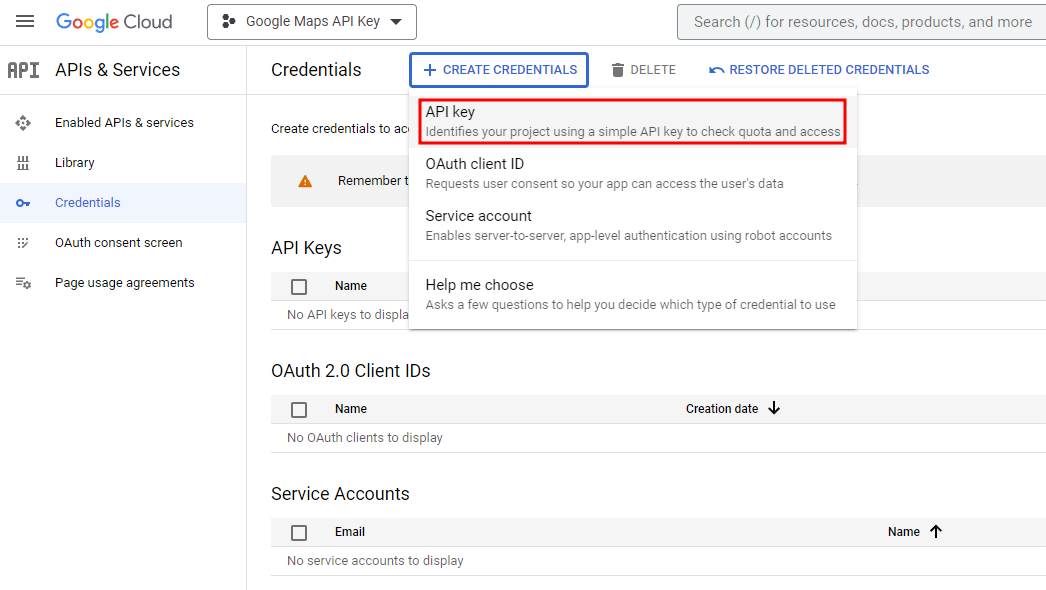
At the top, click on “+ CREATE CREDENTIALS” and select the “API Key” option from the drop-down menu.
With the API Key created, we can now access the Library of Google Cloud Console and enable the necessary APIs.
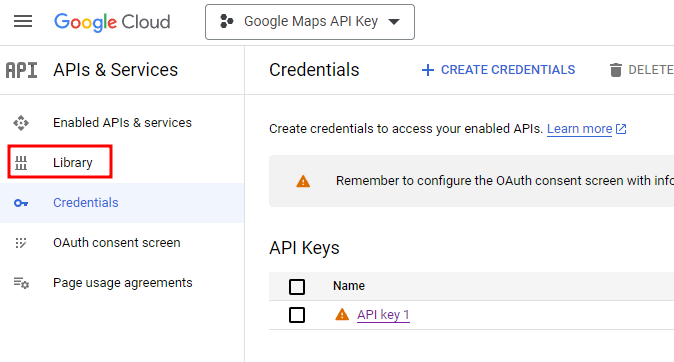
You should still see the APIs & Services page, where the API Key is, so on the left-hand side menu, click on Library.
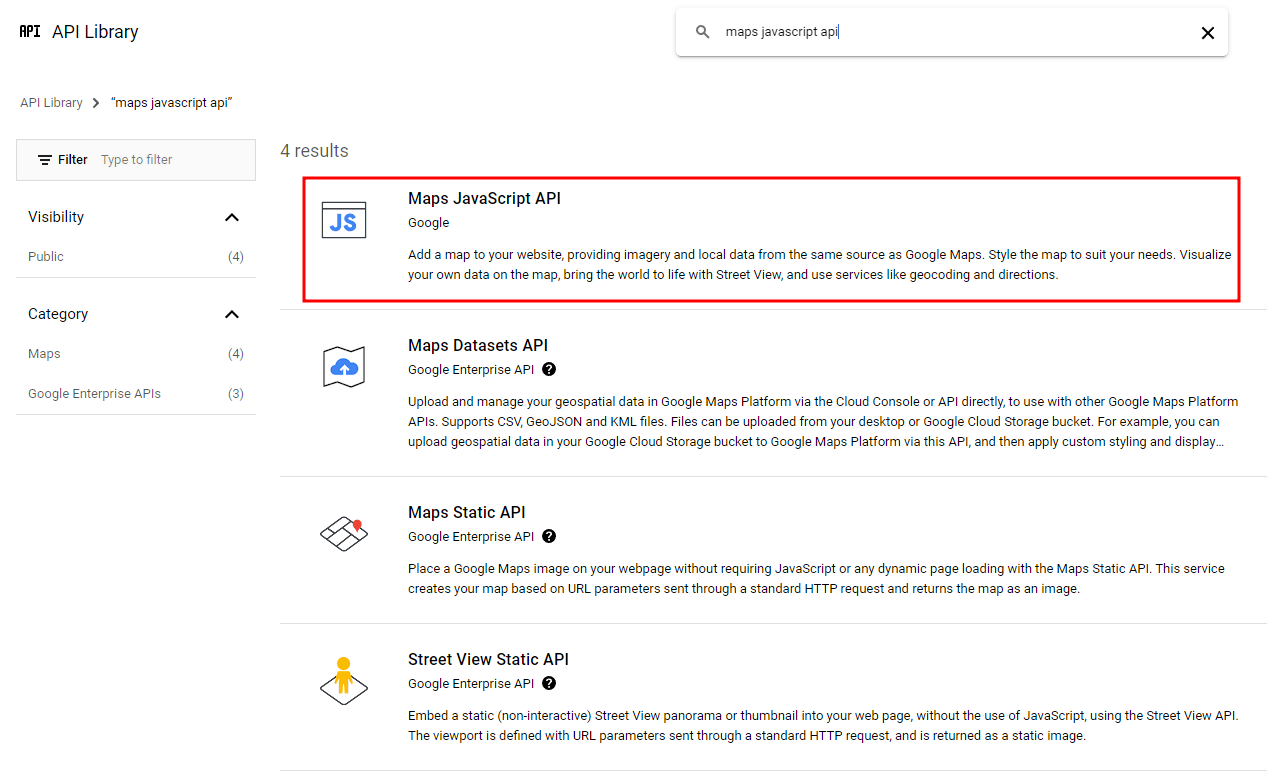
The search should find 4 results. You need to click on the 1st one:
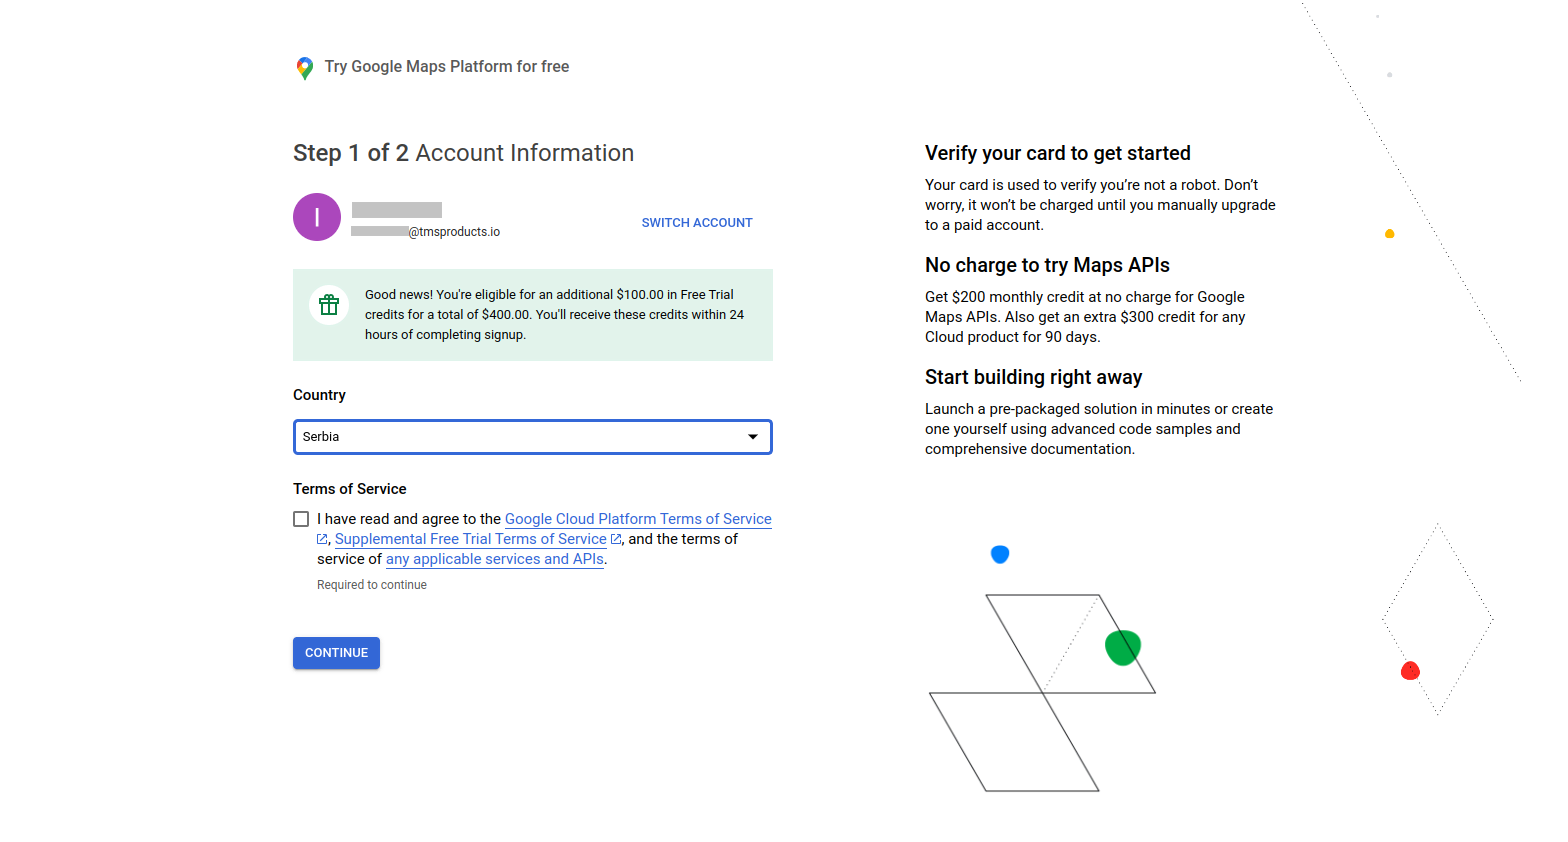
You’ll need to enter your account information and payment method, so on the next screen, choose your country and agree to Terms of Service
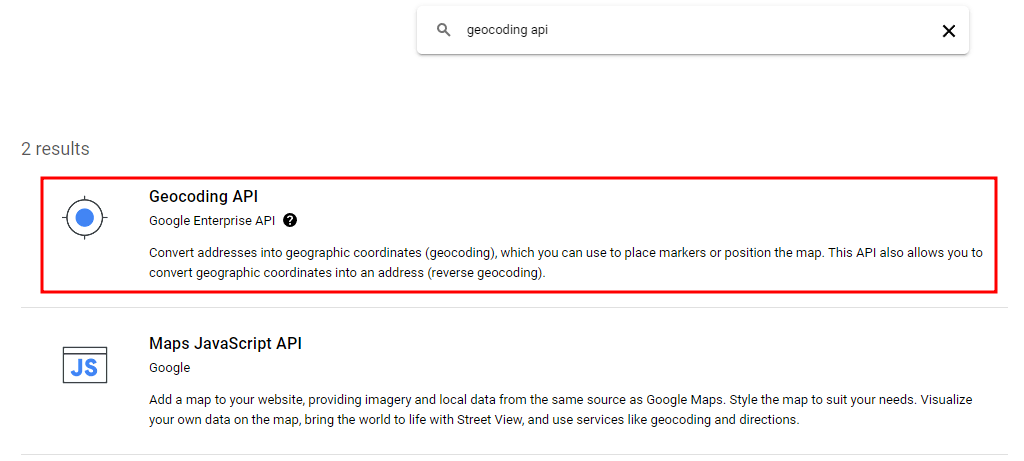
Once you enter the billing information, go back to the Library and search for the “Geocoding API” and enable it.
The procedure is the same as it was for the Maps JS API.
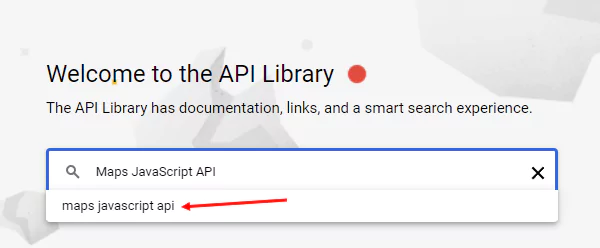
In the Search box, look for “Maps JavaScript API” and click on the offered suggestion:
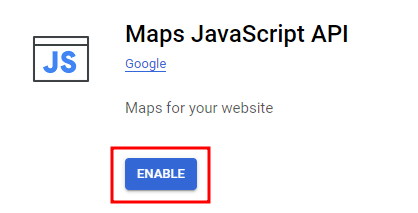
On the next screen, enable this API by clicking the “Enable” button.
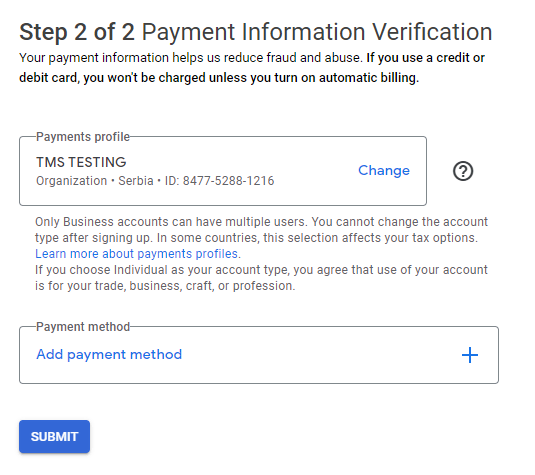
The next step is to either select an existing Payment Profile or create a new one and then add the payment method (credit or debit card).
You’ll need to add the billing info for this API as well, so just repeat the steps you did when you added the billing method for the Maps JS API.
Now that the necessary APIs have been enabled, our suggestion is to limit the usage of the key, such as using it only for this particular website.
You can go back into APIs & Services -> Credentials and click on the API Key to edit it.
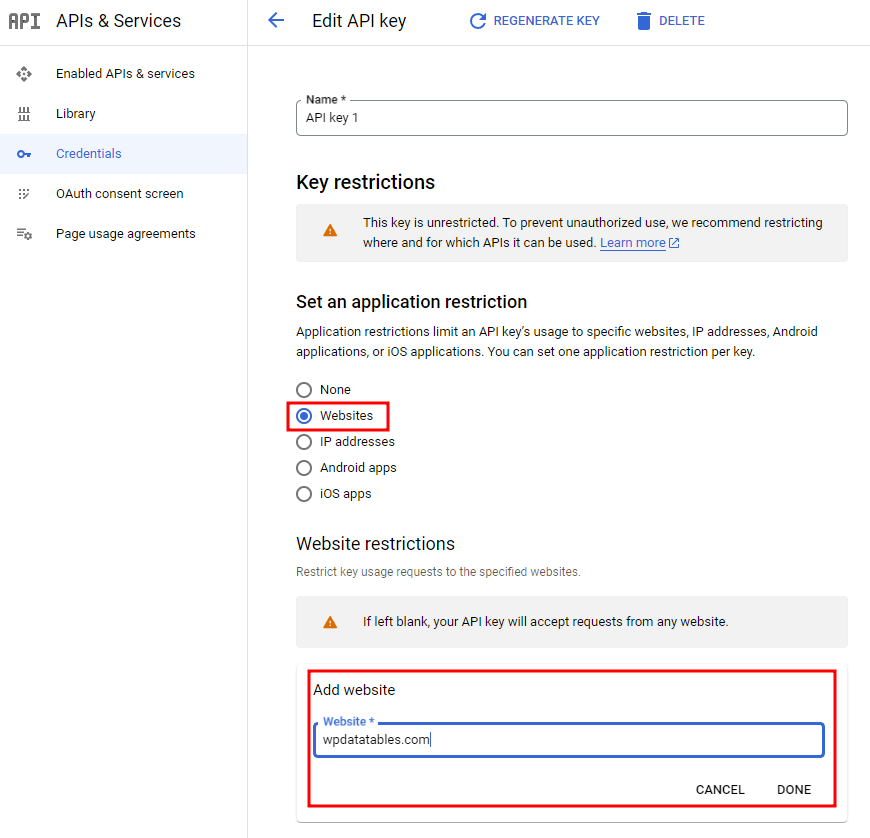
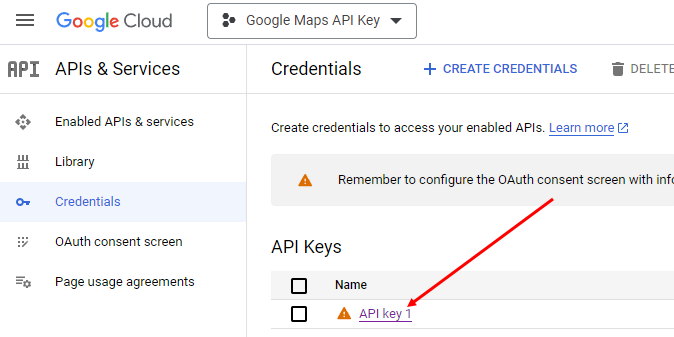
Under “Set an application restriction”, choose Websites, and then click on “ADD”. Enter your website (without http:// or https://) and click on Done.
Once the site has been added, scroll all the way down and click on “Save”.
In the 1st step, where you created the API Key, you copied the key into notepad. Access this note and copy the key again.
Then, access wpDataTables -> Settings -> Charts and paste the API Key in its designated field.
Click on “Validate & Save” and that’s it.
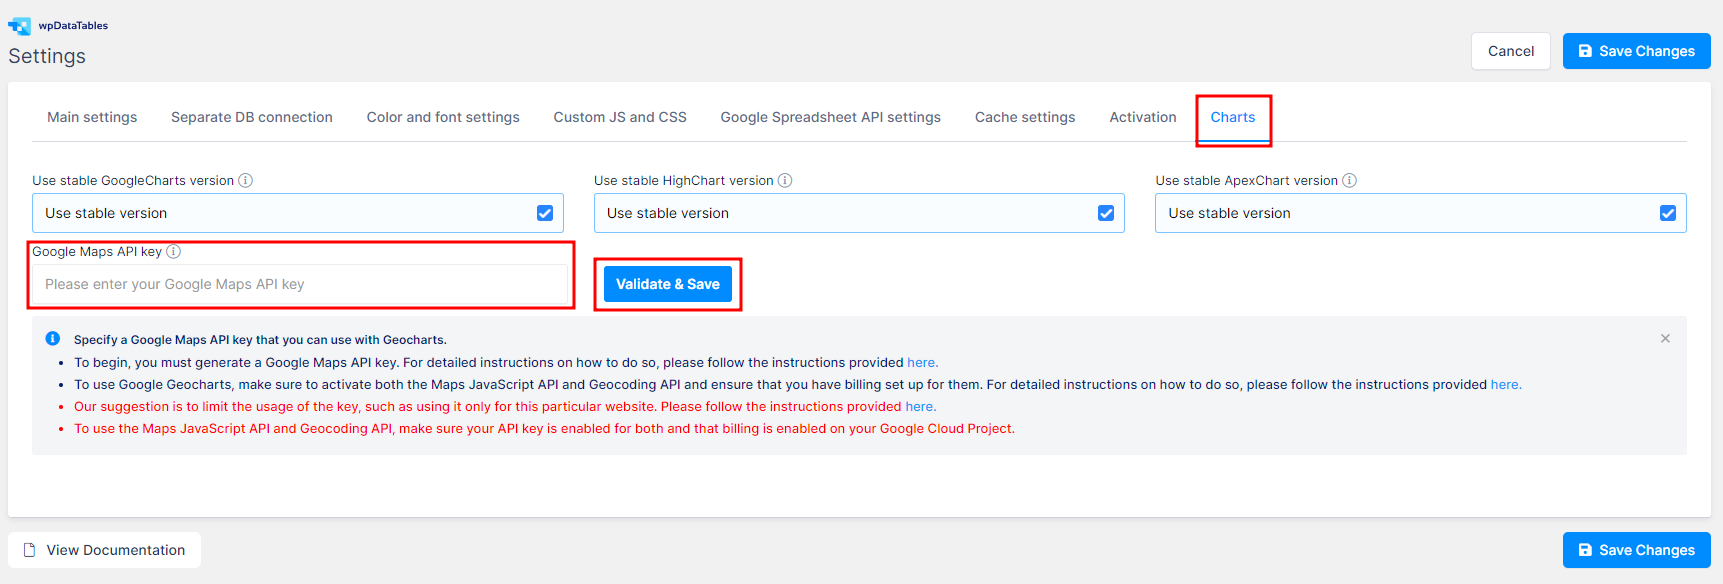
This completes the API Key configuration and its activation in wpDataTables. Now, you’re able to create Google Geo Charts in wpDataTables.
To get your hands on wpDataTables Lite, please enter your email address below. We’ll send you a direct download link and keep you updated on existing features along with helpful tips and tricks!
