Table of Contents
Video tutorial
Folders
Starting from version 6.2, we’ve introduced Folders in WordPress back-end’s “Browse Tables” and “Browse Charts” sections to help organize your tables and charts for easier access.
This tutorial will demonstrate how to utilize these features.
Main elements overview
Let’s begin with an overview of the major sections you’ll encounter within the Folders Feature for tables, followed by a more detailed examination of each section individually.
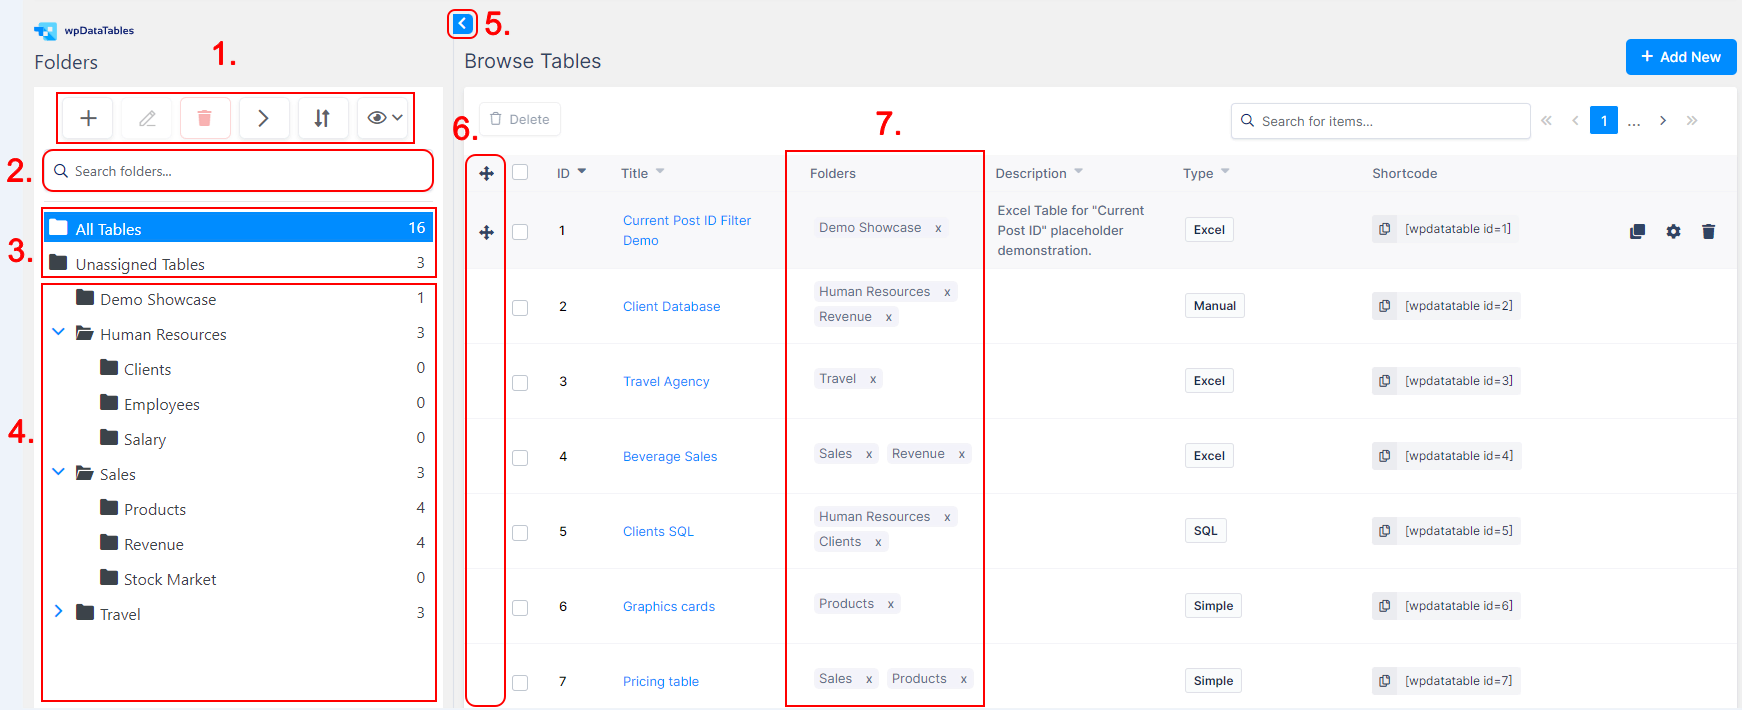
- Main Toolbar
- Folder/Sub-Folder Search bar
- Default Folders
- Custom Folders and Sub-Folders
- Collapse Folders
- Drag and Drop with CheckBox for adding/removing Tables to/from Folders
- Folder Tags
Toolbar
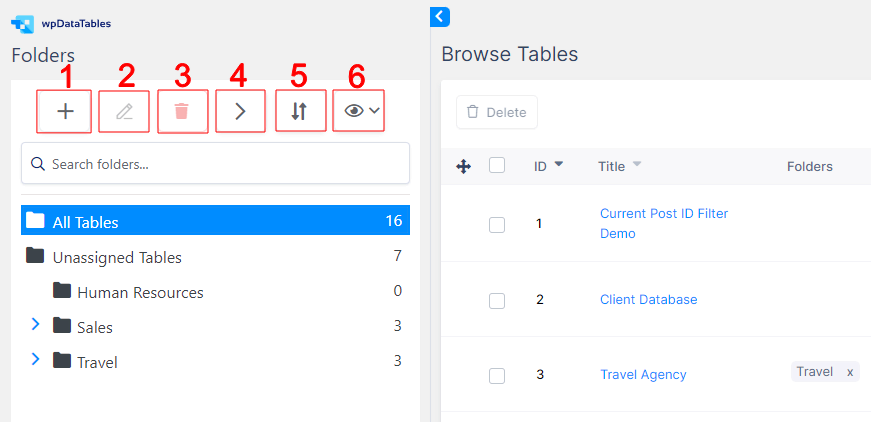
We will go through what each of these buttons does.
- Create Folder – Use this button to create a new Folder or Sub-Folder.
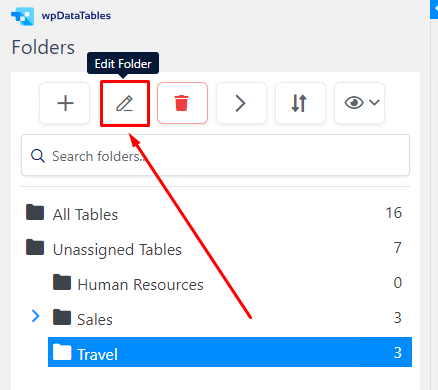
- Edit Folder – This button is used to rename the selected Folder.
- Delete Folder – It is used to delete the selected Folder.
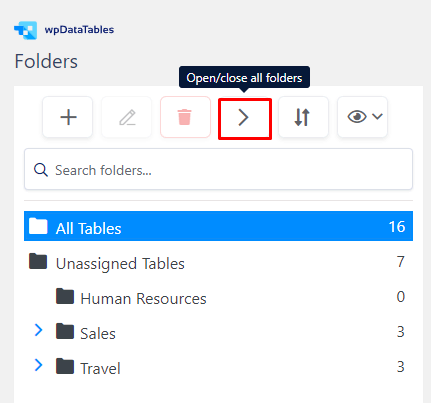
- Open/close All Folders – The “rotating triangle” is used to open/expand to show the full Folder trees with their Sub-Folders or close/collapse all Folders.
- Choose a sort option – Choose the sorting logic of the Folders/Sub-Folders.
- Show/hide browse columns – A checkbox selection of which columns will be shown in the “Browse Tables” section.
Default Folders, Custom Folders and Sub-Folders

By default, all tables will be in the ‘Unassigned Tables’ Folder.
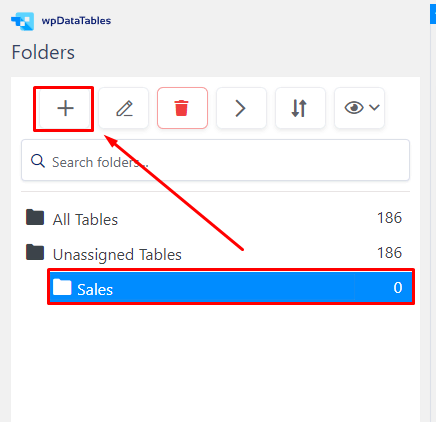
Clicking the “+” button at the top creates a new Folder in the ‘root’ path, if “All Tables” or “Unassigned Tables” are selected.
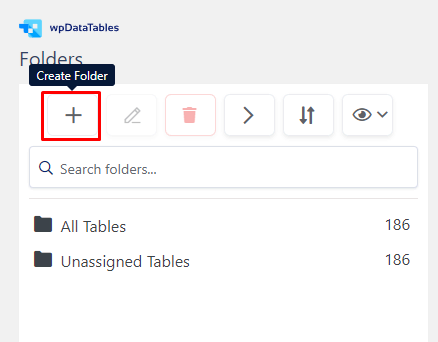
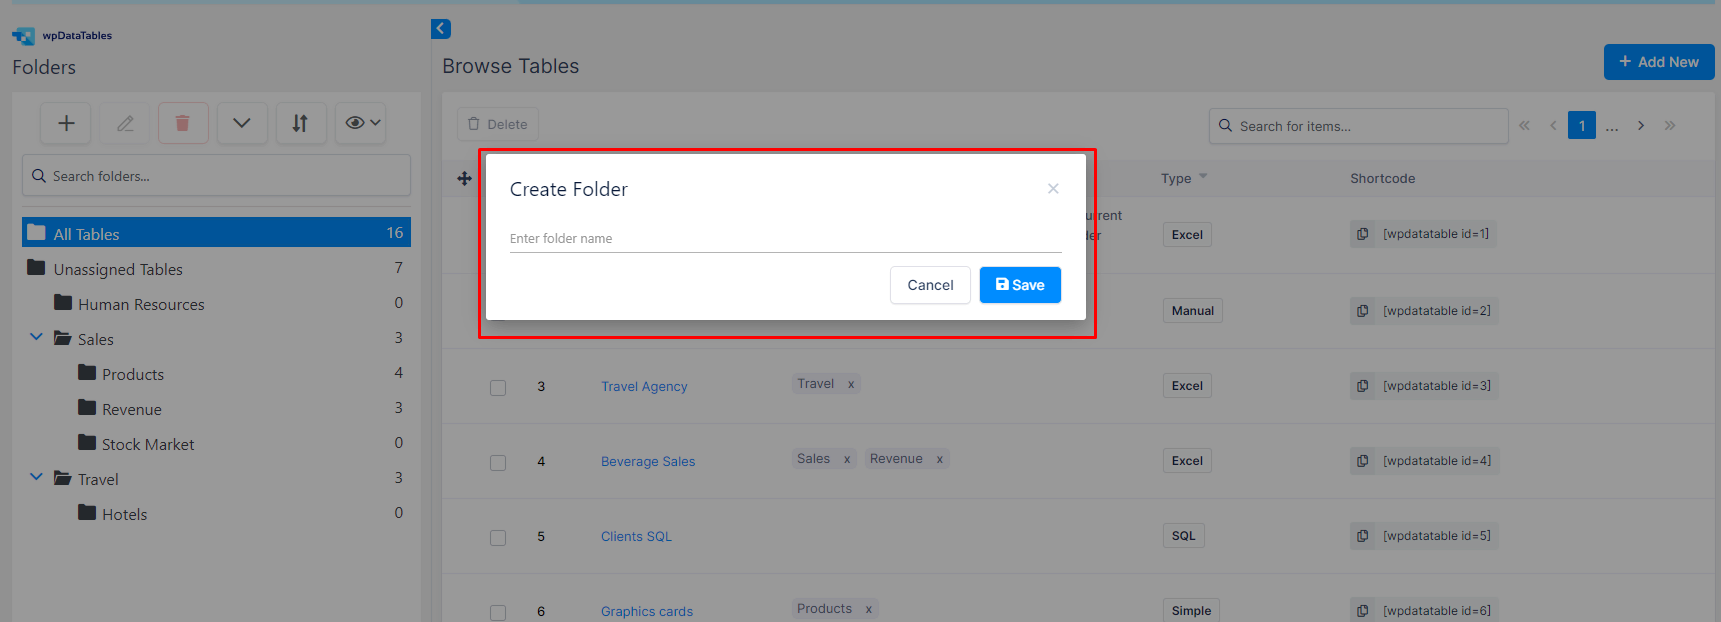
If an existing Folder is selected while clicking the + button, it creates a Sub-Folder.
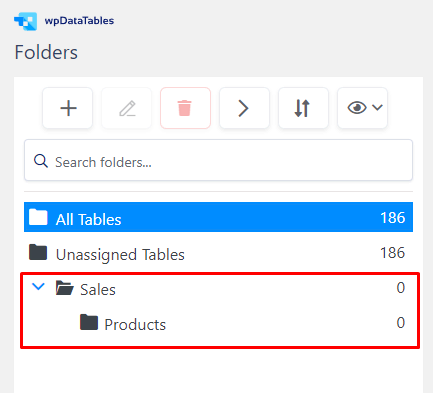
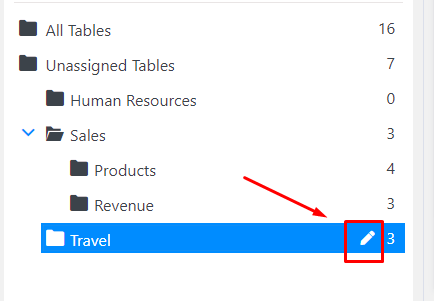
If you right-click on a Folder or hit the “pencil/edit” button on the right side, new pop-up loads with possible actions as “New Sub Folder”, “Rename”, and “Remove”.
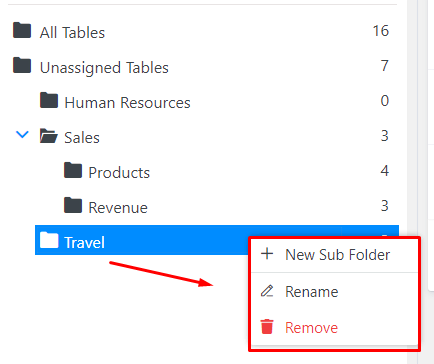
If you need to rename a Folder using the “edit” button or delete it using the “bin/trash can” button, another pop-up appears accordingly.
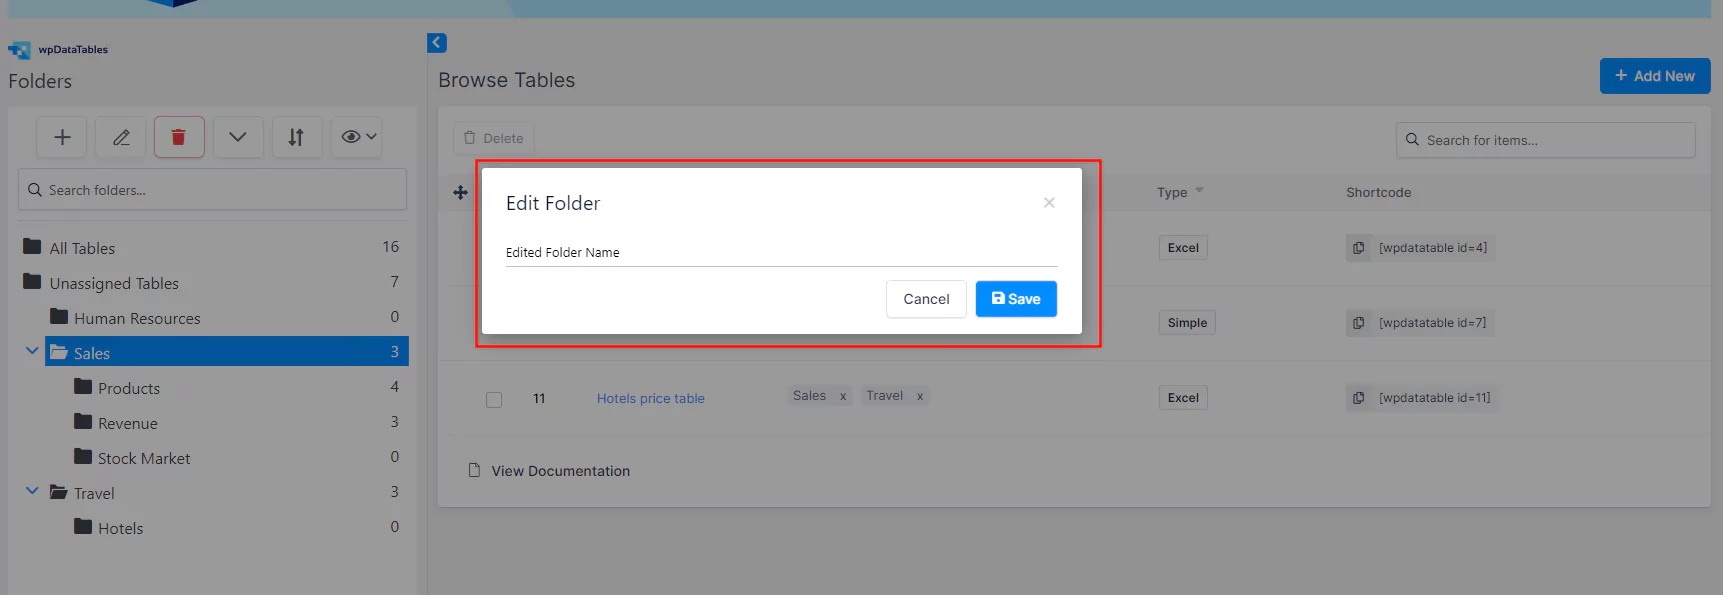

If you remove/delete any Folder or Sub-Folder, any tables that were in a Folder are not going to be deleted, this action deletes only the Folder/ or sub-Folder itself.
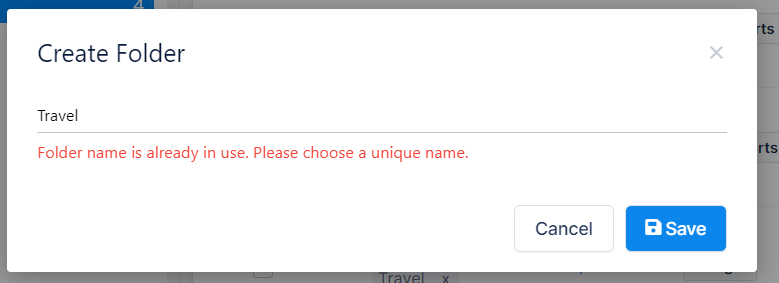
Folder/Sub-Folder names have to be unique.
If you attempt to create or rename a folder with a name that already exists in another folder/or sub-folder, you will receive an error message indicating that the name must be unique.
So, you can have the same folder name repeat only once between the “Browse Tables” and the “Browse Charts” sections, but each section has unique Folder names.
Search Folders
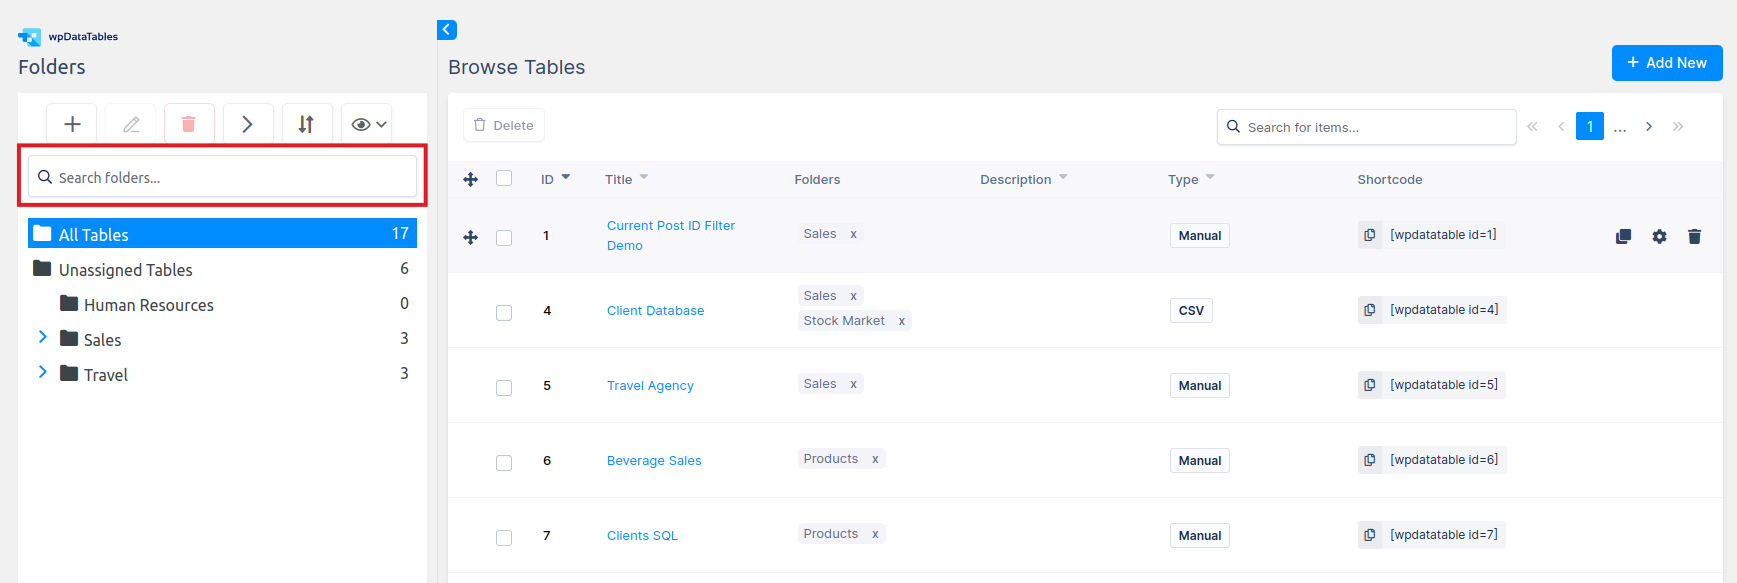
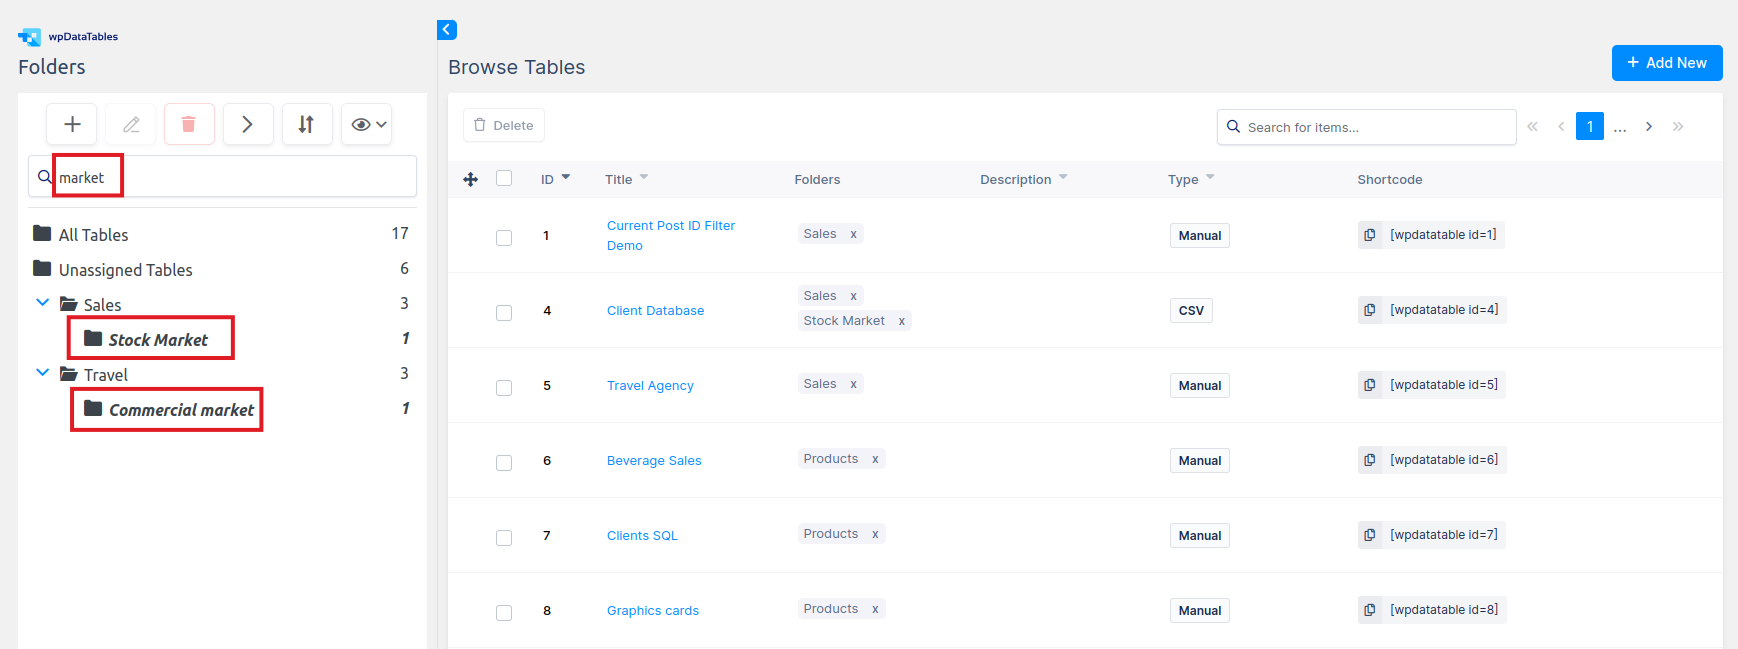
Beneath the Main Toolbar, you’ll find the Folders/Sub-Folders Search Bar, allowing you to search for your desired folders.
You can type either a partial or full name of the folders you need. If they exist, whether they are folders or subfolders and regardless of their visibility due to the collapsing folders option, only those matching your search will be shown. They will appear in bold and italic to enhance visibility.
Collapse Folders Card

Clicking the ‘rotating triangle’ button between Folders and Browse Tables from ‘left’ to ‘right facing position’ position collapses/closes a Folder card.
This way, the Browse Tables page will look as it did before.
Switching back from ‘right’ to the ‘left facing position’, will open/expand the Folders card again.
The selection from the button will be memorized.

Adding tables to folders
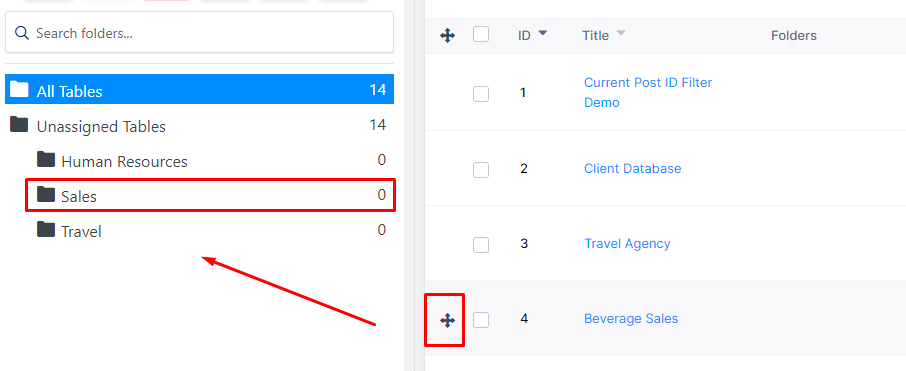
Adding a Table to a Folder or Sub-folder: Simply drag and drop the table to the desired folder or sub-folder.
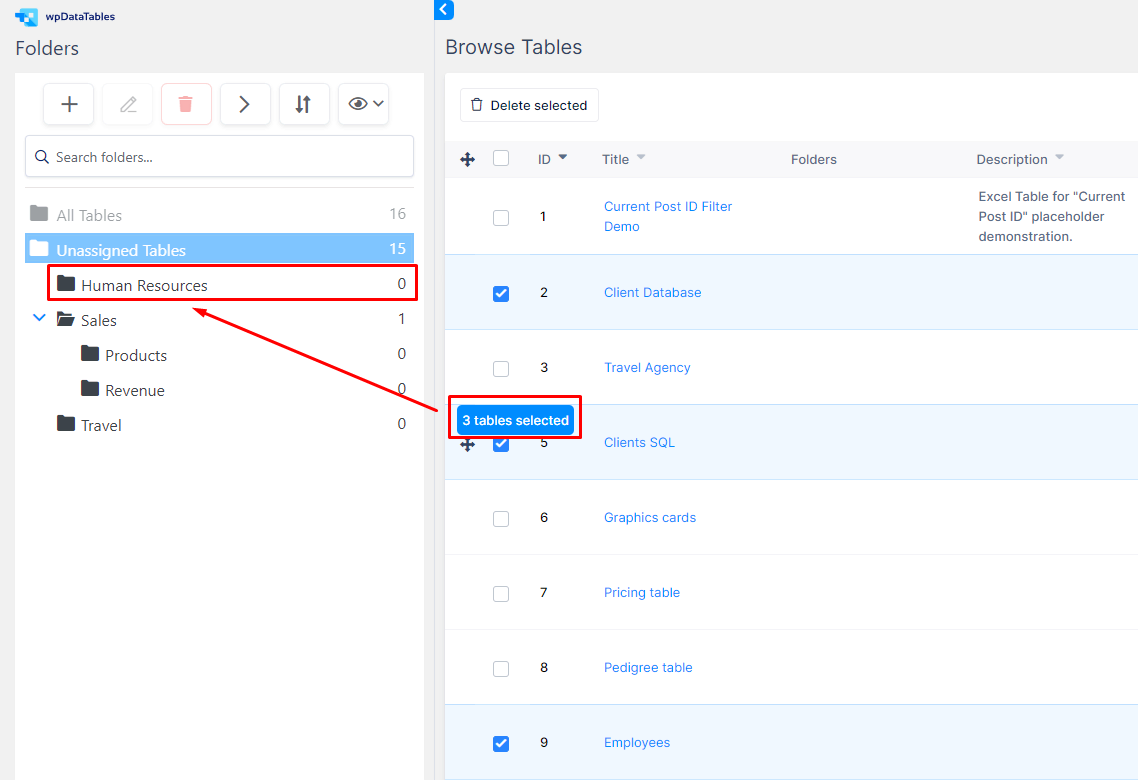
You can select multiple tables using the checkbox next to each table.
Once selected, drag and drop them together to a specific folder to group them accordingly.
Folder Tags on Tables
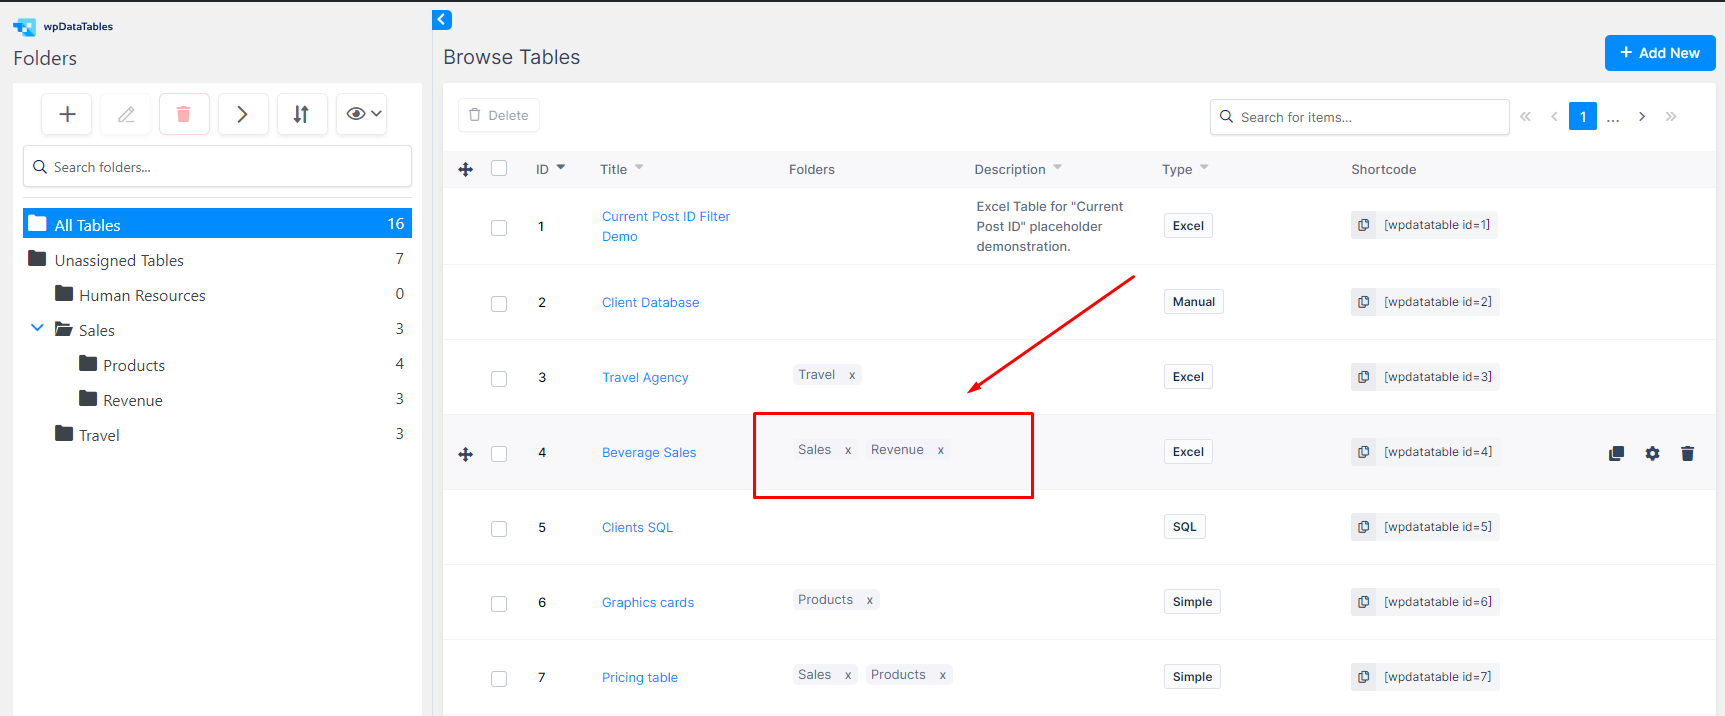
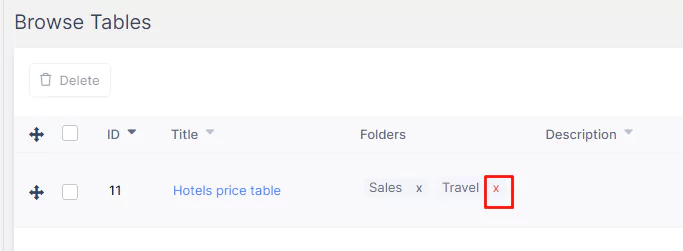
When you add a table to a folder, notice that a folder tag now appears on the table.
It is under the “Folders” Column in the “Browse Tables” section.
Adding the same Table to multiple Folders(or Sub-Folders) will show as multiple Folder Tags.
To remove a table from a Folder, hit the “x” on the right side of the tag.
Opening/expanding Folders
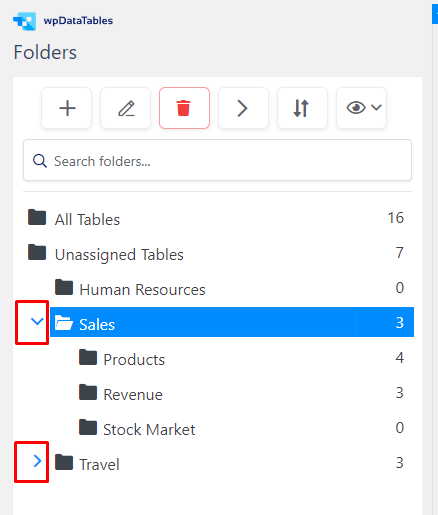
Clicking the ‘rotating triangle’ button on the left side to a ‘downward’ position expands/opens a Folder to show its Sub-Folders Tree structure, or if switched to the ‘forward facing position’, it will close/collapse its Sub-Folders.
You can also Open/Close all Folders via the ‘rotating triangle’ button on top.
The selection from the top button will be memorized.
For example, if you leave them all closed with the ‘triangle’ facing forward ( or vice-versa/all open with the triangle facing downwards), if you go to some other Page and later come back, it will remain as you left it.
Sorting Folders
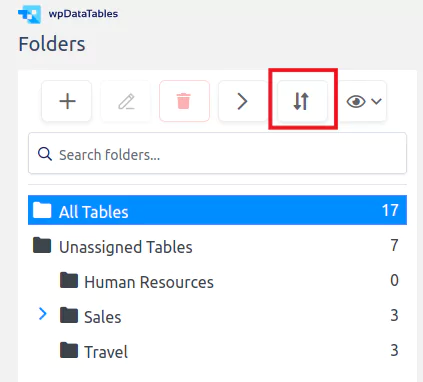
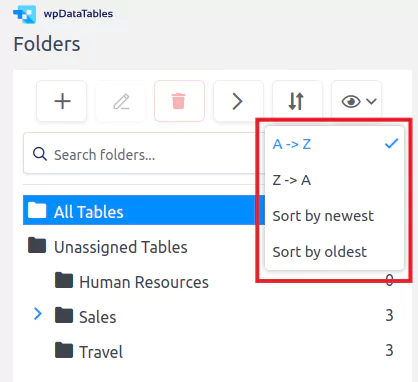
By clicking the ‘Choose sort option’ button in the Main Toolbar, you can customize the sorting of your folders according to your preferences.
There are 4 options for sorting:
- From A to Z – from the first to the last letter alphabetically.
- From Z to A – from the last to the first letter alphabetically.
- From the newest created folder to the oldest.
- From the oldest created folder to the newest.
Show/Hide Browse Tables Columns
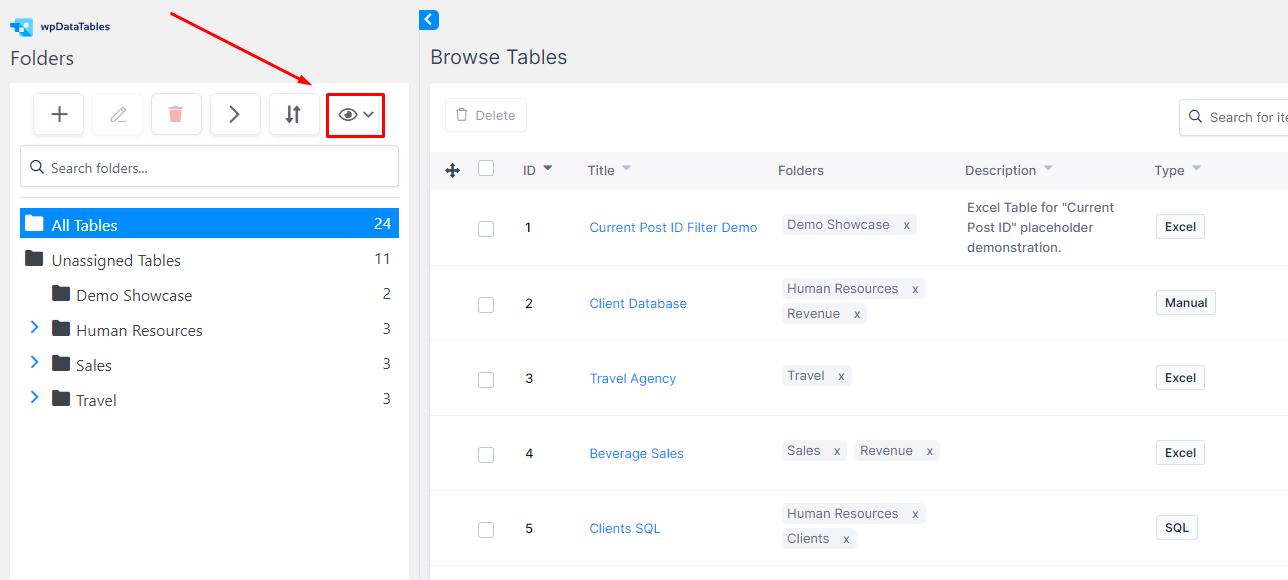
Show/hide browse columns – A checkbox selection of which columns will be shown in the “Browse Tables” section.
There are 6 column types from which you can choose what you want to see simply by checking/unchecking options next to the column names.

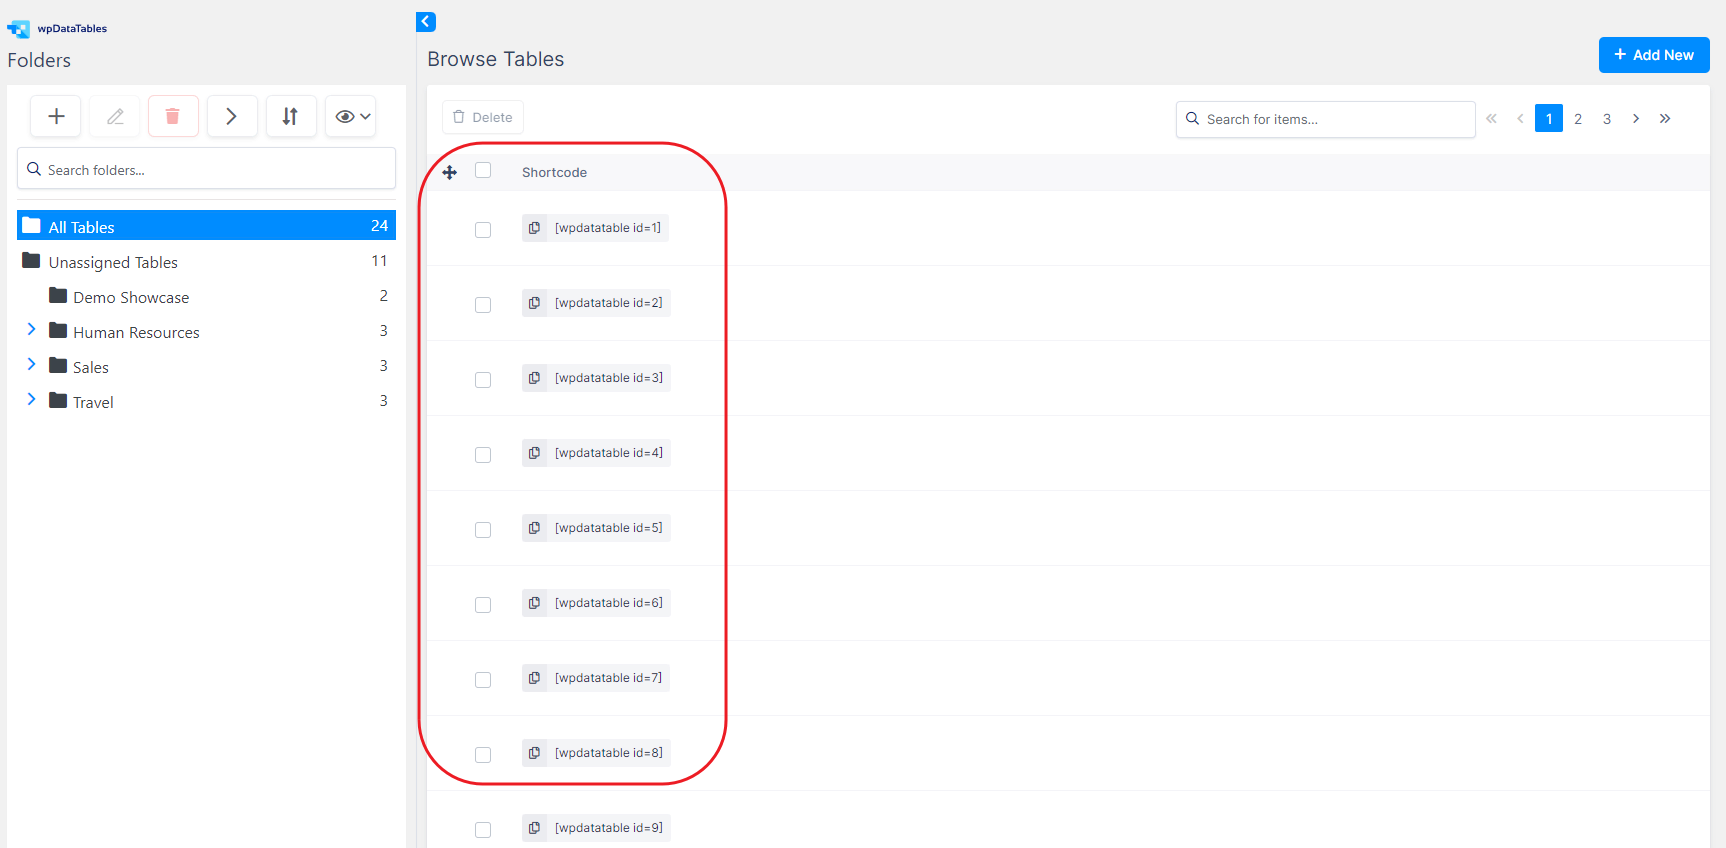
For example, if you uncheck all the options from the checkbox, then only the table Shortcode column will be visible in the “Browse Tables” section.
Folders for Charts
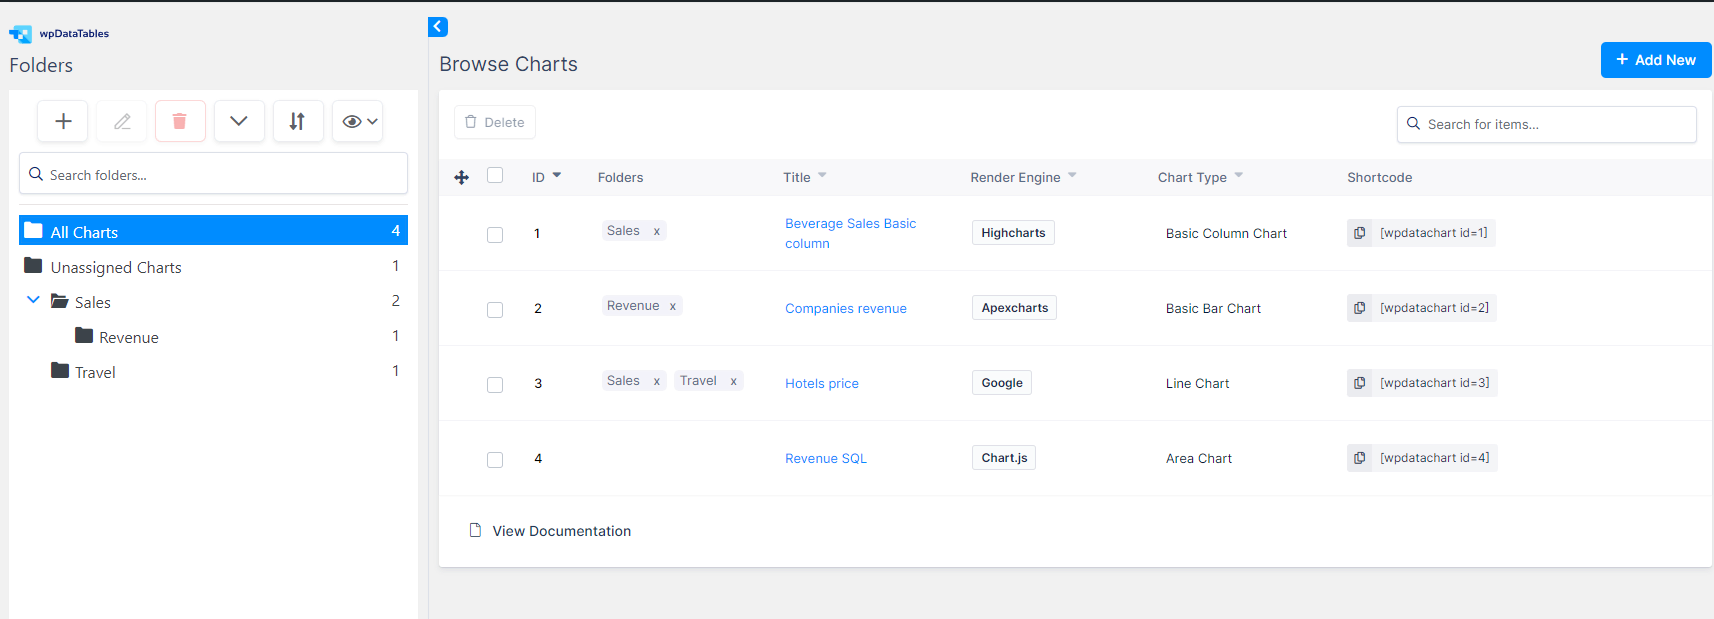
When it comes to organizing the Charts via the Folders feature in the “Browse Charts” section, everything will be absolutely the same as we have shown above for the “Browse Tables”.
