Table of Contents
Video tutorial
wpDataTable MySQL integration
MySQL is a powerful, yet free, SQL-based database engine. It allows you to create both small and very large databases, and to create, read, and edit data in these databases quickly and effectively. That’s why it has been the #1 database engine in the web for many years. Even WordPress runs on MySQL.
wpDataTables is deeply integrated with the MySQL engine. It allows you to display results of SQL query in a table, you can use MySQL server to do searches/filters/sorting/pagination for large datasets, it allows front-end (and back-end) editing of MySQL tables, creating MySQL tables from back-end, importing CSV or Excel to editable MySQL tables, generating SQL queries with visual constructor, and much more.
Whenever your data set grows to more than a few hundred rows, and when you need better performance, MySQL-based wpDataTables is the way to go.
In this tutorial we will demonstrate how to create a wpDataTable based on a query to a MySQL table.
You can download the SQL dump for this sample “dummy employees” table from this link and import it to your MySQL server using PHPMyAdmin or other software, to repeat the tutorial steps.
Let’s create the table first, as demonstrated in the following step-by-step tutorial.
Instructions to create the table

The first step for creating a MySQL-based table in WordPress by using wpDataTable is to prepare the data on the MySQL side.
We will start by assuming that you will use the same data set as we did in this example, and import the data via PHPMyAdmin (since almost every host has this tool pre-installed); but this is not mandatory. You can also prepare the structure and fill in the data from PHPMyAdmin, or from any other software.
So, first download the SQL dump from this link.
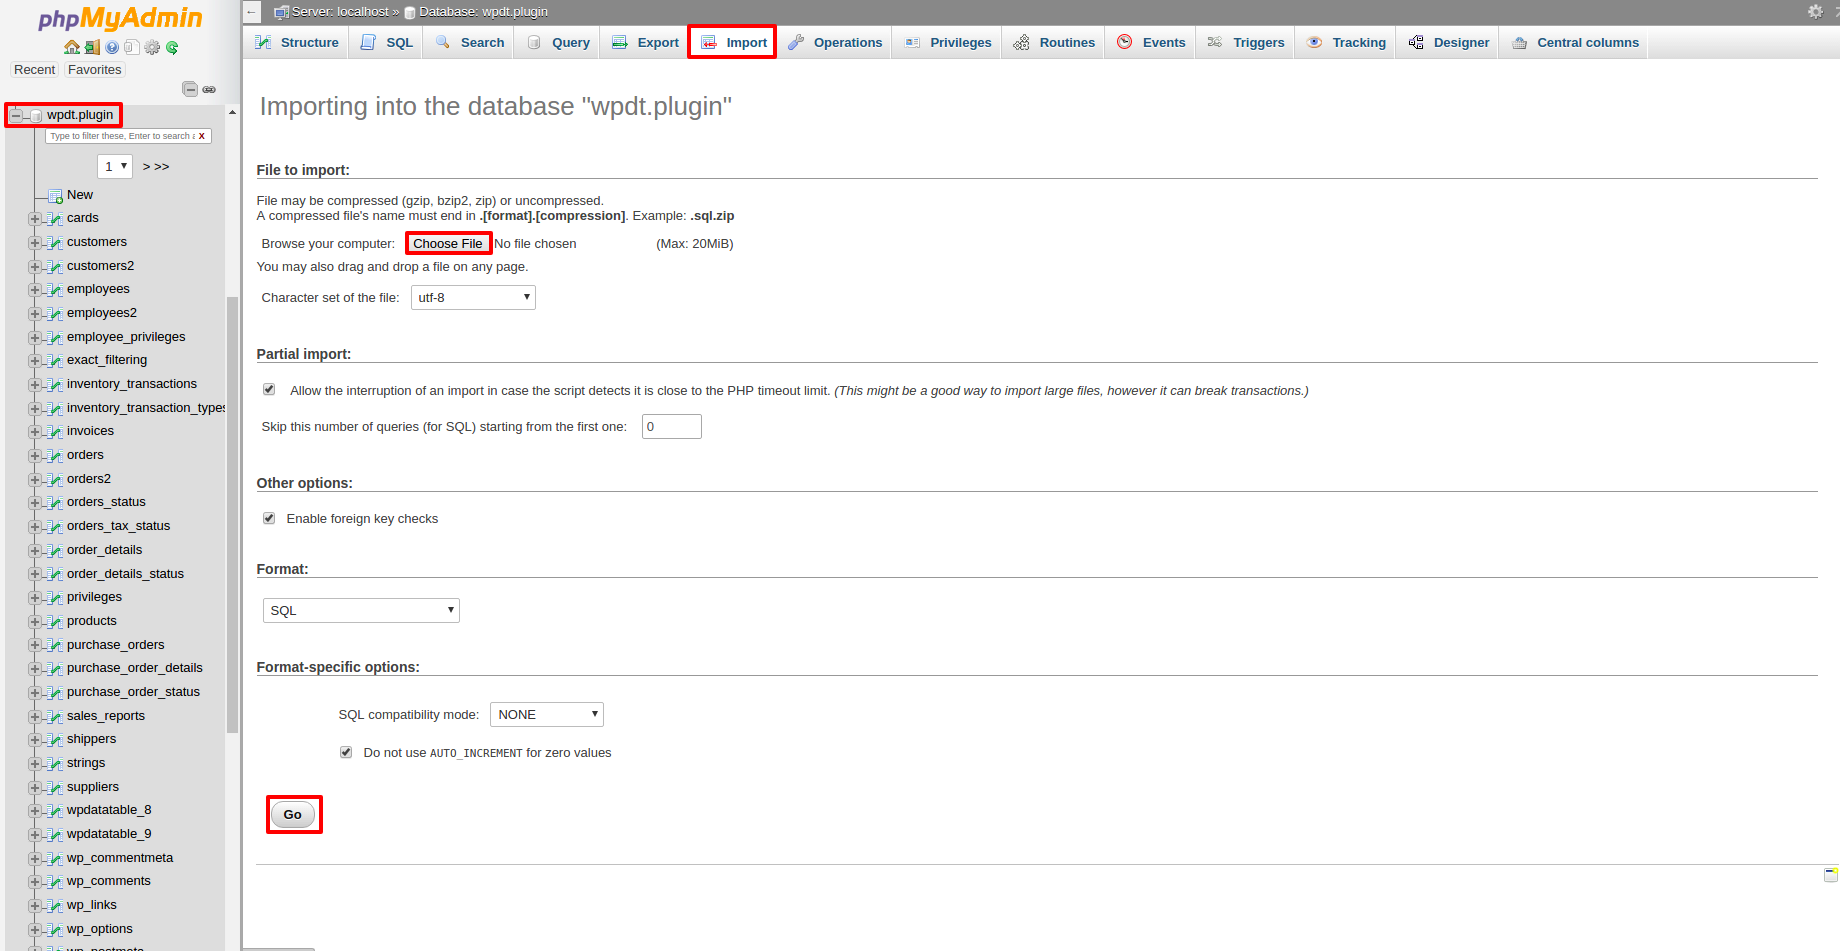
Now, go to your PHPMyAdmin, choose the DB that wpDataTables is configured to use, open the “import” tab, click “browse files” and open the SQL dump file that you downloaded.
Then, click “Go” and PHPMyAdmin will import the dump and create a table in your MySQL database.

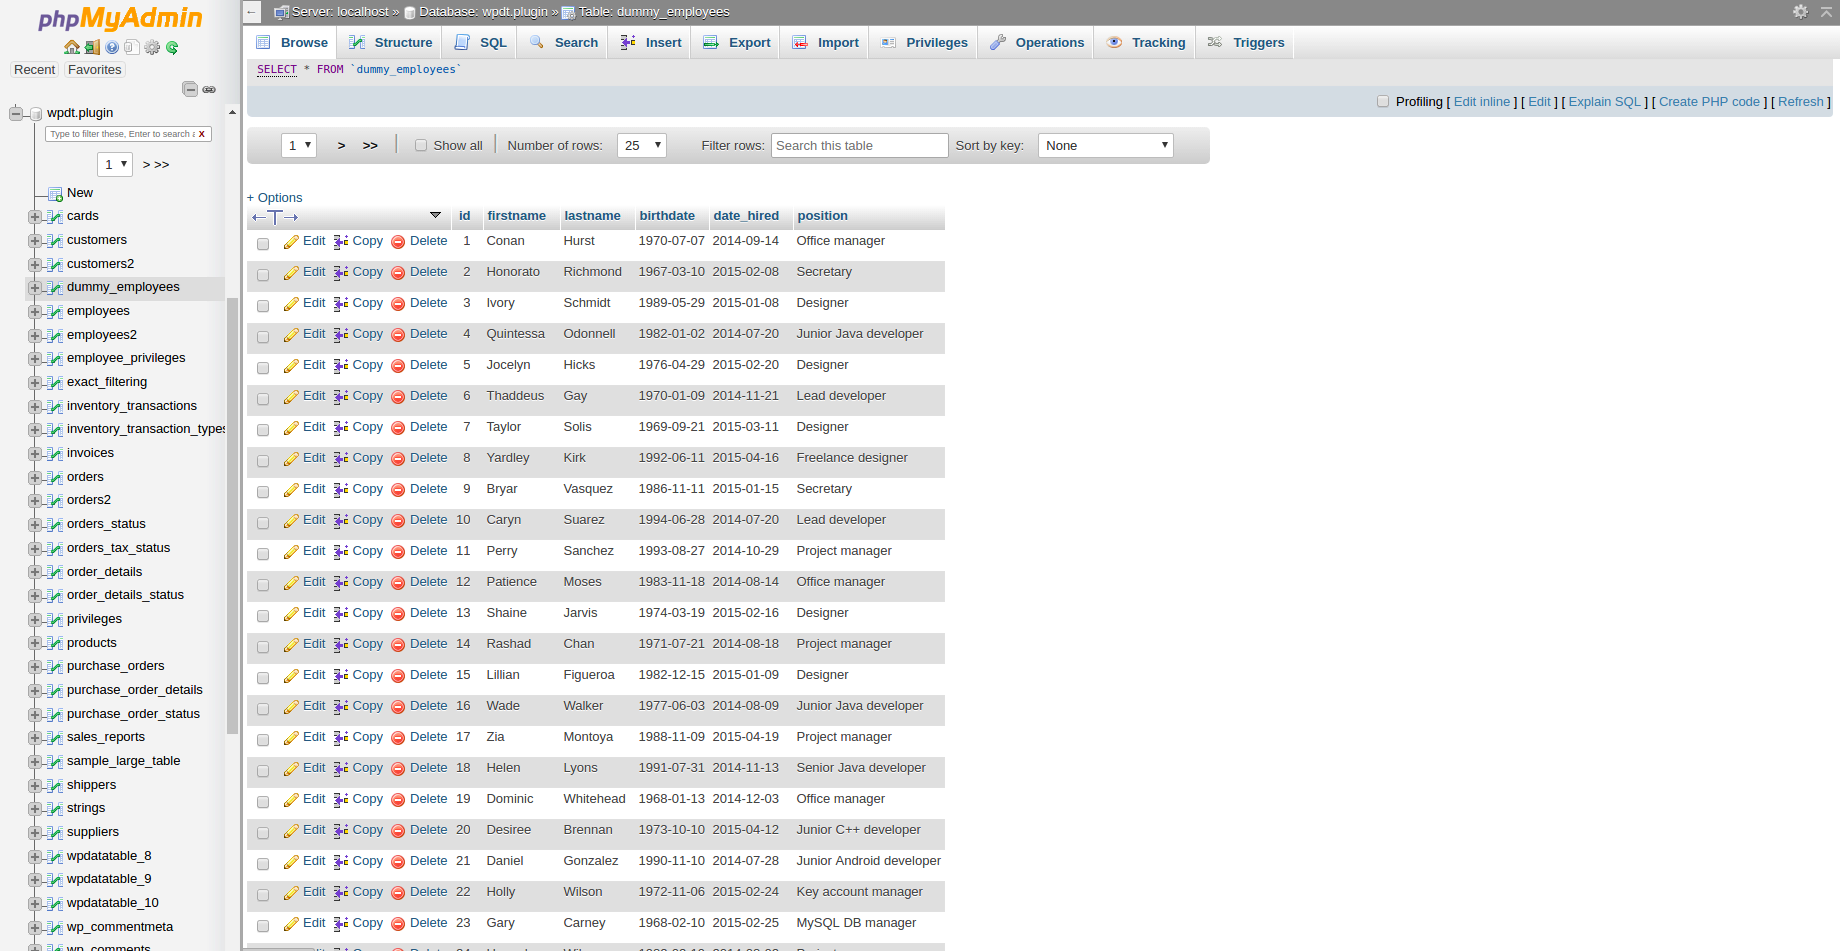
You can click on this MySQL table in the database browser on the left to review the results.
Next, we need to prepare a query that will return the data we need in our table. In this case, it will be simple: “SELECT * FROM dummy_employees“. You can try it in “SQL” PHPMyAdmin tab to make sure that it returns the data you need.
Create the wpDataTable and paste the query
Now that the data is prepared on the MySQL server side, we need to create a wpDataTable to display this data.

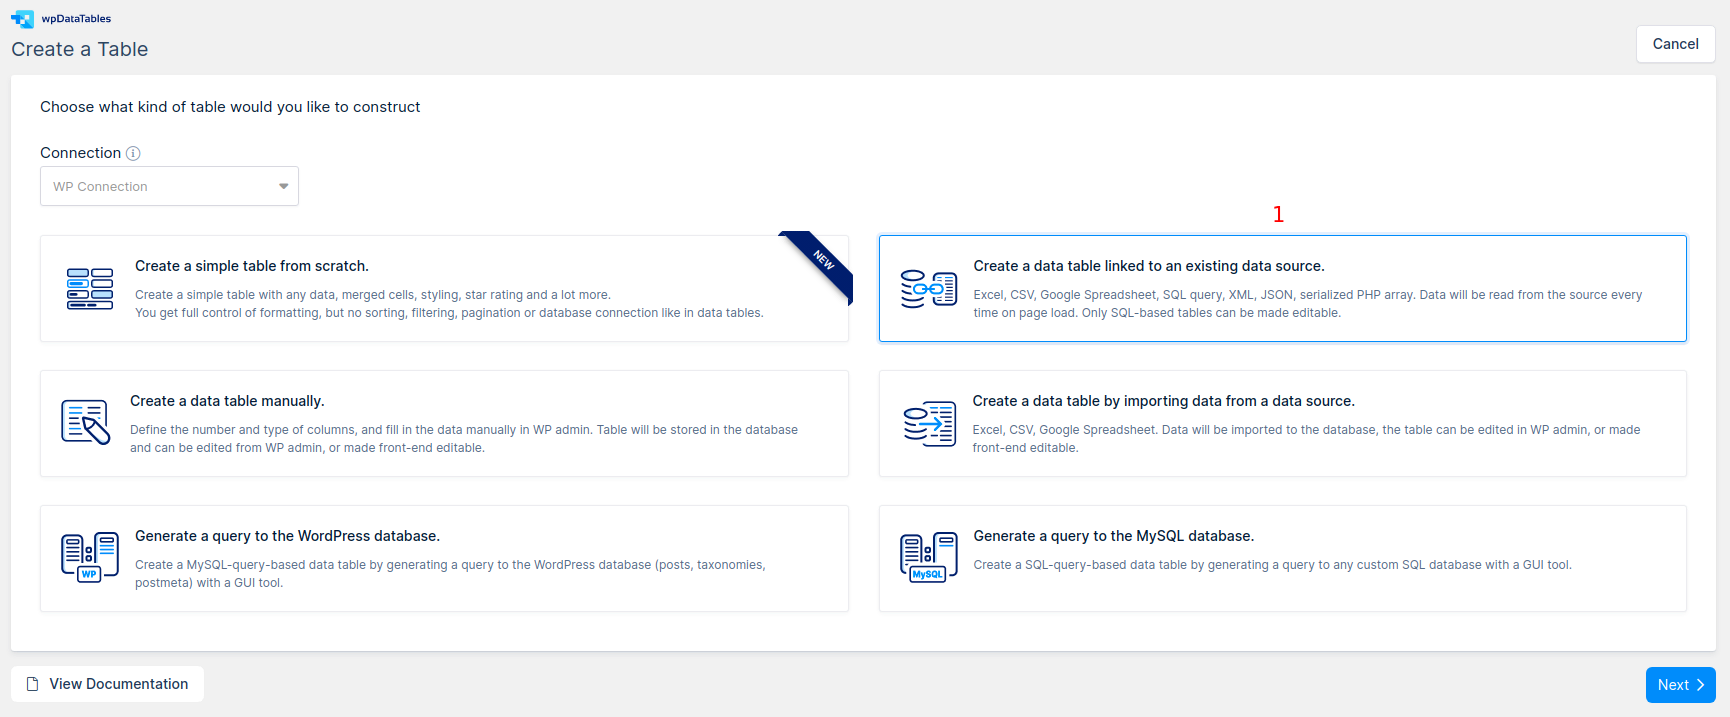
1. Go to wpDataTables -> Create a Table, and choose the Create a table linked to an existing data source option.

2. Provide a name for the table in the Table Title input; it will help you to identify this table later.
3. Select SQL query in the Input data source type select-box.
4. Paste the SQL query we prepared in the step 1 (SELECT * FROM dummy_employees) in the SQL editor that appears in SQL query input.
5. Click “Save Changes” so wpDataTables will read the table structure, and initialize the columns’ metadata.
Define additional table and column settings (Optional)
Once the table structure is read, and the column metadata is initialized by wpDataTables, you might elect to re-define the default settings.
If this is the case, let’s change some general settings for the table.

1. Click on the “Display” tab.
2. Check the “Limit table width” checkbox.
3. Check the “Word wrap” checkbox.
4. Click on the “Save Changes” button to save the changes.
Now, let’s change some Column settings. For example, we can hide ID column.
There are 2 ways to do this:
1. By clicking on the Column settings button

2. Or, by clicking on the ‘Column List‘ button above the table.
In this dialog you can quickly rename, reorder, or toggle visibility for columns.


Now, uncheck the “Visible on front-end” checkbox.
Once the setup is done, click “Apply” again to store the changes in wpDataTables. You can also see the table changes in the live preview to see how the table will look in the front-end.
Insert the wpDataTable in WordPress post or page

When you’ve finished preparing your MySQL-based wpDataTable, you need to insert it to your post or page.
Create or open a WordPress post or page, place the cursor in the position where you would like to insert your table, click the “Insert a wpDataTable” button in the MCE editor panel, and choose the MySQL-based table that you prepared.
Or, you can copy the wpDataTable shortcode that the wpDataTables edit page shows, and paste it manually where you need it.
If you are using Gutenberg editor, Elementor, or WPBakery page builder, you can check out the section for Adding wpDataTables shortcodes on the page.
Read more
- If your MySQL table has more then 2000-3000 rows it makes sense to enable server-side processing. See documentation on server-side processing.
- Creating editable tables manually
- Creating editable tables based by importing Excel, CSV or Google Spreadsheet data
- Generating MySQL queries
- Creating non-editable tables showing Excel data
- Creating non-editable tables showing CSV file data
- Creating non-editable tables showing data from Google Spreadsheets
