Table of Contents
Video tutorial
Example of a XML-based wpDataTable
XML (eXtensible Markup Language) is a long-time standard for data exchange between many different kinds of software platforms, both online and offline. Many web services “run” on XML, and wpDataTables supports XML as an input data source as well.
In this tutorial we will use a dummy (randomly generated) automobiles database in XML format, that you can download via this link.
Let’s view the resulting table first. The step-by-step tutorial on how to generate it follows:
Prepare the data source in correct XML format
You first need to prepare the data source in the correct XML format. Please check these 3 conditions:
1. The data set should not be empty, but should contain at least 1-2 rows.
2. The returned XML should exactly follow the format highlighted above: a single root node, with one level of same-structured child nodes, where the child nodes will be parsed as rows, and their attributes as cells.
3. The XML should be available via an URL that wpDataTables is able to access.
In this example, we will use a sample XML data set available from this link. You can copy and paste it to your new wpDataTable if you would like to follow the steps of this tutorial.
Create a new wpDataTable and paste the URL of your XML
Now, we need to create a wpDataTable based on the XML data source that we prepared.
Open your WordPress admin, and:

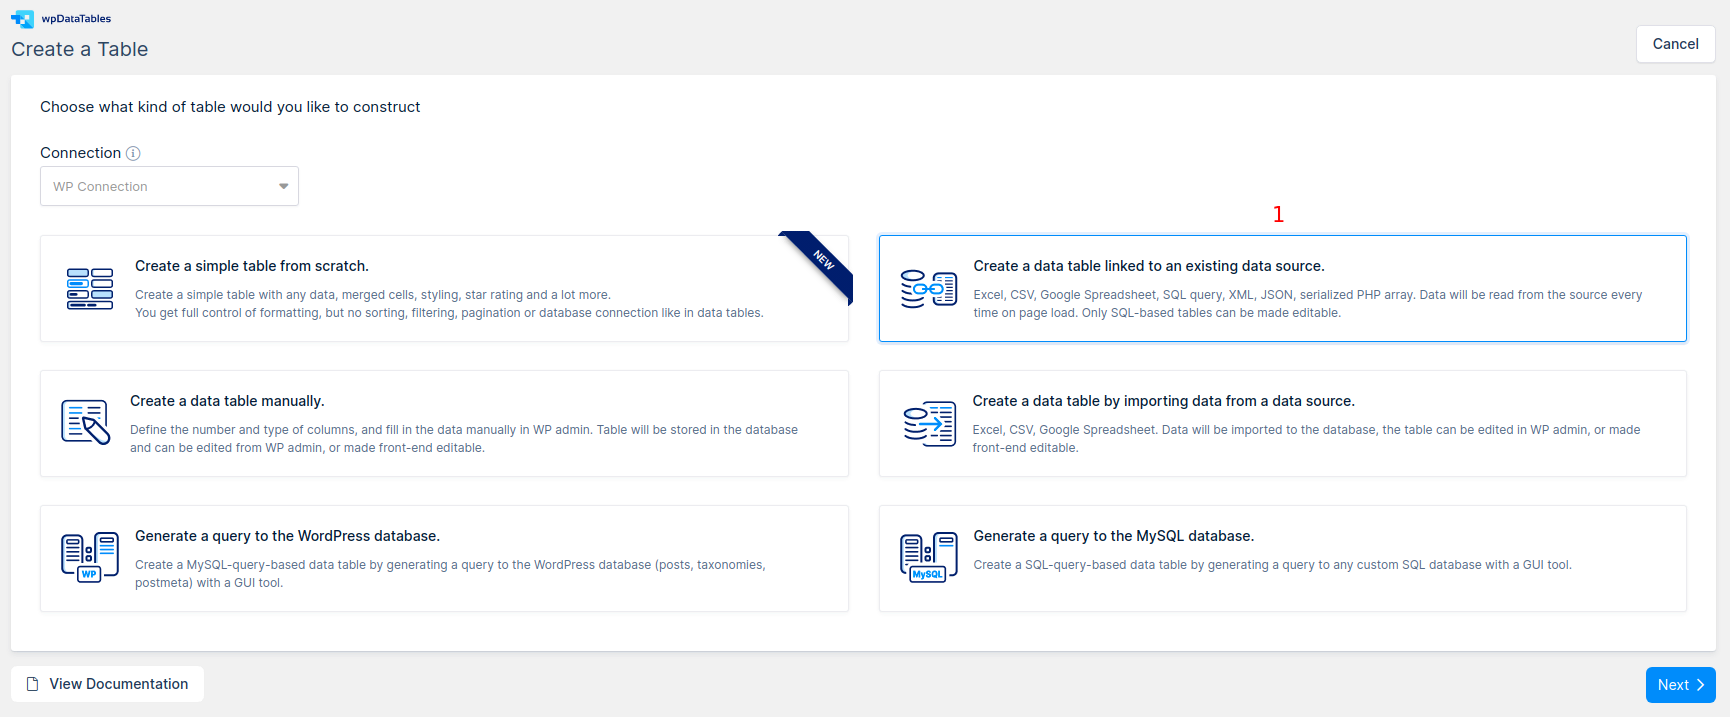
1. Go to wpDataTables -> Create a Table and choose the Create a data table linked to an existing data source option.

2. Define a name for your new wpDataTable in the Table title input. This will help you to find it later.
3. Choose the XML option in the Input data source type selectbox.
4. Paste the URL of your XML data set to the Input file path or URL input field.
5. Press Apply, so wpDataTables can read the table data and initialize the columns metadata from the provided XML input.
Define additional settings for the table and columns (Optional)
After you clicked Apply, wpDataTable has now been created, and available to be inserted in posts or pages, but you might want to define some additional settings for the table in general, or for some of its columns. For the table above we defined these additional settings:
1. Disable Table title, Rows per page, Info block, and enable Hide until loaded, Limit table width on the “Display” tab.
2. Disable the Main search block on the “Sorting and filtering” tab.
3. Disable all options in the Buttons selectbox on the “Table Tools” tab.
4. Set the Displayed header for the “HP” column as “Horse Power“, and the “Year” column as “Year of Manufacture“.
5. Set the Filter type for “Make” and “Displacement” columns as “Select box“, for “Horse Power“, and the “Year of Manufacture” columns as “Number Range“.
When you’ve done with your configuration, click “Save Changes” once again so wpDataTables can store them.
Insert your XML-based table to WordPress post or page

Now the table is prepared, and the only thing remaining is to insert it in our post or page.
1. Open or create a new post or page.
2. Put the cursor in the position where you want to place the wpDataTable.
3. Click the “Insert wpDataTable” button in the editor.
4. Locate the wpDataTable that you created in the steps 1-3 and click OK.
5. Save the post or page, and open it in the front-end to see the result.
As an alternative, you can paste the generated wpDataTable shortcode manually.
If you are using Gutenberg editor, Elementor, or WPBakery page builder, you can check out the section for Adding wpDataTables shortcodes on the page.
Read more
- Creating non-editable wpDataTables based on Google Spreadsheets
- Creating non-editable wpDataTables based on CSV files
- Creating wpDataTables based on MySQL queries
- Creating editable wpDataTables manually
- Creating non-editable wpDataTables based on JSON
- Creating non-editable wpDataTables based on serialized PHP arrays
