


You can integrate Gravity Forms with wpDataTables by installing and activating the Gravity Forms integration add-on. Once it is active, “Gravity Form” appears natively as a table type in the wpDataTables plugin, and you can create wpDataTables based on your Gravity Form entries using the “Create a table linked to an existing data source” page.
Table of Contents
It is an add-on that adds “Gravity Form” as a native table type, so your Gravity Form entries can be displayed and managed as a wpDataTable. After you install and activate the Gravity Forms integration for wpDataTables plugin, “Gravity Form” appears as a table type, and you can build tables from your form entries through the “Create a table linked to an existing data source” page.
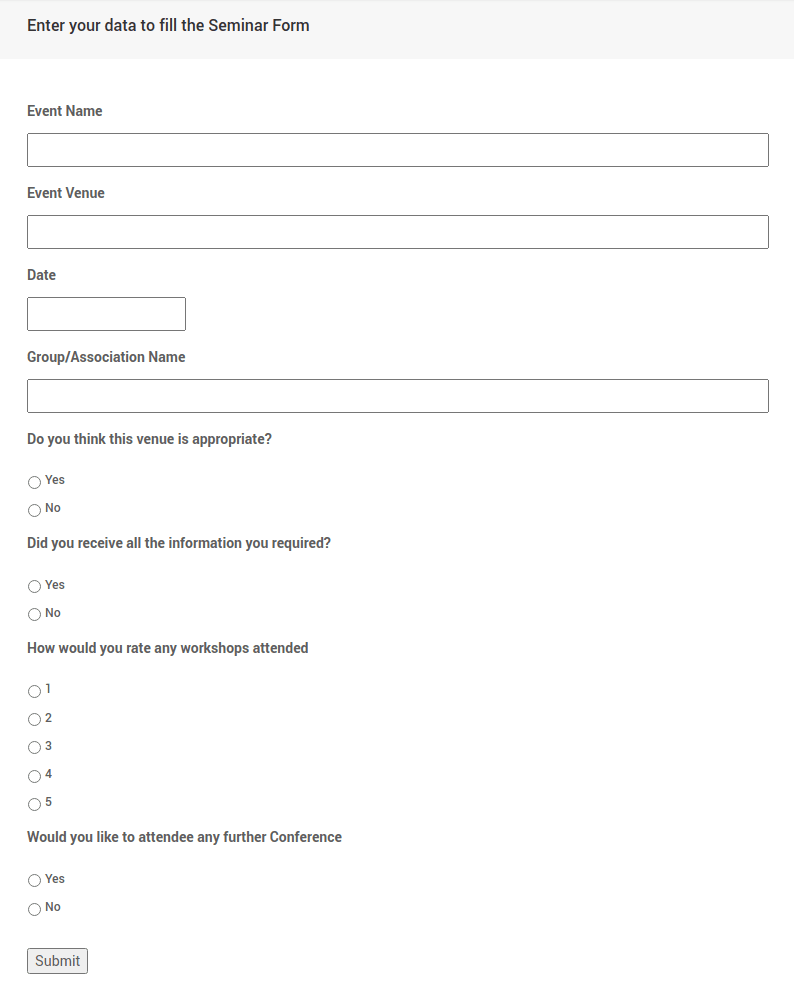
Prepare a Gravity Form with at least one entry, then link it to wpDataTables. Each field becomes a column and each entry becomes a row. The example uses a “Seminar Feedback Form” with 15 entries.
Form Fields are the custom fields added during form creation, and Common Fields are the default metadata fields (Entry Date, Entry Id, User, User IP). After selecting the fields and clicking “Save changes”, a preview displays with each row representing one form entry.
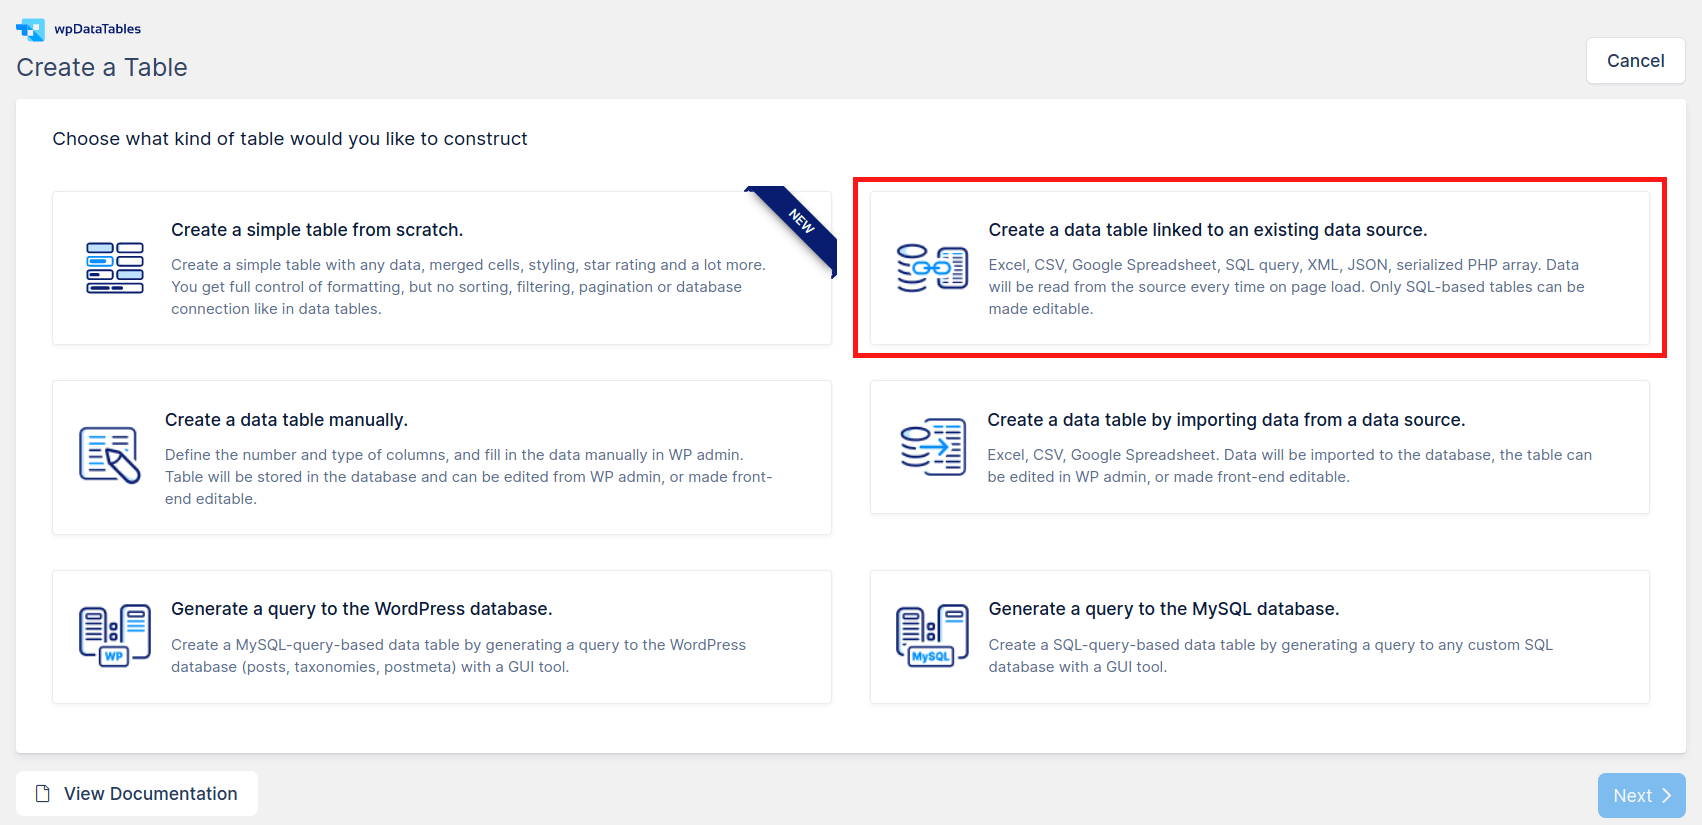
When the form and entries are ready, you can begin creating a wpDataTable based on it. First, go to wpDataTables -> Create a Table, choose “Create a data table linked to an existing data source” option, and click “Next”.
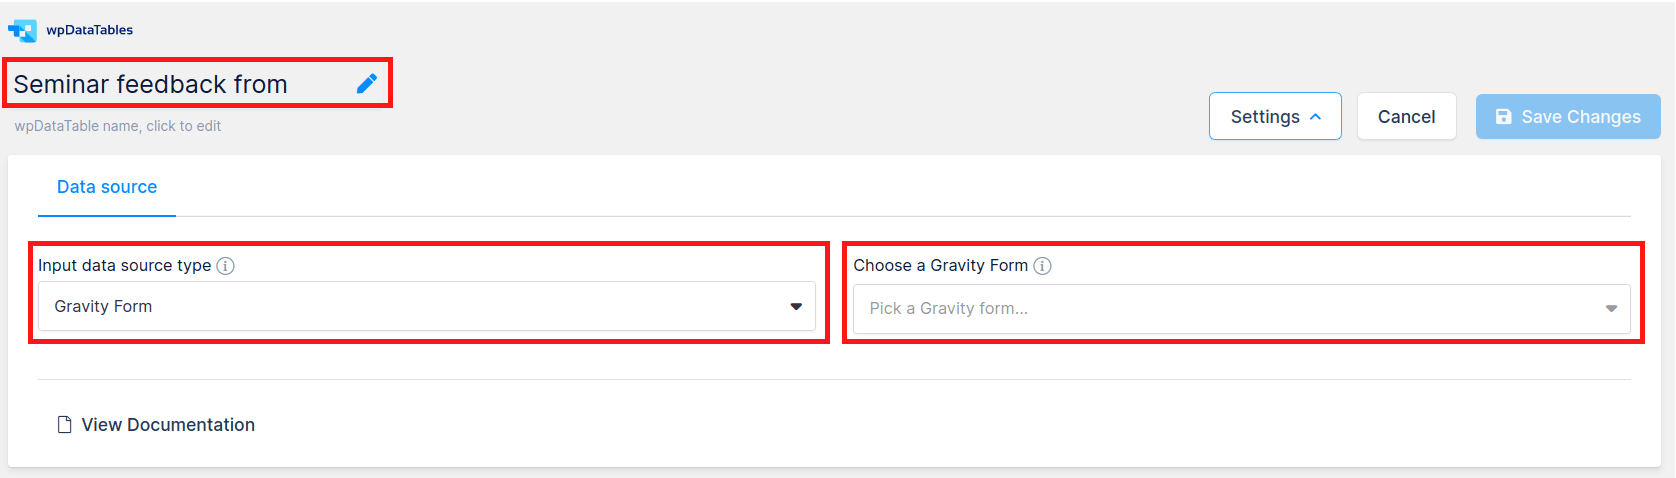
Set a name for your new wpDataTable to help you find the table later; then choose “Gravity Form” as the Input data source type. After you choose “Gravity Form” as a table type, a new selectbox “Choose a Gravity Form” will appear. With this selectbox, you can choose a form, that will provide entries as data for your new table. In this tutorial we will use the “Seminar Feedback” form.
The fields are separated into two categories: Form Fields and Common Fields.
As mentioned above, it is not required to add all of these fields to create a wpDataTable — just choose the ones you would like to show in the table. In this example we add “Event Name”, “Event Venue”, “Date”, “Group/Association Name”, “Do you think this venue is appropriate?”, “Did you receive all the information you required?”, “How would you rate any workshops attended?”, “Would you like to attendee any further Conference?”, and “Entry Date” from the Common Fields category.
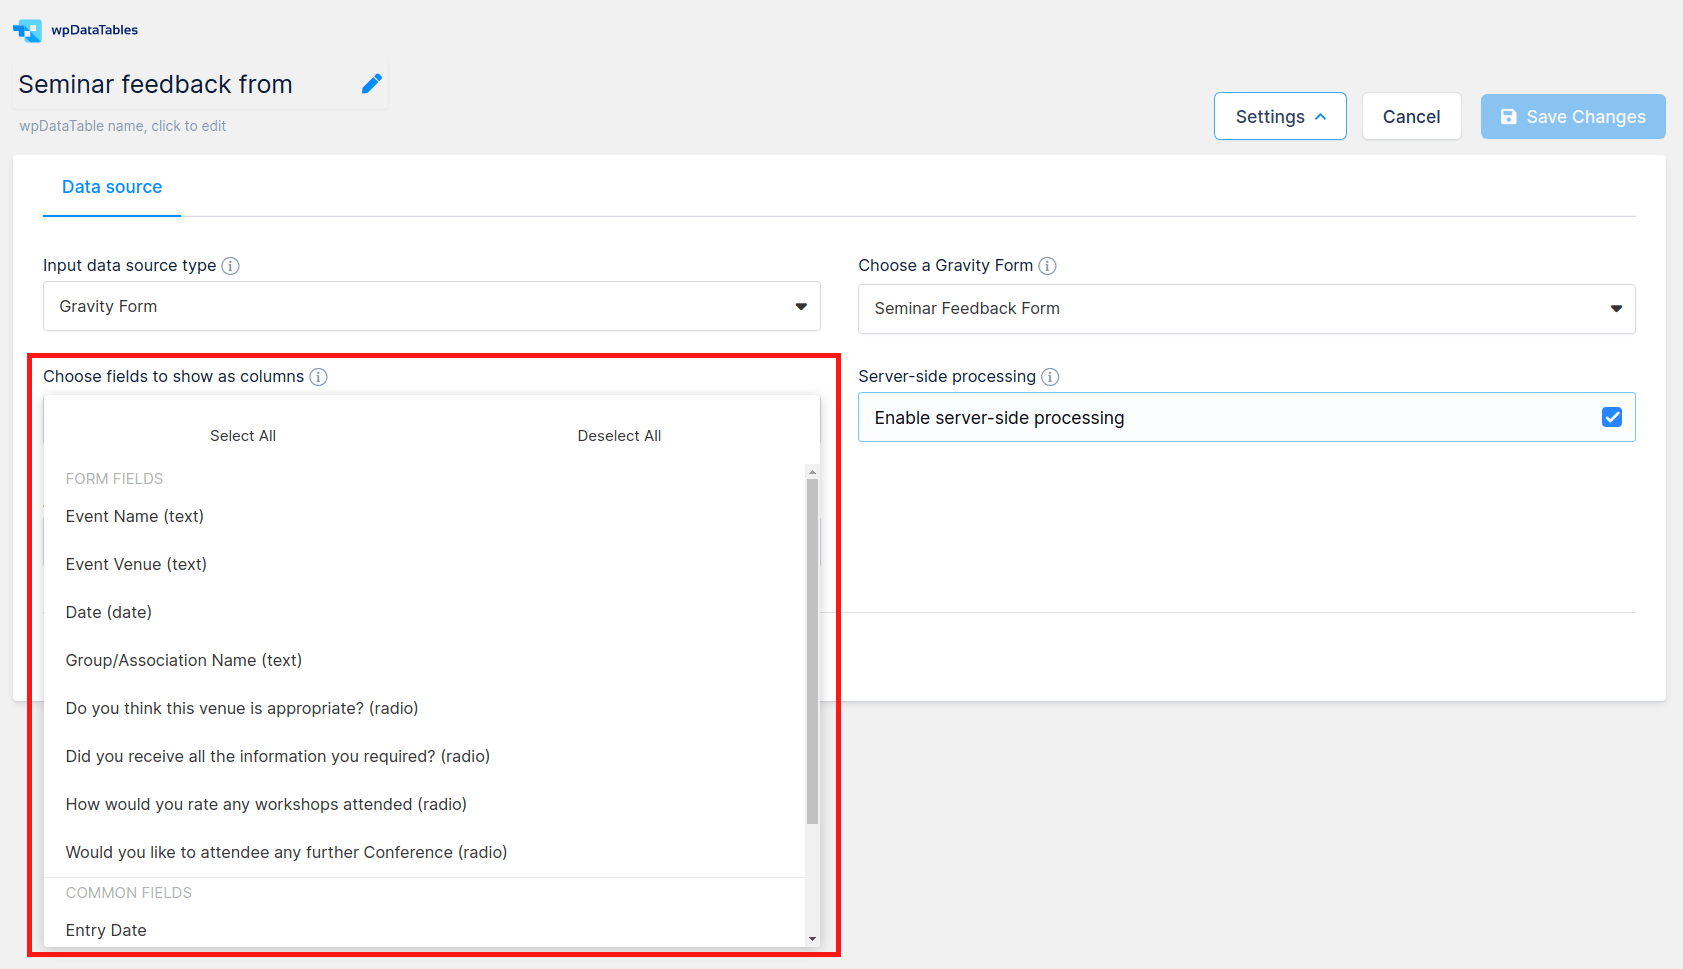
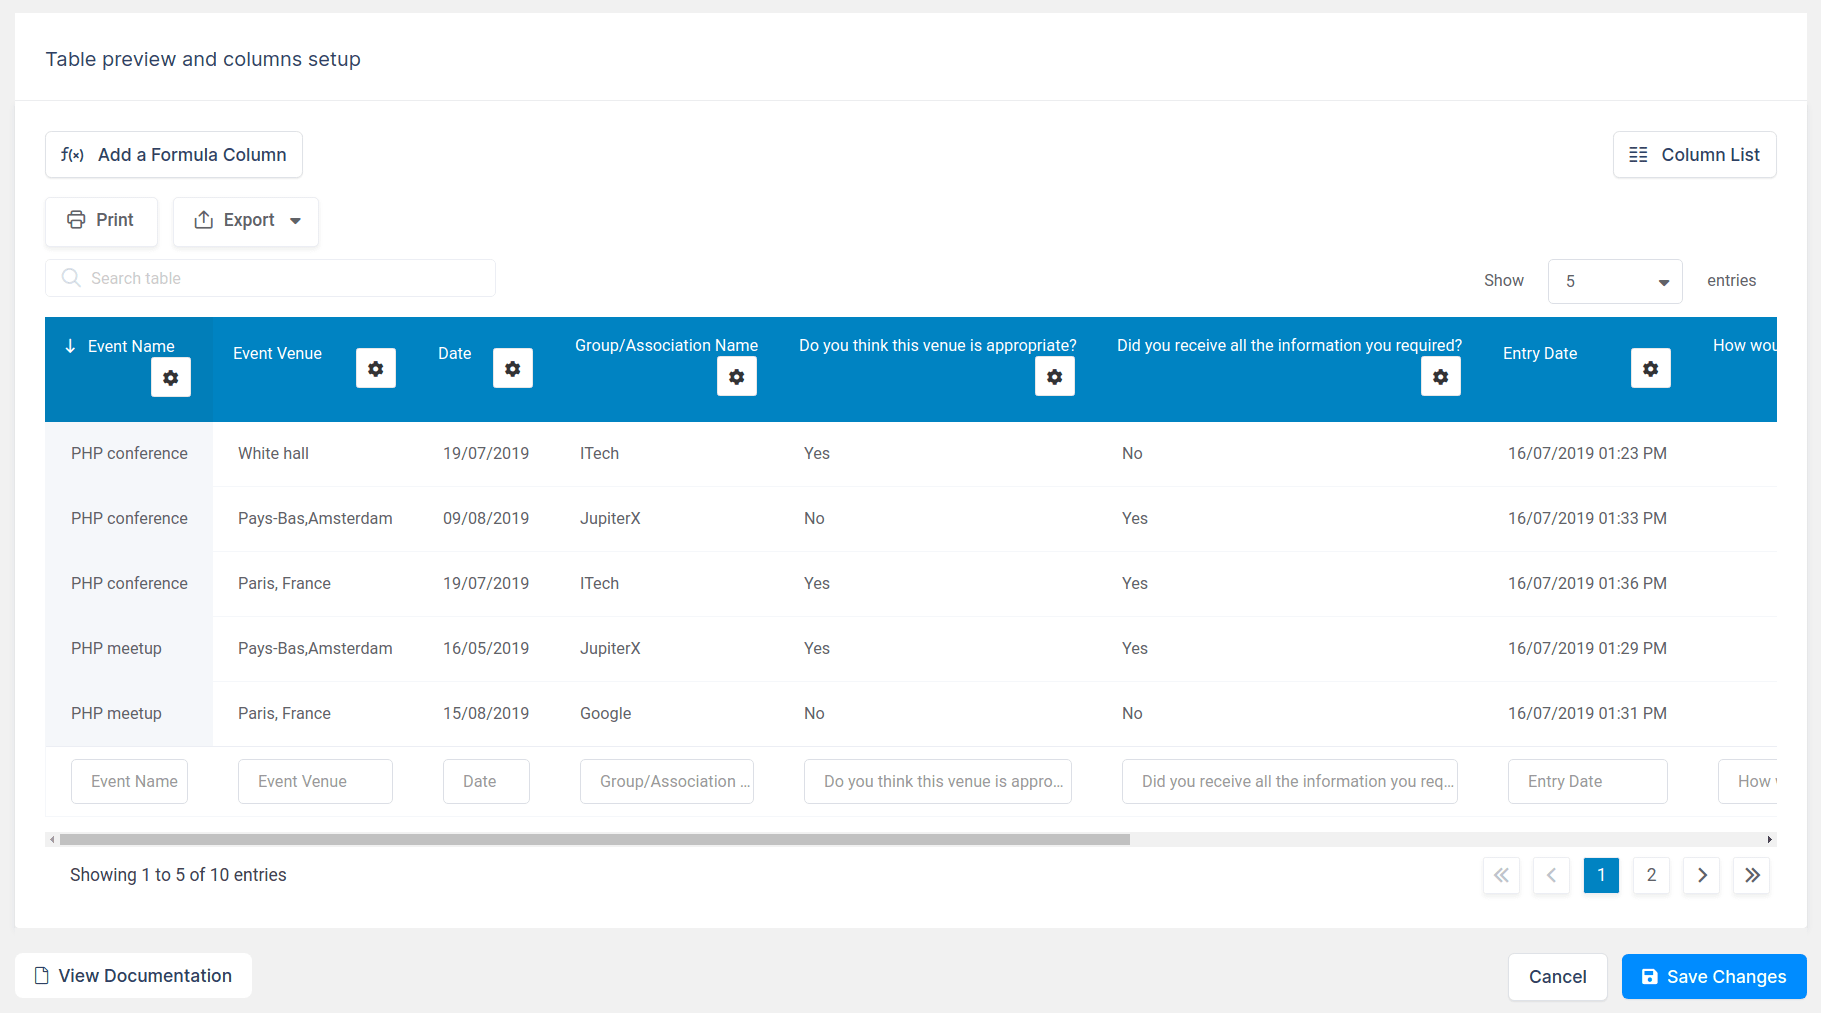
Once you’ve selected the fields/columns you want to show in the table, click “Save Changes”, and a wpDataTable will be created and displayed in the “Table preview and columns setup” card. Each row represents one form entry that was previously added in the form.
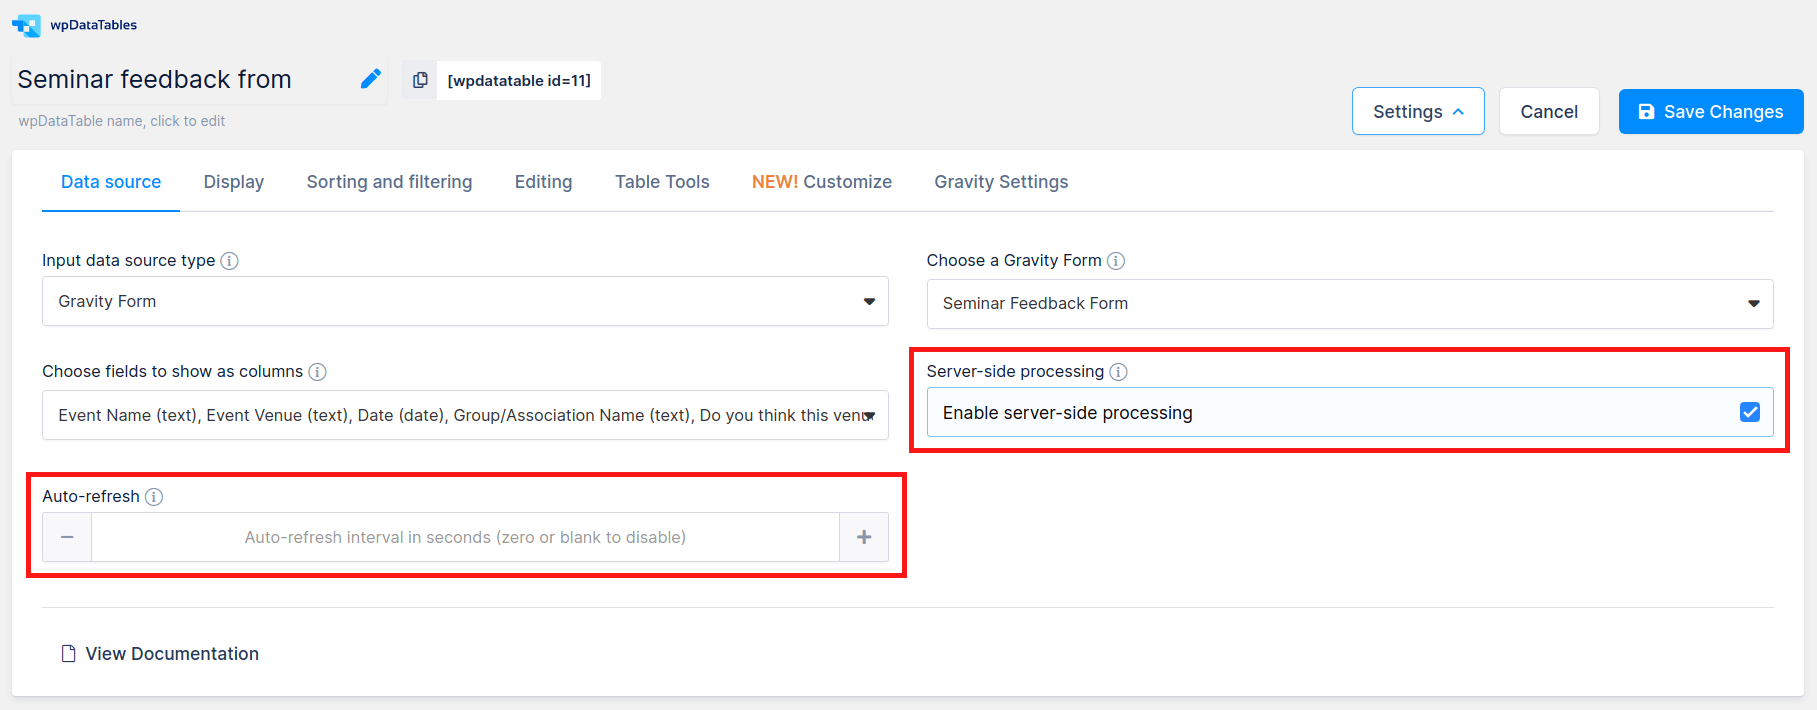
From version 1.1 there is an option to use Server-side processing with Gravity form based tables. This allows you to create a table from the form which has hundreds of thousands of entries.
Under DATA SOURCE tab you will find two more options:
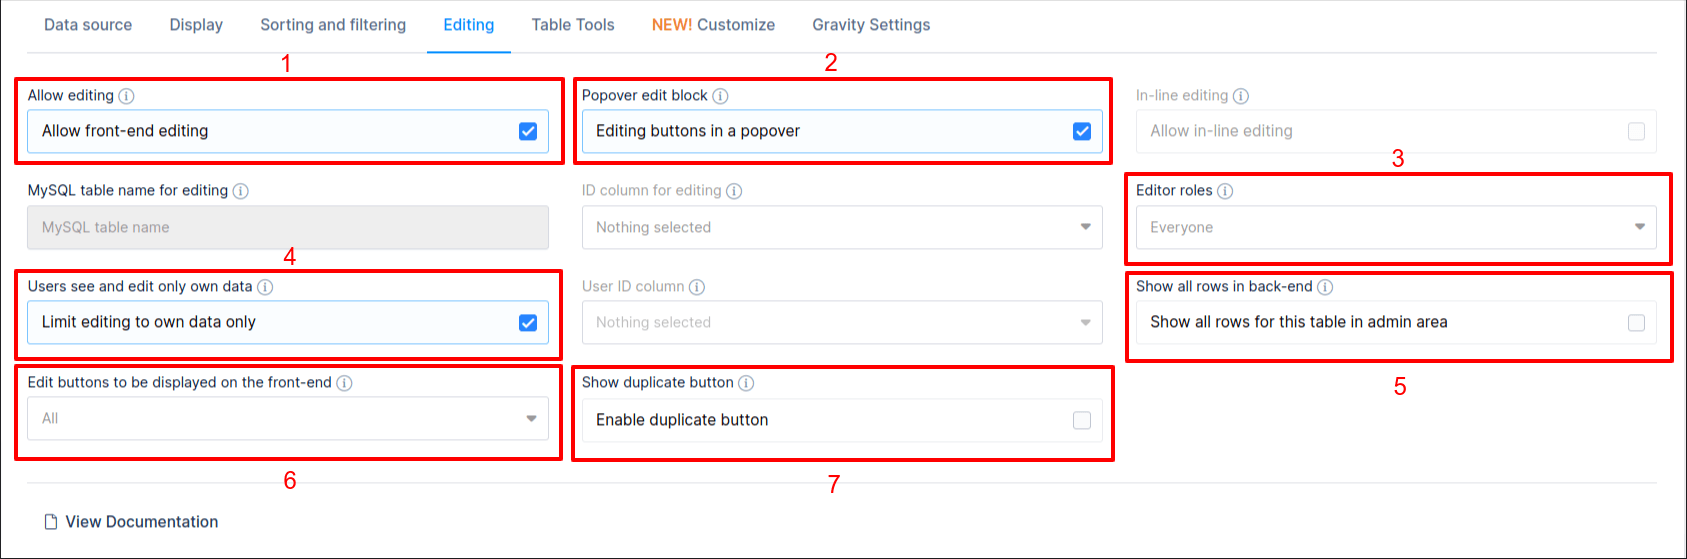
Yes. To allow front-end editing, open the “Editing” tab in the table configuration settings, click the “Allow editing” option, and click the “Apply” button. From the standard editing features in wpDataTables, for Gravity based tables you can use:
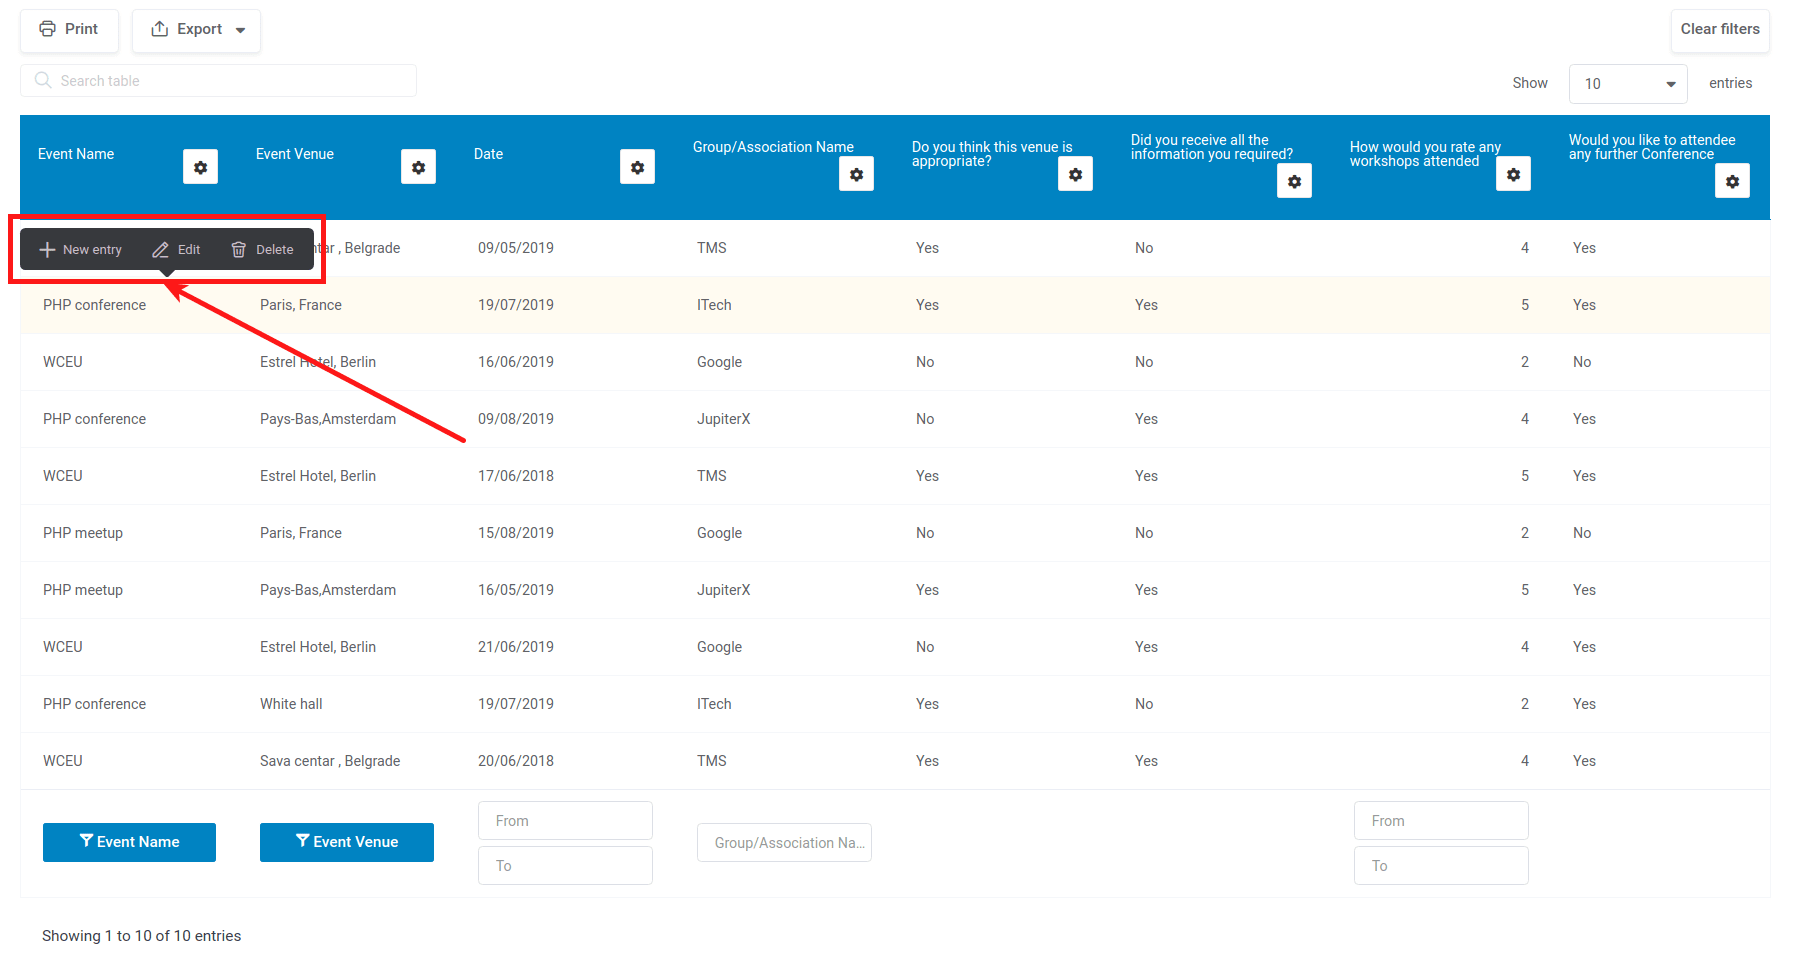
When the table is saved and inserted in the post or page, the look of the table on the front-end is slightly different from a typical non-editable table. You will see three new buttons (unless you set it differently with the “Edit buttons to be displayed on the front-end” option) in the Table Tools section of the table.
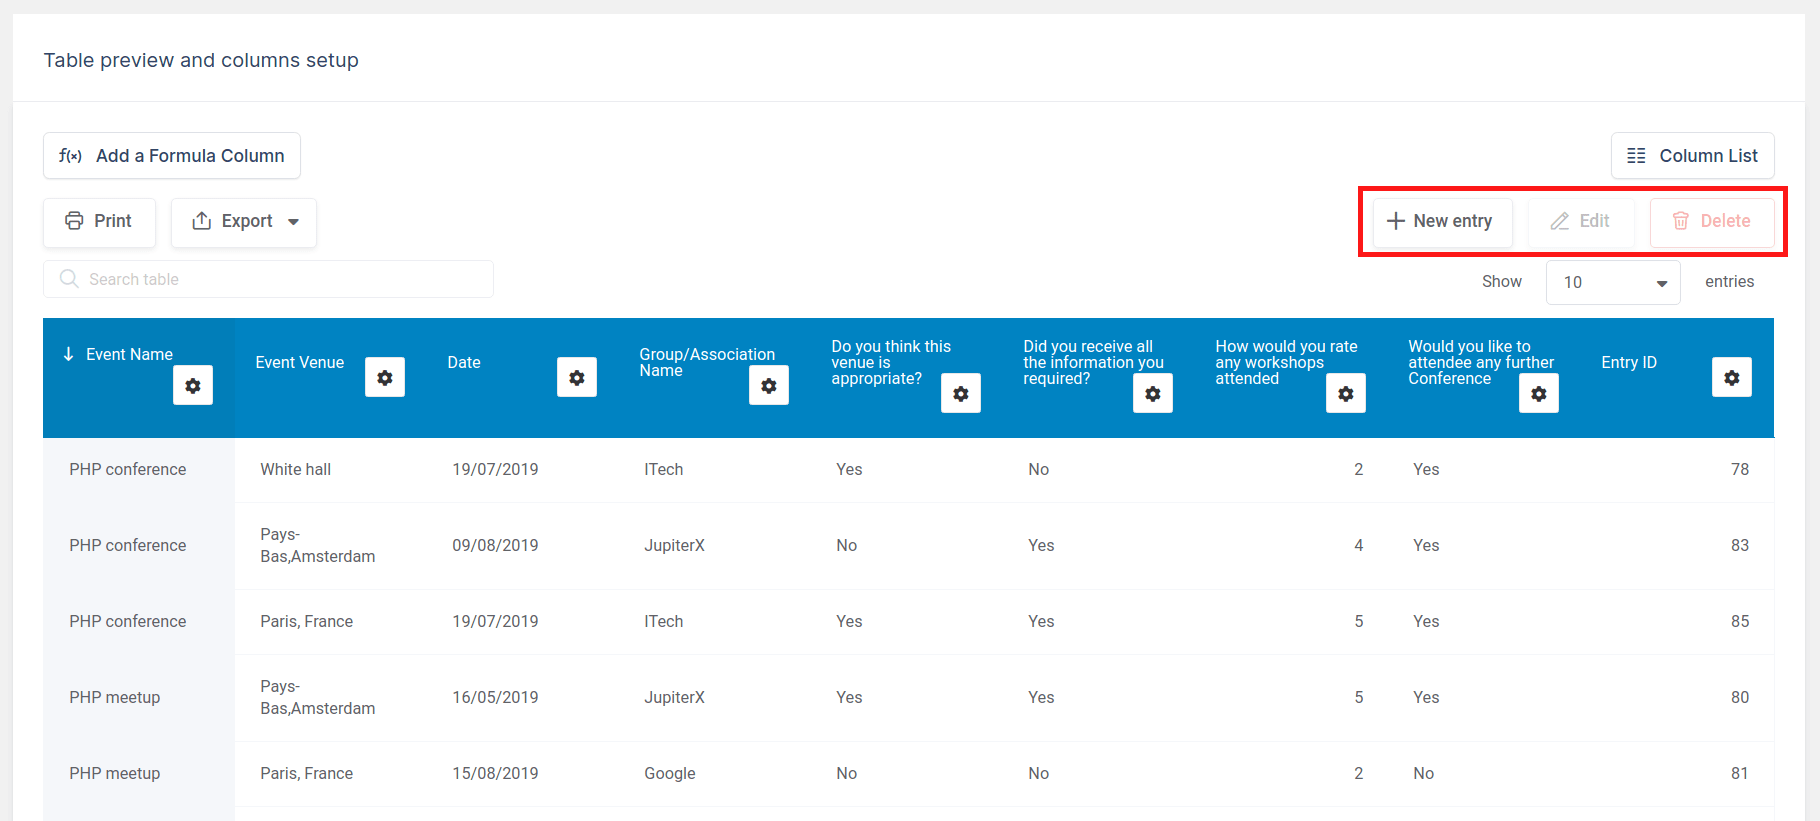
On the other hand, if the “Popover edit block” option is enabled, you won’t see the “Add”, “New” and “Delete” buttons in their standard place; instead, when you click on any table row, you will see a popover with the edit buttons (unless you set it differently with the “Edit buttons to be displayed on the front-end” option) in the Table Tools section.
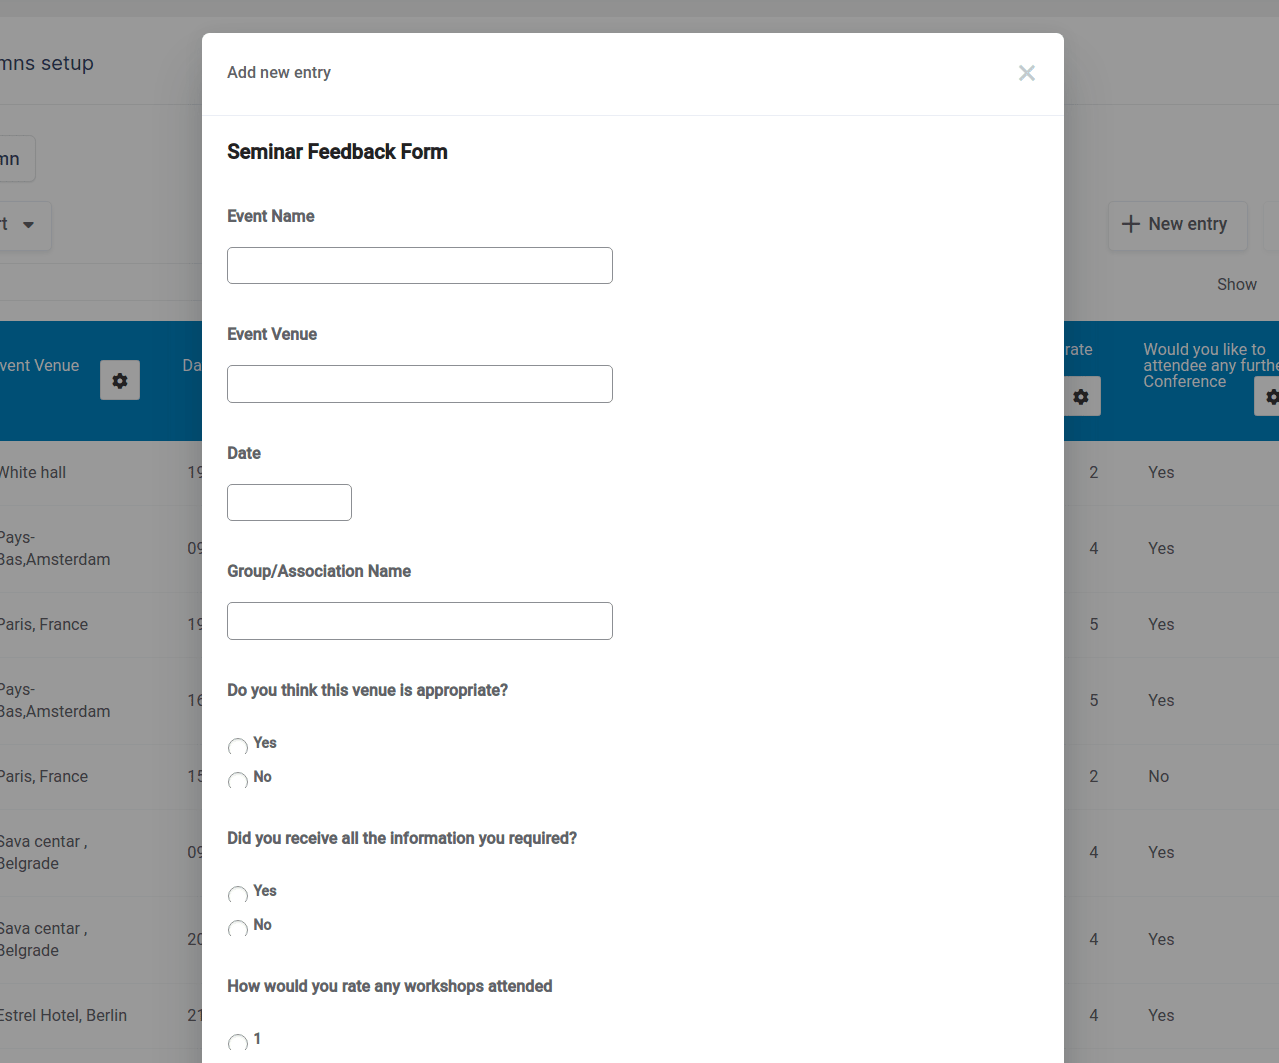
After clicking the NEW button, you will see an editor popup. The popup is responsive, so it will work correctly on mobile and tablet devices as well. Multi-page forms will also work for adding new entries. Please keep in mind that we are using Gravity’s own form for adding new and editing entry functionality.
To edit an existing entry, click on the row that has the desired entry data and, after you select it, click on the EDIT button. The same popup will show up, with the same form in it, only this time populated with data. After entering the necessary changes, click the OK button to save it.
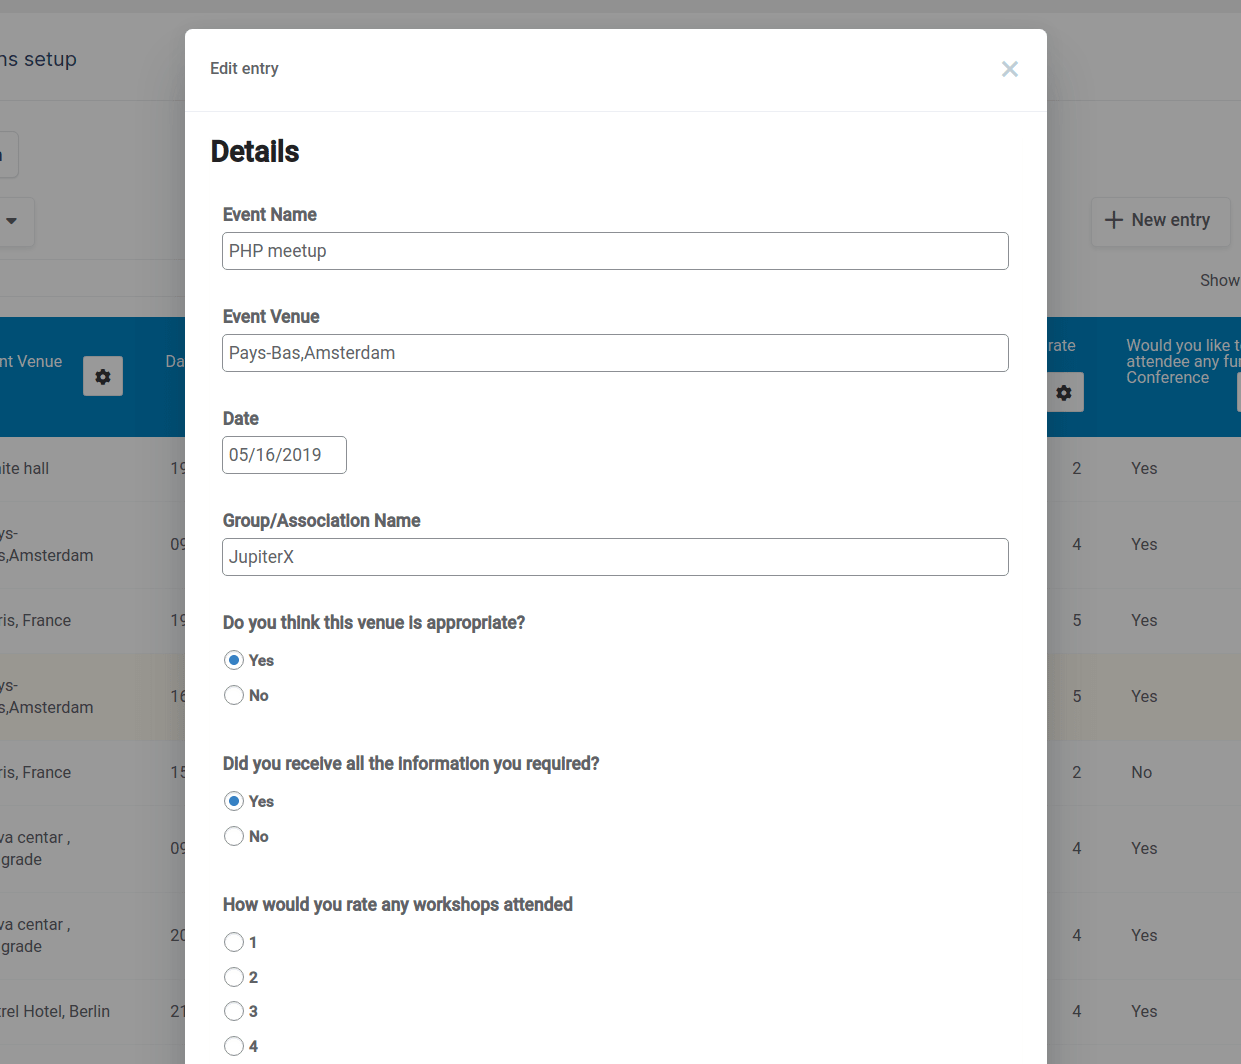
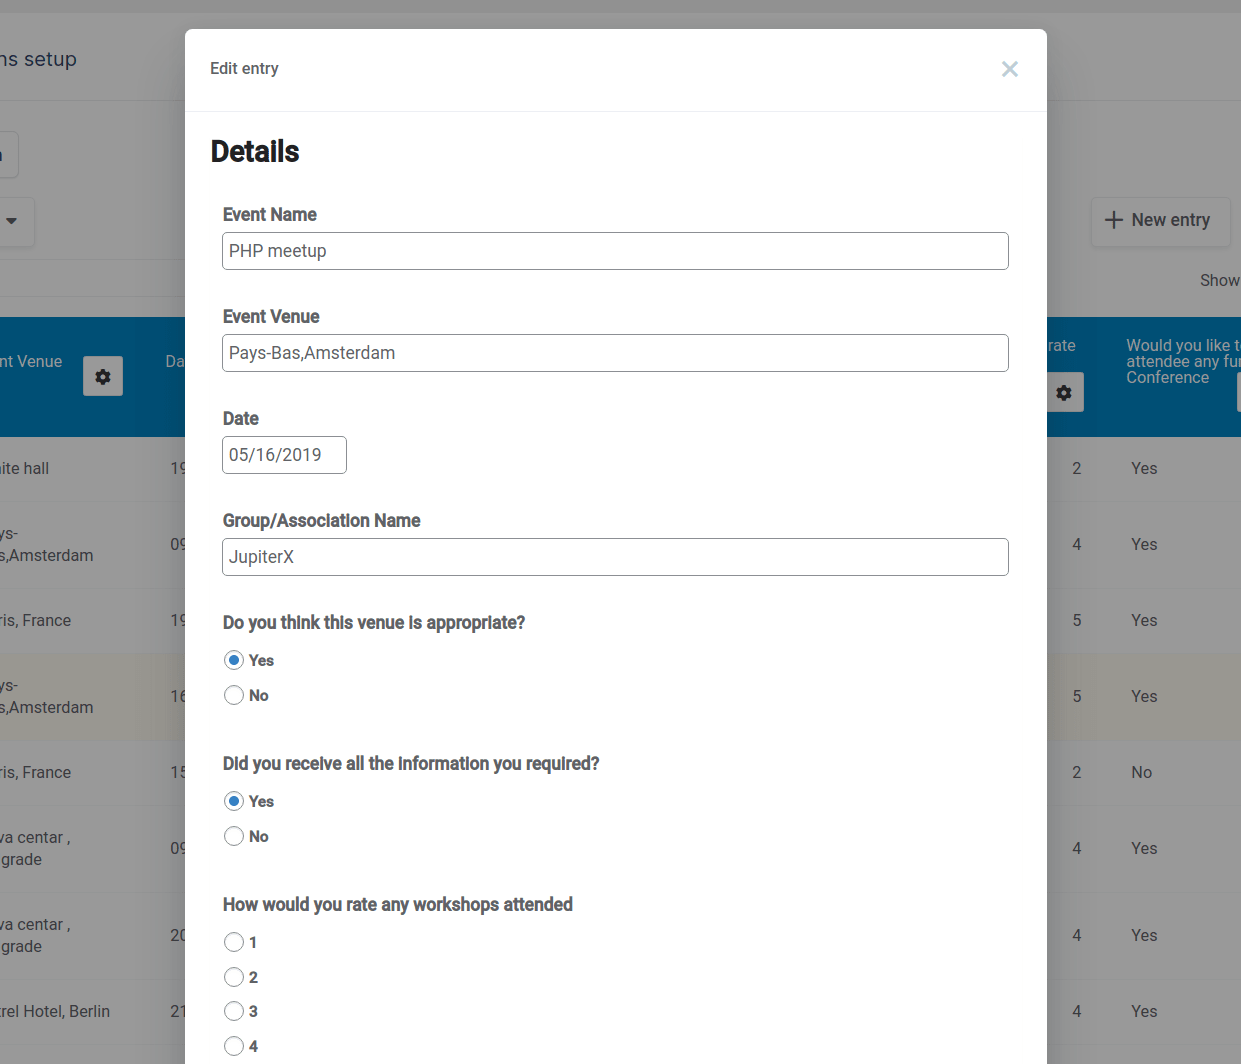
To duplicate an existing entry, click on the row that has the desired entry data and, after you select it, click on the Duplicate button. Before that, please make sure the “Show duplicated button” option is turned on on the Editing tab in the table settings. The same popup will show up, with the same form in it, only this time populated with data. After entering the necessary changes, click the OK button to duplicate it, and the edit modal will be closed.
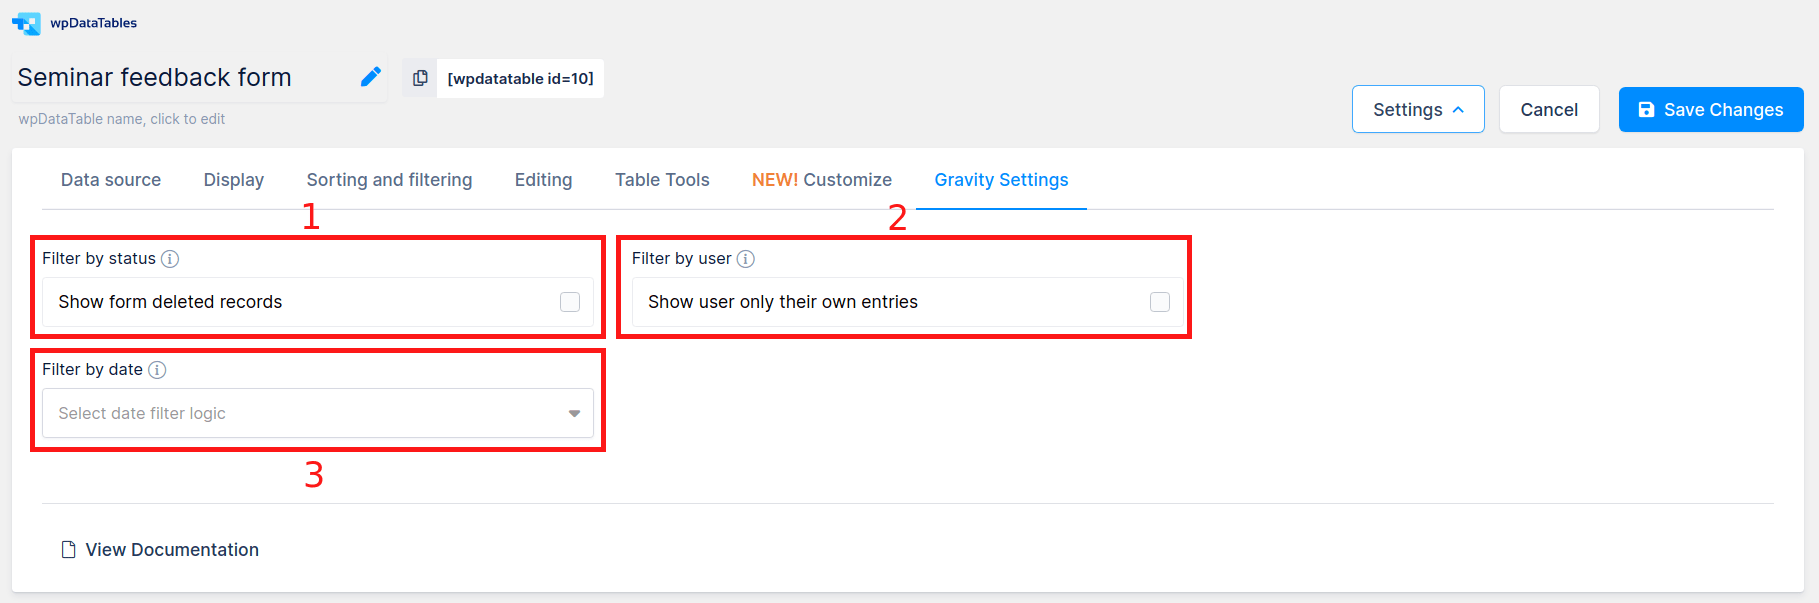
Each Gravity form-based wpDataTable receives an extra Gravity settings tab on the table configuration page, along with several additional table settings. These allow you to narrow the range of form entries to be displayed in the wpDataTable — by status and by date.
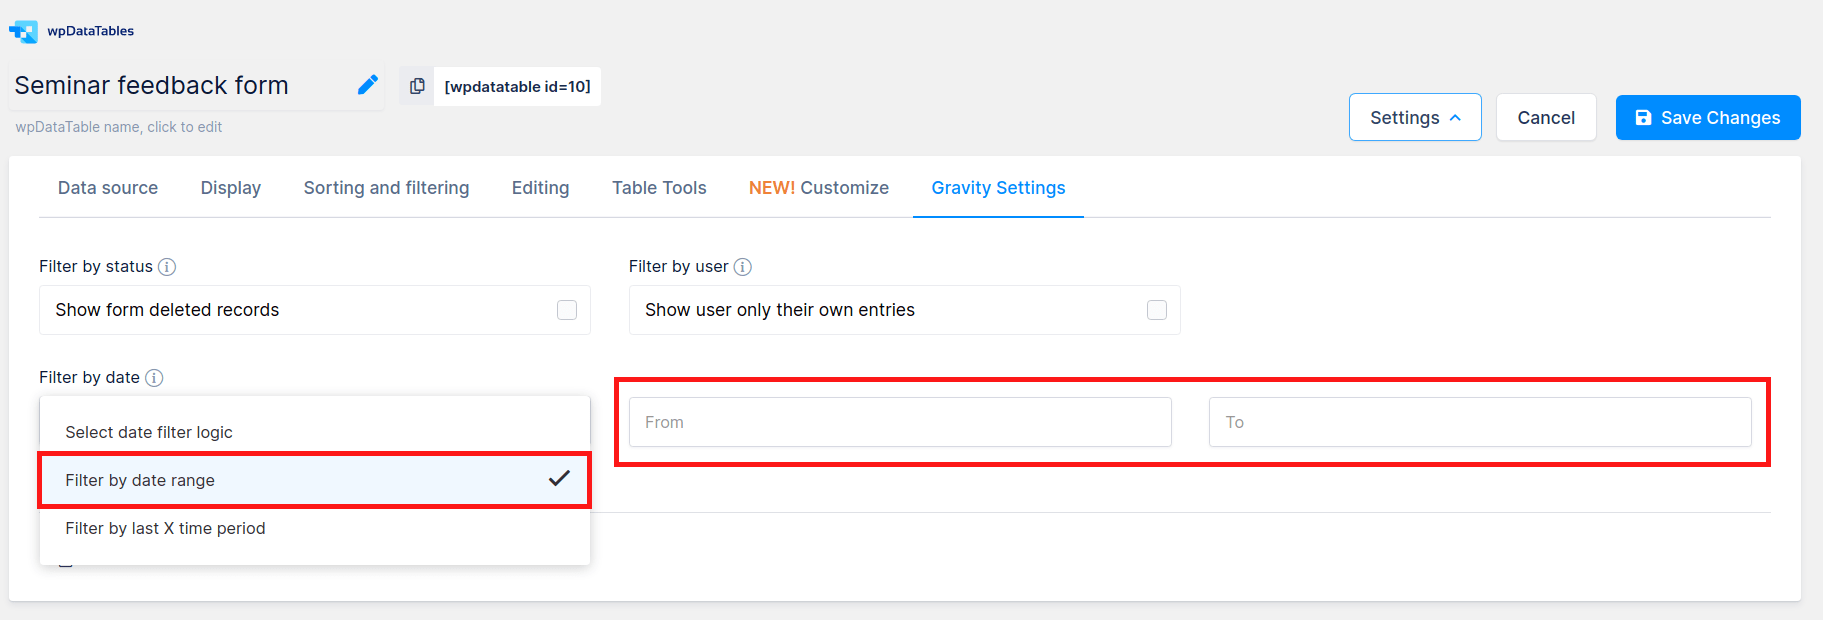
Filter by date range – If you select this option, two input fields (“From” and “To”) will be displayed by the Filter by date selectbox. By choosing several date values in these datetimepicker input fields, wpDataTable rows will be updated by date range once entries have been added to the form.
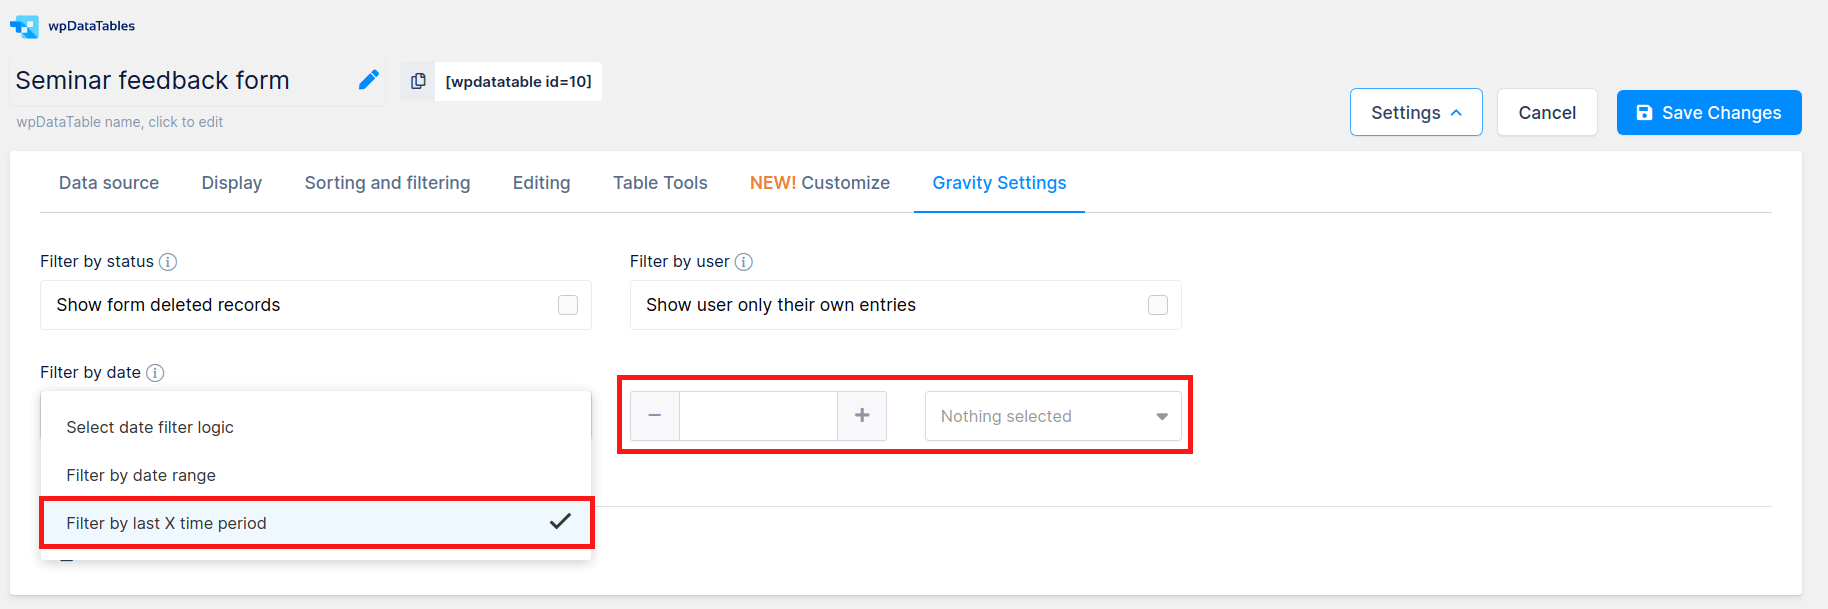
Filter by last X time period – If you choose this option, two additional input fields will be displayed by the Filter by date selectbox. In the first field, you can add a number of periods (e.g., 30), and in the second field, you can choose between (Day(s), Week(s), Month(s) and Year(s)). By selecting “30 Day(s)” for example, you will filter and display in the wpDataTable only those entries that were added in last 30 days in the Gravity Form that is used as the data source for this wpDataTable.
At this point, the table is prepared. But to improve its usability, we need to define some additional settings for the table and its columns. In this case, we defined these settings as:
1. Enabled Limit table width checkbox and disable Table title checkbox on “Display” tab.
2. Set the Filter type for “Created at” as “DateTime range”.
3. Add “$” character in Cell content suffix input field for “Your total order” column.
When the configuration of your Gravity form-based wpDataTable is finished, you simply need to insert it in your post or page.
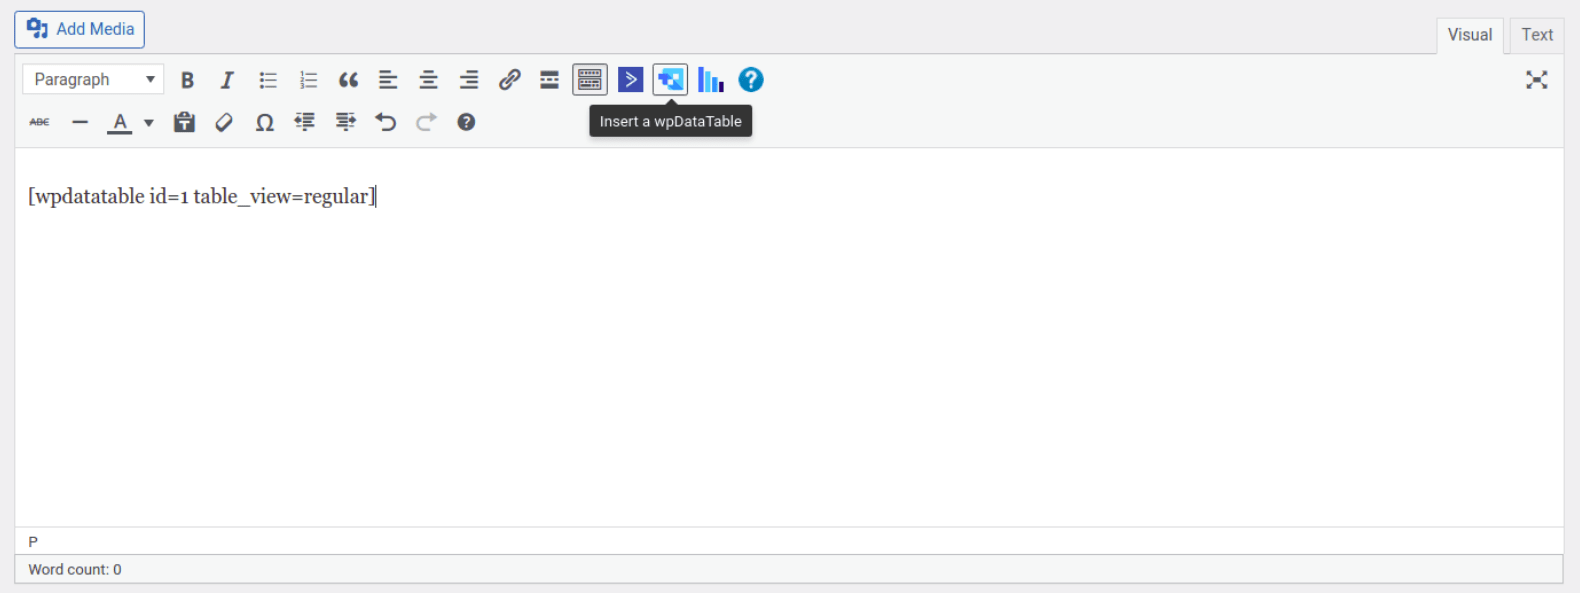
To open or create a new WordPress post or page, place the cursor in the position where you would like to insert your table, click the “Insert a wpDataTable” button in the MCE editor panel, and choose the Gravity wpDataTable that you prepared.
Or, if you prefer to do things manually, you can just copy&paste the wpdatatable shortcode (you can find it in the wpDataTables browse page, or in wpDataTable edit page). To add wpDataTable shortcodes on the page, please check out the section for Adding wpDataTables shortcodes on the page.
To get your hands on wpDataTables Lite, please enter your email address below. We’ll send you a direct download link and keep you updated on existing features along with helpful tips and tricks!